

How To Install LED Strip Lights In House: Steps And Tips
LED strip lights are a modern and versatile lighting solution for any space. Their energy efficiency, aesthetic appeal, and the ability to customize their placement make them a top choice for homeowners looking to upgrade their lighting. Whether you’re aiming for ambient lighting, accent lighting, or task lighting, LED strips offer flexibility to achieve the perfect look.
In this guide, we’ll walk you through how to install LED strip lights in house with a simple step-by-step process. From planning to installation and troubleshooting, this guide will ensure you get the most out of your LED strips.
1. Plan Your Layout
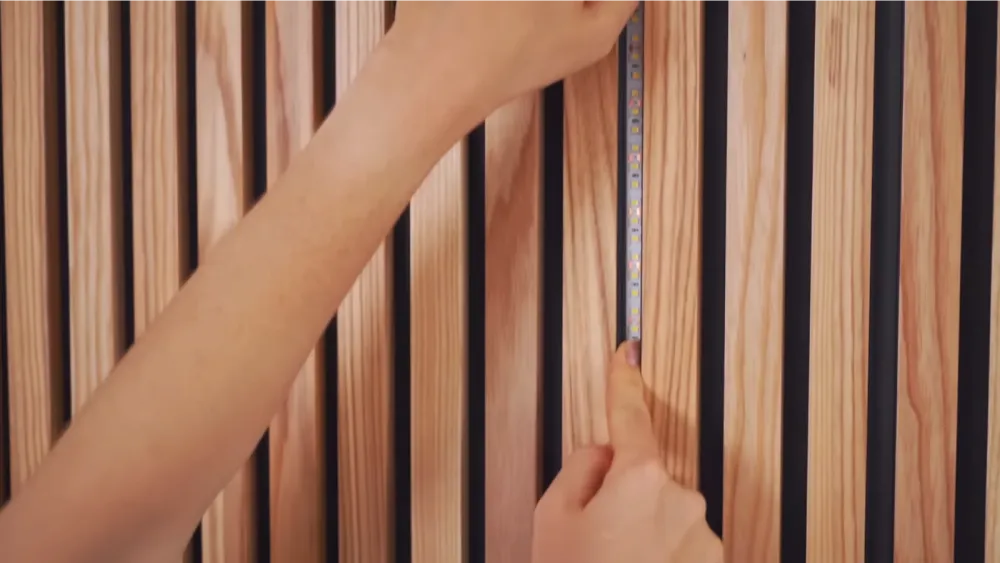
2. Measure and Mark
3. Prepare the LED Strip
4. Clean and Dry The Installation Surface
5. Start Hanging
6. Continue Securing
7. Finish Up
8. Test the Lights
1. Plan Your Layout
First, identify the areas you want to install the LED strip lights. Consider spaces like under cabinets, along ceilings, or behind furniture to create ambient lighting effects.
Also, decide on the desired brightness and color temperature for your space. For example, 600 LEDs per reel offer excellent intensity, while dimmer switches can help you control the lighting ambiance.
2. Measure and Mark
Next, calculate the length of the strip lights you’ll need for the chosen area by using a tape measure.
If you’re wondering how to install led strip lights in house, start by marking the installation points with chalk or a pencil for accuracy. Check the product specifications to see if the LED strips can be trimmed.
Most LED strips include marked cutting points at copper ends to ensure safe and functional cuts. Use sharp scissors to cut only along these designated points, ensuring your measurements align with the space.
3. Prepare the LED Strip
Before starting the installation, test the LED strip lights to ensure they work correctly. Connect the uncut strip to a power supply and inspect for issues like flickering or dim lights.
Also, check whether the lighting matches your expectations. If needed, consider adding dimmers or switching to a different color temperature for better results.

When preparing to connect multiple strips, ensure you use the right connectors and drivers. Low-voltage DC drivers are generally recommended for safety and efficiency. Follow the product manual to choose the correct power supply for your LED strips.
4. Clean and Dry the Installation Surface
As part of learning how to install LED strip lights in house, thoroughly clean the area where you’ll apply the LED strips.
Use a microfiber cloth and a cleaning solution like warm soapy water or an alcohol wipe to remove dirt, grease, or residue. Let the surface dry completely to ensure proper adhesion.
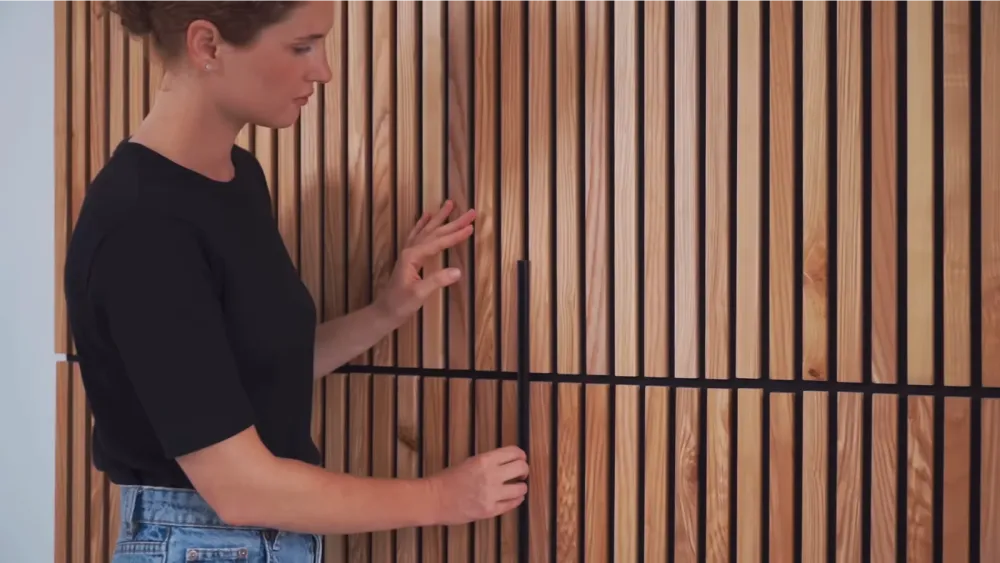
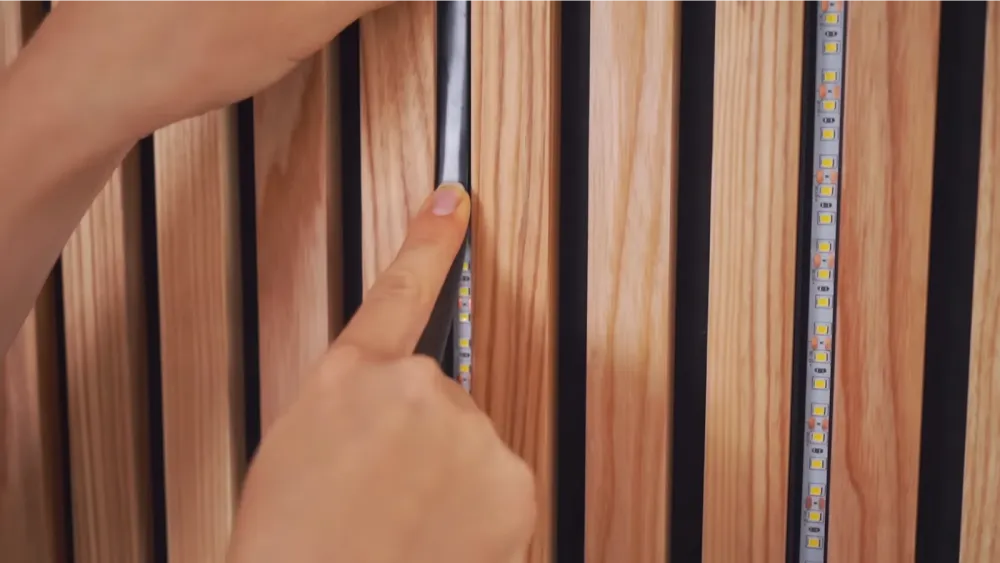
5. Start Hanging
Peel off the adhesive backing from the LED strip and attach it to the marked surface. Begin at the plug-in end and work in small sections to maintain precision. Press each segment firmly for 10-15 seconds before moving to the next.
If you find the adhesive too sticky, consider using double-sided tape for easier repositioning.
6. Continue Securing
If you want to install longer strips, use connectors to join multiple LED strips seamlessly. These connectors allow flexibility to create patterns or extend the lighting to different areas.
For a 90-degree corner, use a flexible connector to avoid bending or damaging the strip. Follow the manufacturer’s instructions for connecting LED strips in case you’re unsure.
7. Finish Up
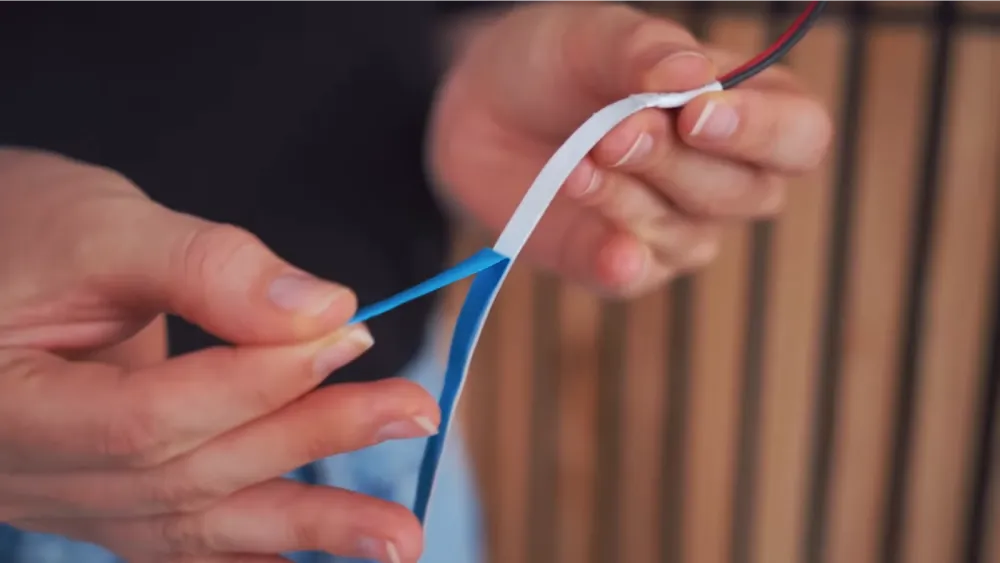
Projects like how to install led strip lights on house require connecting multiple LED strips using strip-to-strip connectors, ensuring proper alignment of positive and negative ends.
Peel back a small portion of the tape backing on each strip to expose the connector points. Always double-check the polarity and secure connections before proceeding.
8. Test the Lights
Once you know how to install led strip lights in house, test the LED strip lights to verify that everything is working. Ensure that all sections light up evenly, and dimmers or remote controls are operating properly.
If you experience issues like flickering or sections not lighting up, inspect the connections and polarity. For troubleshooting, always disconnect the power supply first to avoid hazards.
7 Tips for Strip Lighting Installations
To maximize your LED strip lighting experience, follow these practical tips:
1. Avoid Bending & Twisting at Awkward Angles: Handle strip lights gently, especially at corners, to prevent damage to wiring and avoid short circuits.
2. Cut at the Appropriate Cut Lengths: Always cut LED strips at marked copper points to maintain functionality and avoid damage.
3. Peel Off the Cover with Caution: When removing the adhesive backing, ensure you only peel the protective cover and not the adhesive itself.
4. Prepare the Surface: Clean and dry the installation surface to ensure secure adhesion of the LED strips.
5. Choose the Right Power Supply: Match the power supply to your LED strip’s requirements to avoid underpowering or overpowering the lights.
6. Mindful Storage of Power Supplies and Controllers: Store components in weather-sealed boxes or indoors to protect them from moisture and damage.
7. Explore Comprehensive Resources: Refer to manufacturer resources for installation guides and troubleshooting tips to achieve the best results.
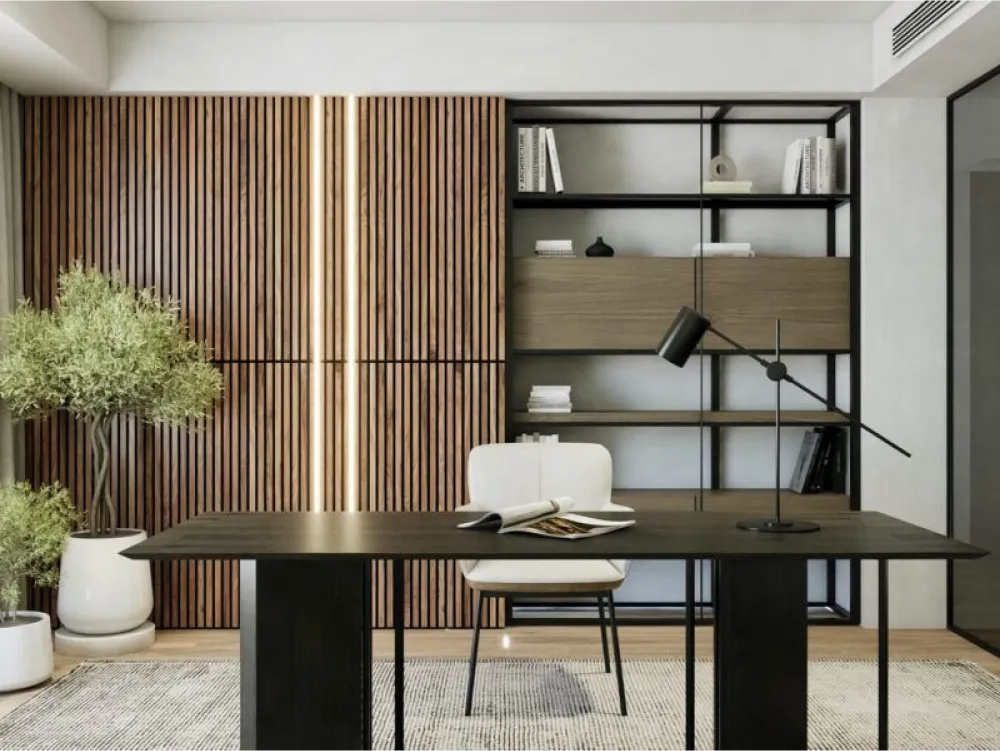
At Woody Walls, we offer a selection of high-quality LED strip lights that are perfect for various home applications, and our experts can show you how to install LED strip lights in house with ease.
- 24V COB LED Strip/Single Color/IP20: Perfect for small spaces to accentuate architectural features or creating mood lighting, these strips are versatile and offer an all-in-one easy installation.
- 24V COB LED Strip Light Bundle – Dual LED Strips: Perfect for bigger spaces with 2 LED strips, it is ideal to highlight your accent walls, shelves, and under-cabinet applications. You may choose from Natural White, Warm White, or Cool White to suit your preference.
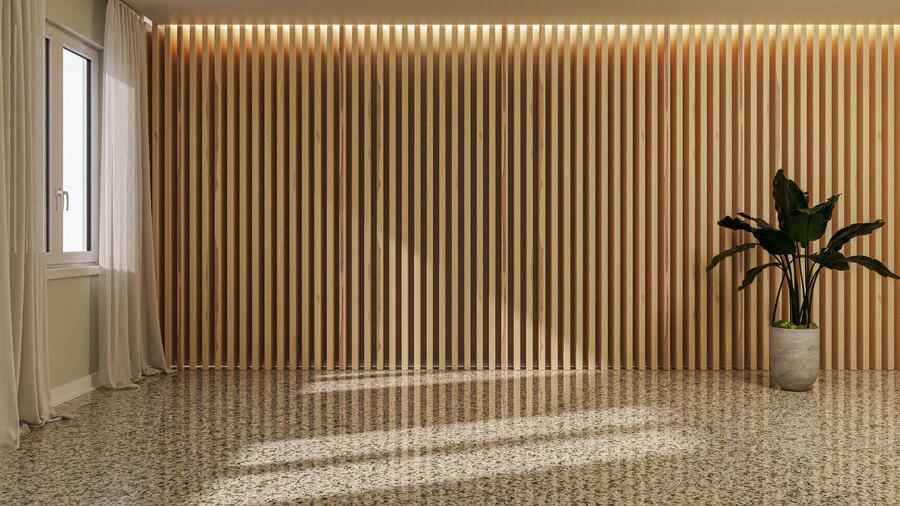
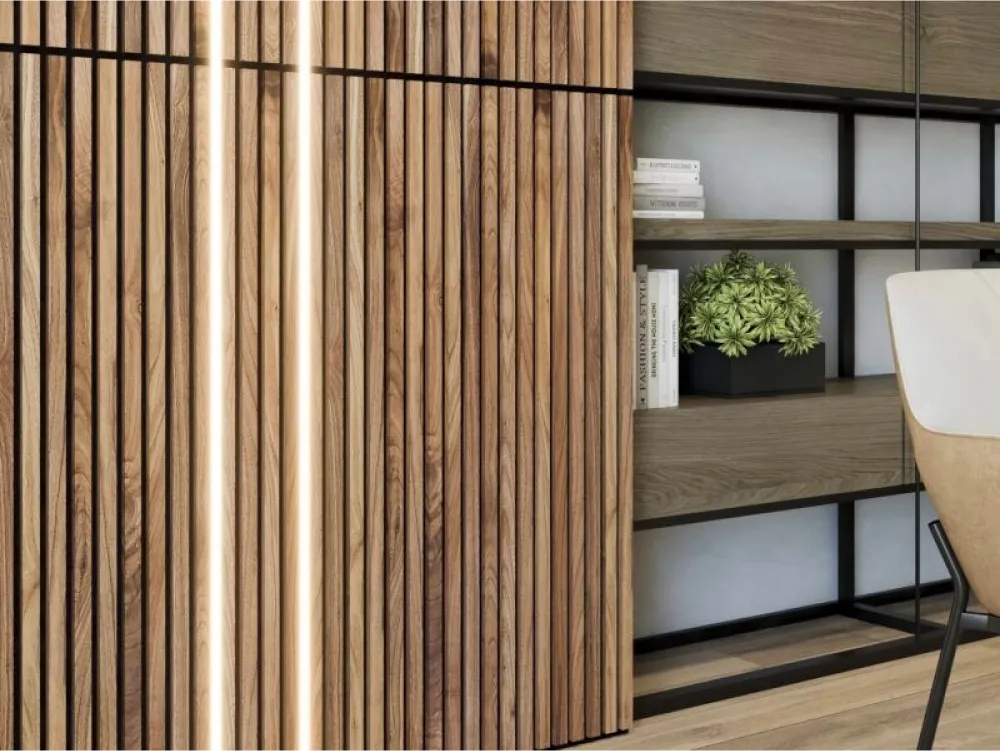
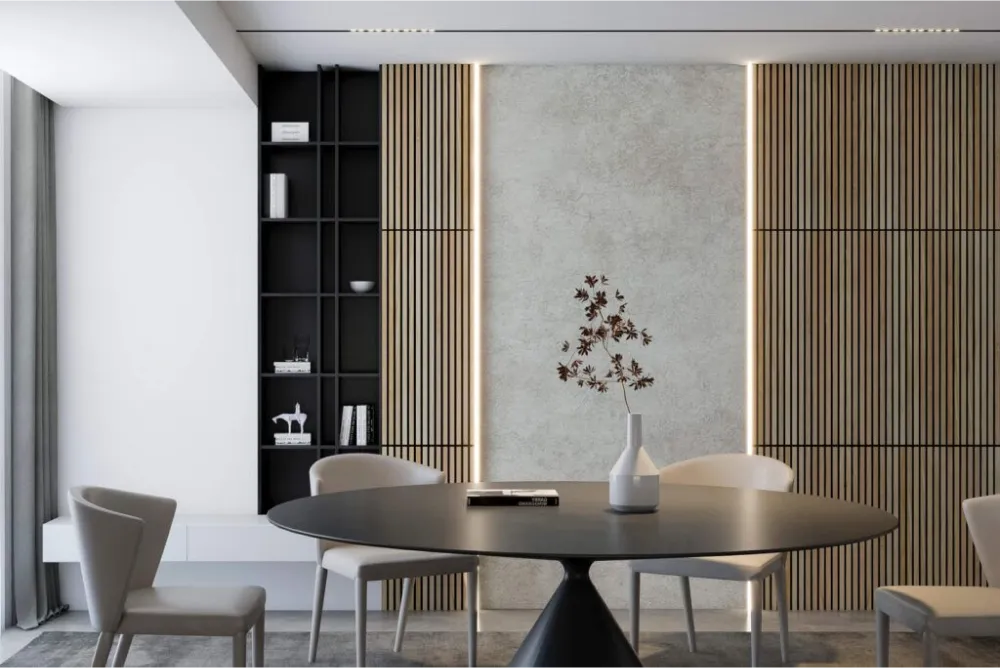
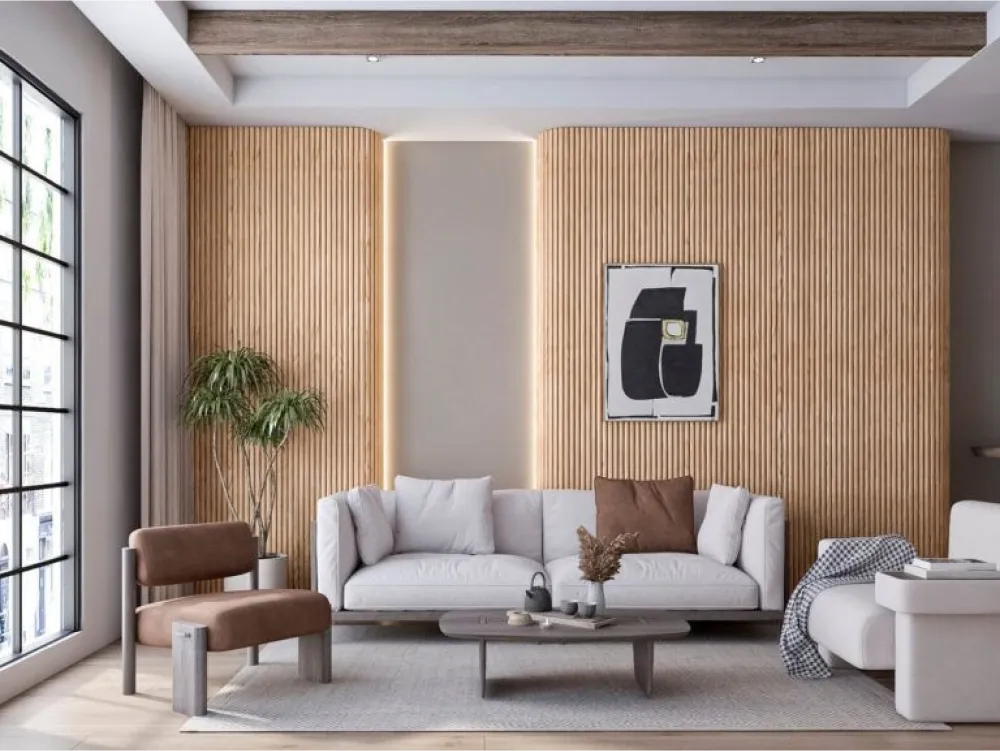
- LED Channel for Wood Slat Wall Panels: Designed to seamlessly integrate with our wood slat wall panels, these channels enhance the aesthetic and functionality of your installations.
- LED Channel for Wood Wall Edging: These channels provide a sleek, finished look for LED installations along wood wall edges, ensuring a polished appearance.
Conclusion
Installing LED strip lights is a straightforward yet transformative project for any home. This guide on how to install led strip lights in house ensures you achieve professional results while enhancing your space’s aesthetics and functionality.

With proper planning, preparation, and the right tools, you can enjoy the benefits of energy-efficient, customizable lighting that elevates your home’s ambiance. Let’s explore our LED light options and designs at Woody Walls!


