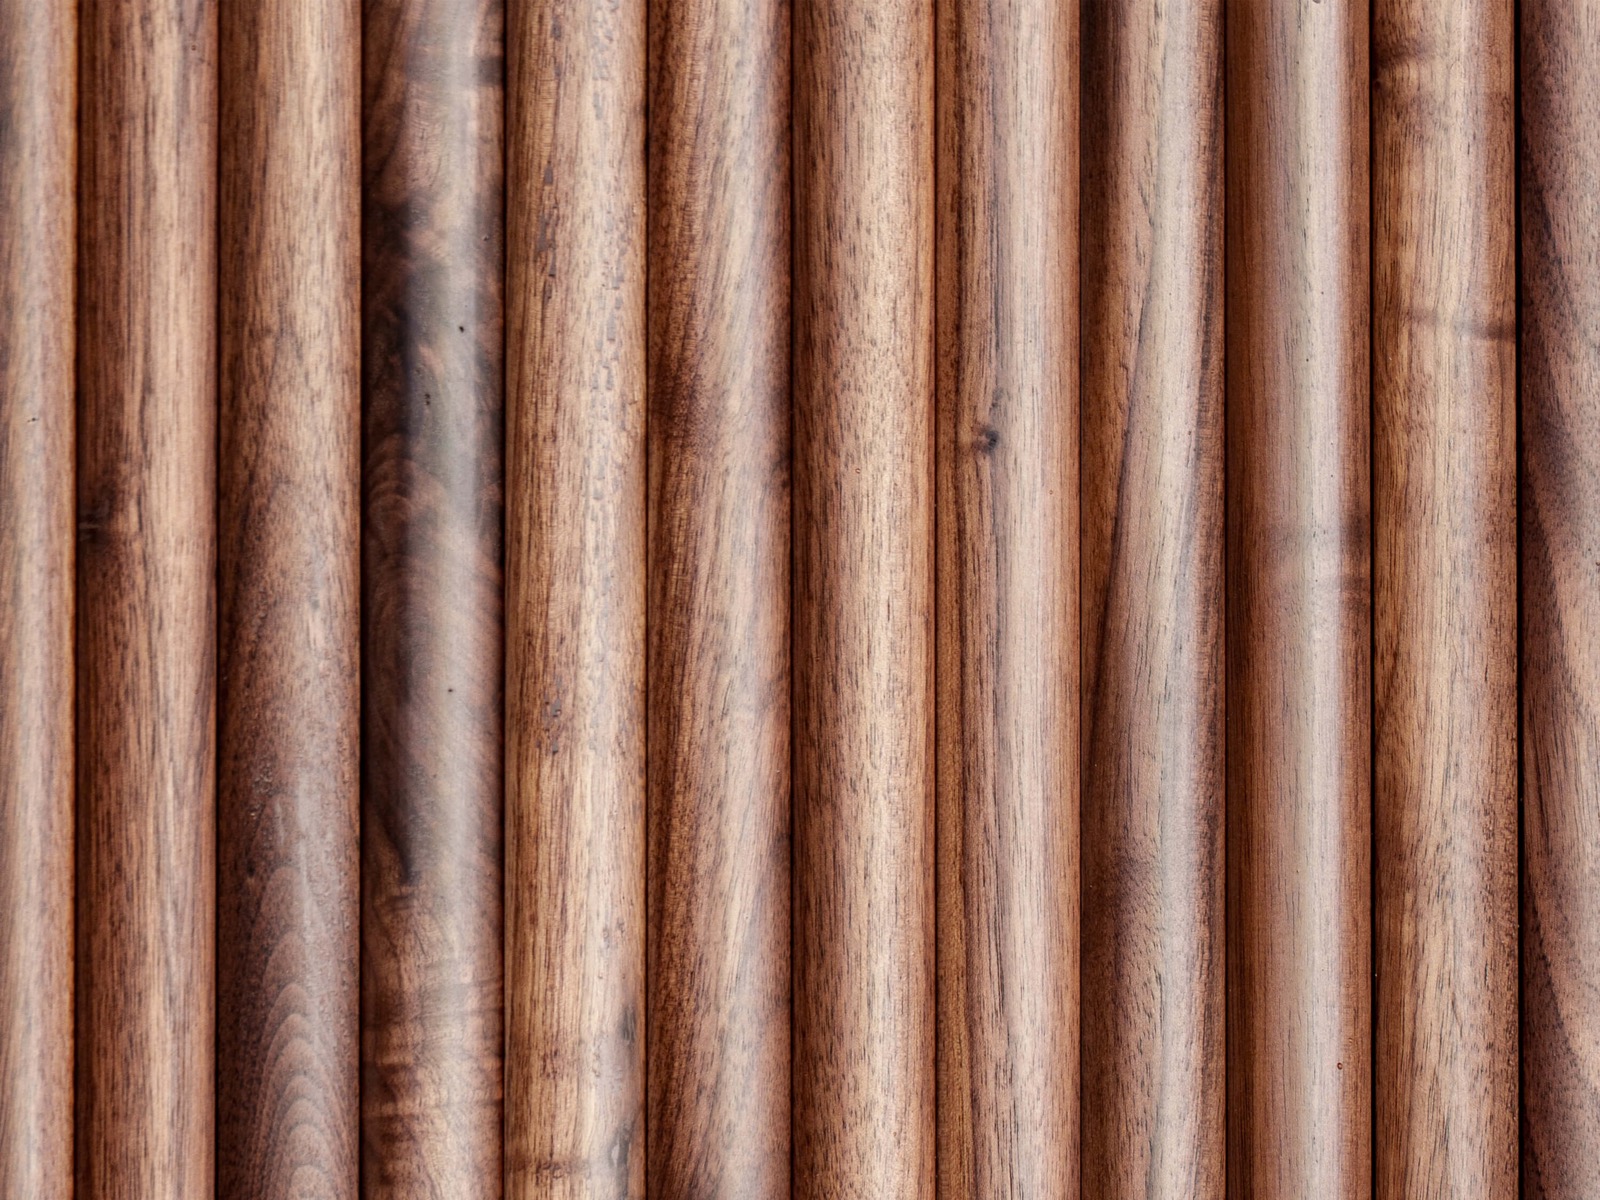
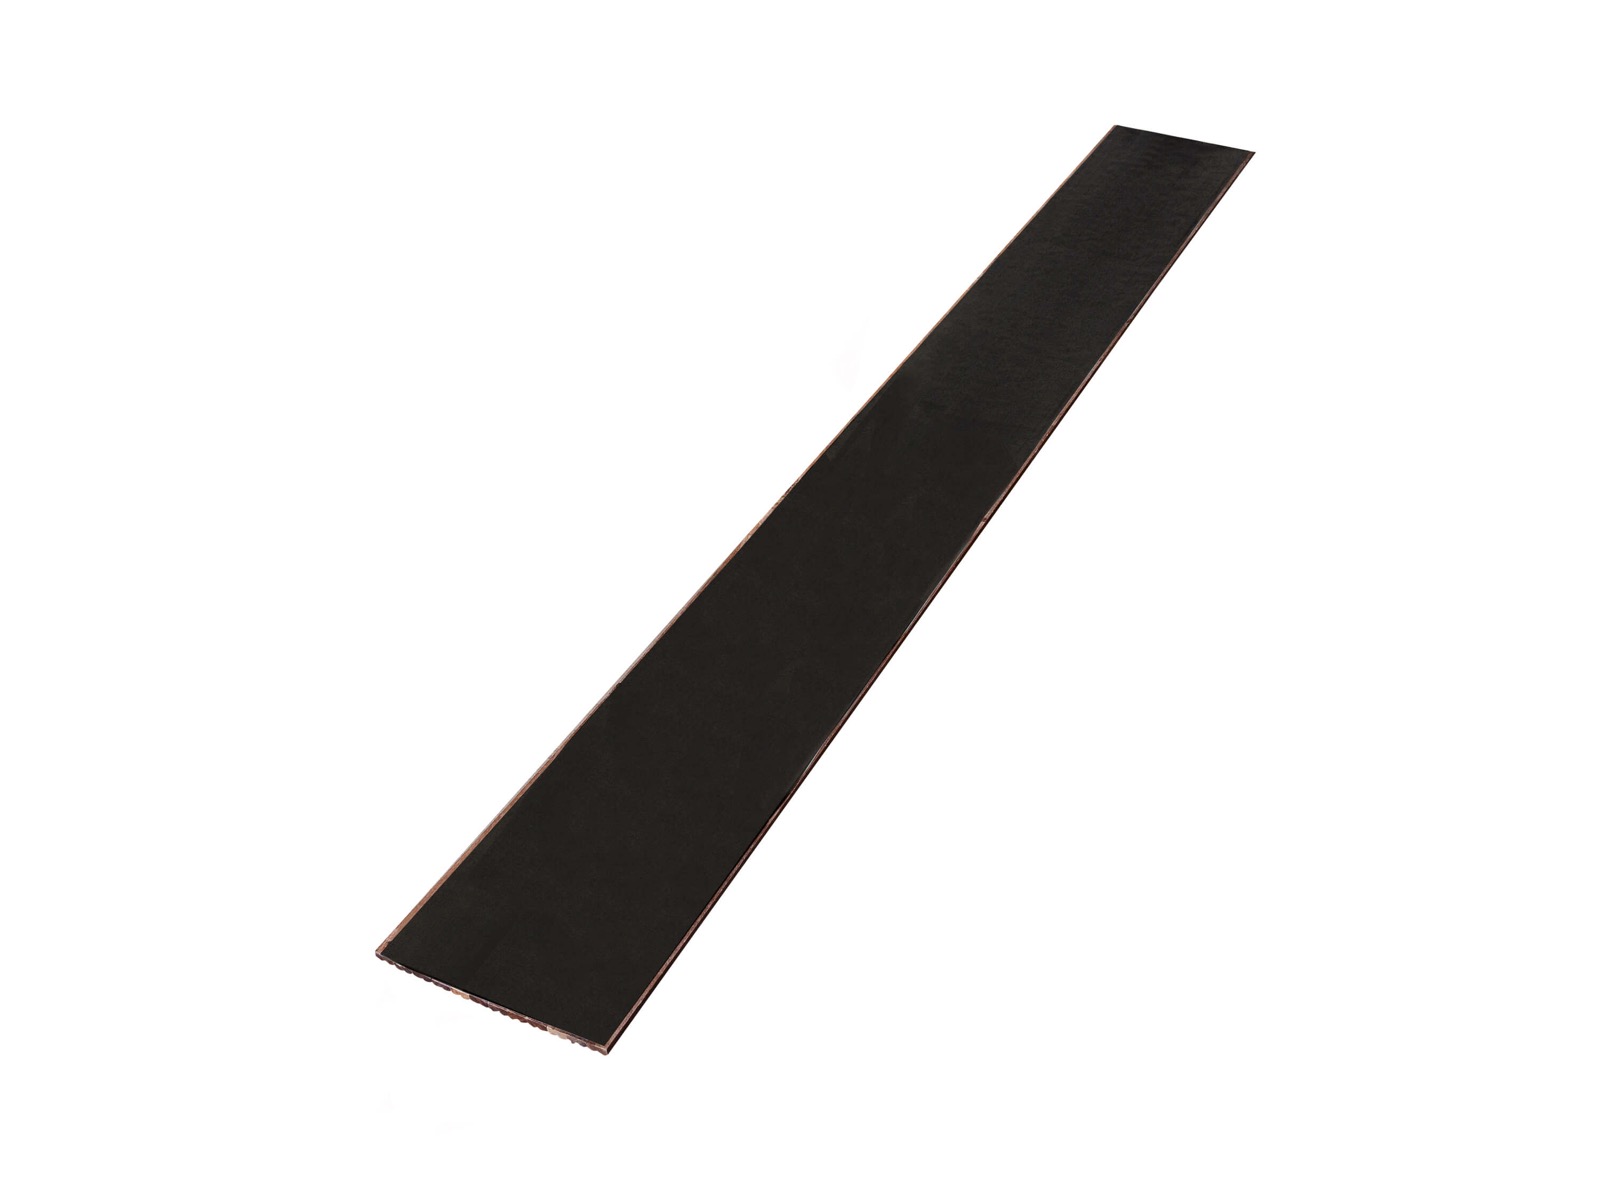
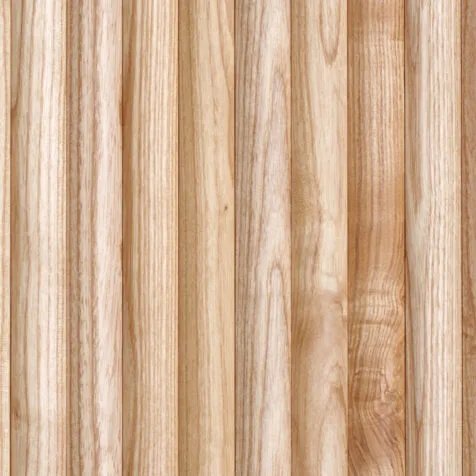
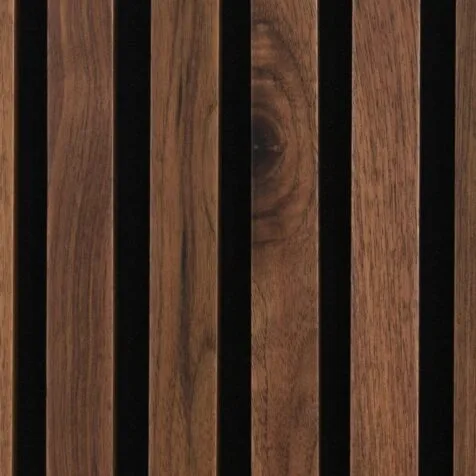
1″ Half-Round Walnut Tambour Wood Panels
Wood Type: 100% Real American Walnut
Box Coverage: 2 Panels / 15.5 sq ft per box
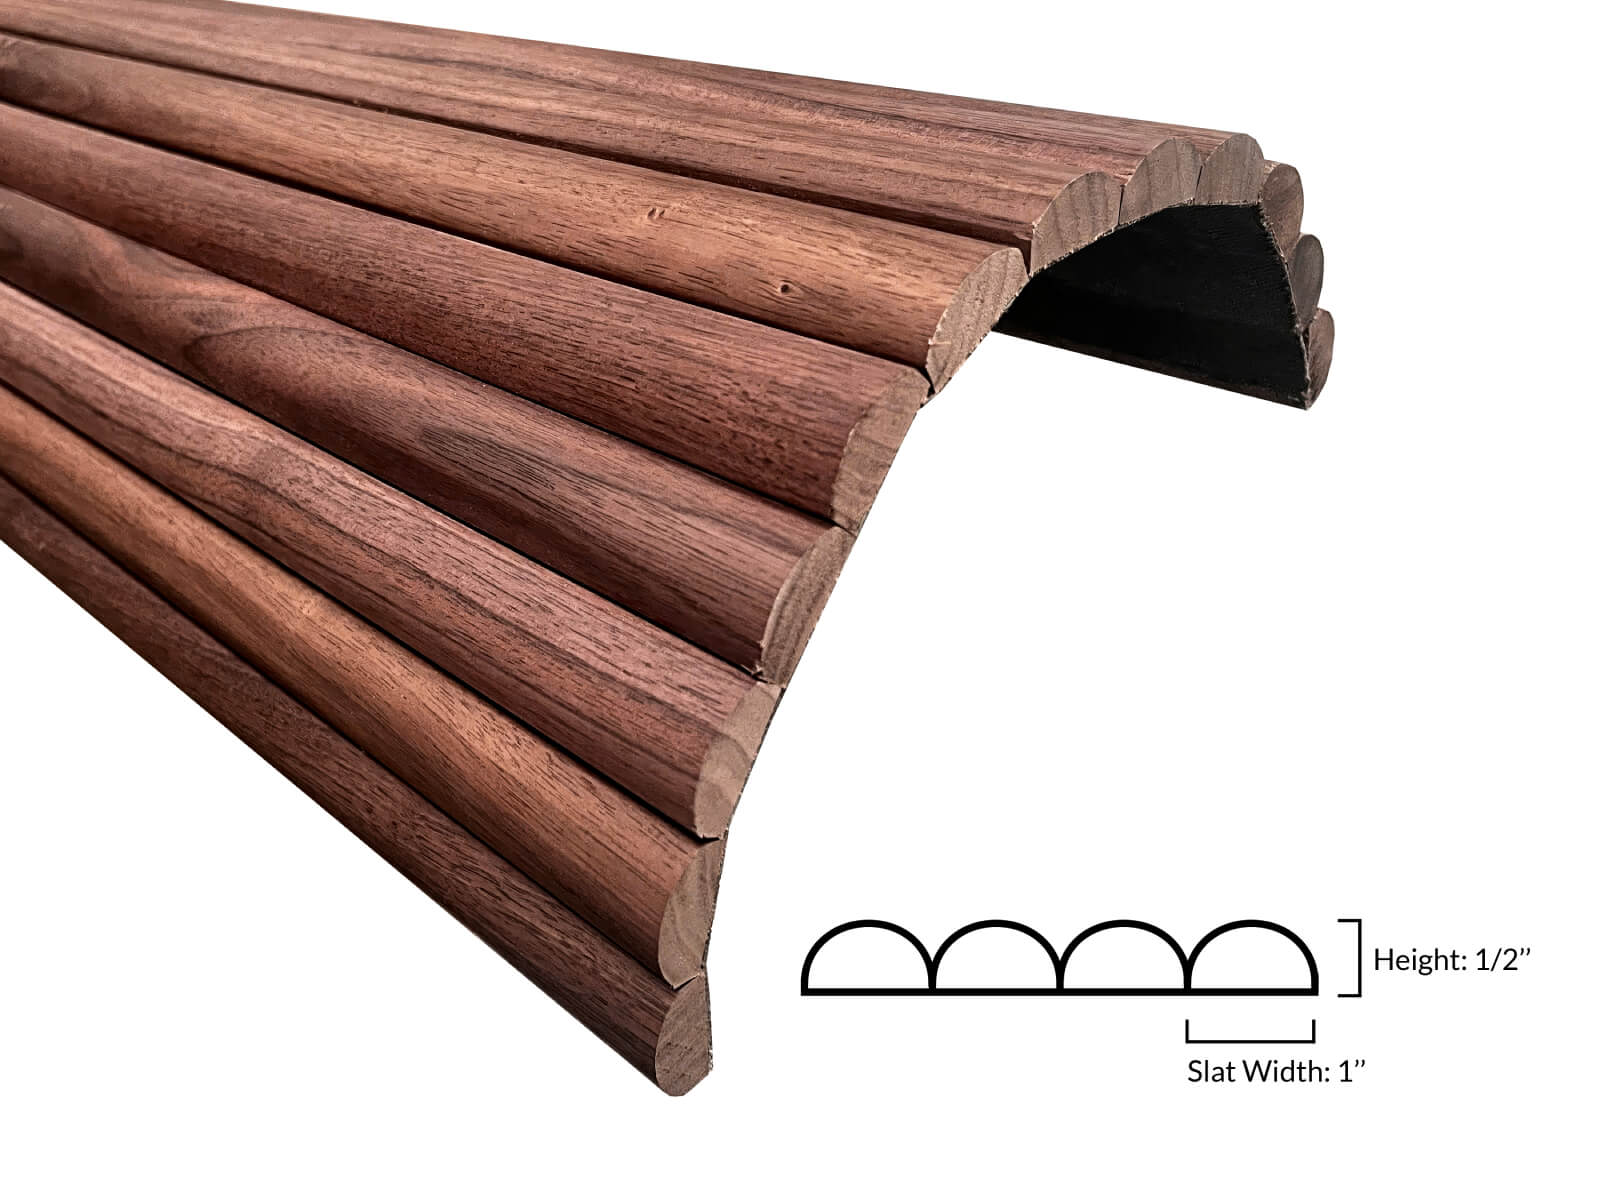
Panel Dimensions: 94 1/2 in x 11 13/16 in x 1/2 in
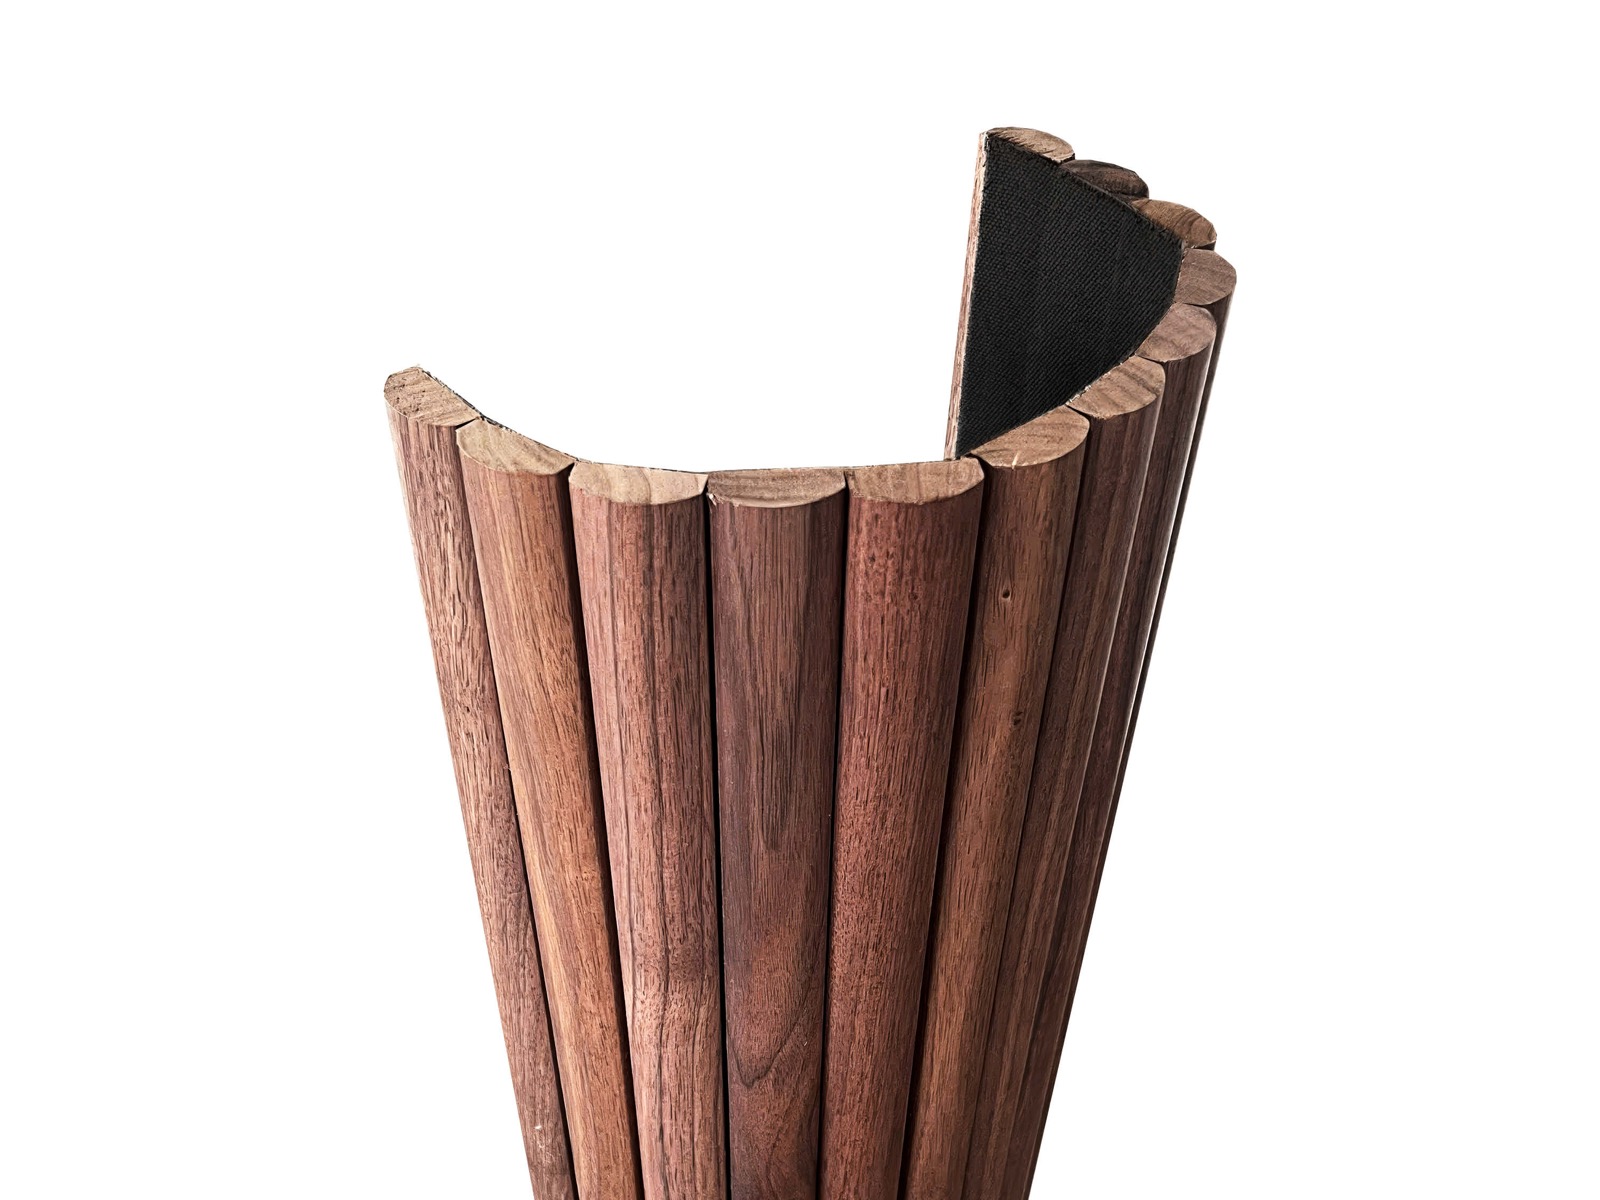
WoodyWalls 1″ Half-Round Walnut Tambour Wood Panels provide a high-quality, versatile solution to enhance your interiors. Crafted from 100% real American walnut with a flexible fabric backing, these flexible wall panels add a sophisticated and timeless elegance to any space. The natural grain and warm tones of walnut create a rich, inviting atmosphere, while their flexible design allows for easy adaptation to various applications, whether you’re updating walls, furniture, or other surfaces.
Key Features:
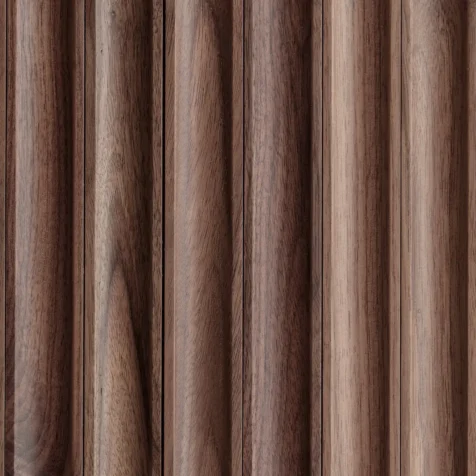
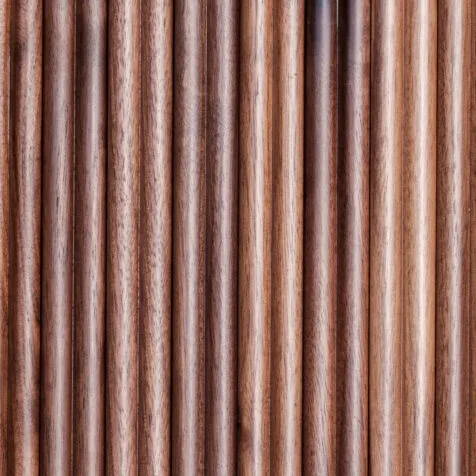
Premium Walnut Construction
Crafted from solid walnut, WoodyWalls tambour wood panels showcase the natural beauty of real wood. The rich texture and durability of walnut make these reeded wood panels ideal for creating a luxurious and long-lasting interior. Enhanced with moisture-resistant treatments, these tambour panels offer superior stability compared to MDF alternatives, ensuring they maintain their beauty over time
Flexible Design for Versatile Applications
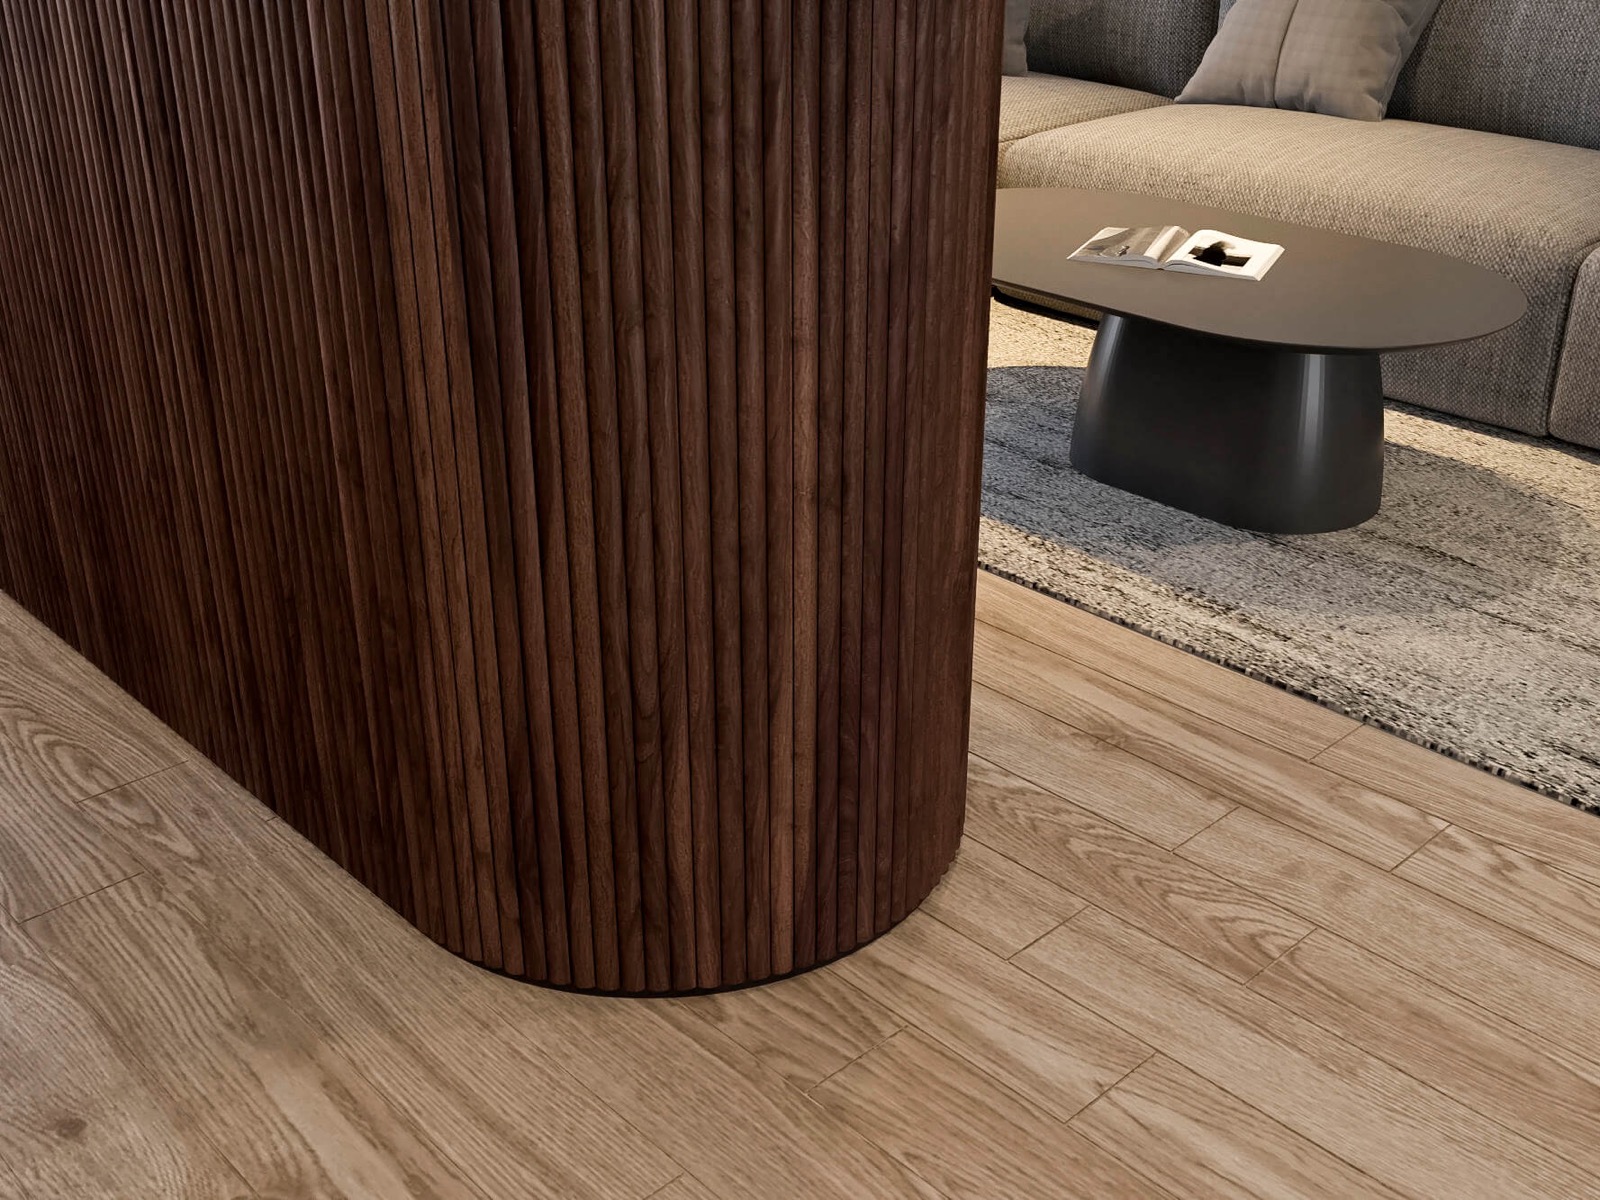
WoodyWalls flexible wood panels are designed to be adaptable. Their flexibility makes them suitable for both flat and curved surfaces, offering endless possibilities in how they can be applied. Whether you’re looking to enhance walls, create a stunning feature, or upgrade furniture surfaces such as cabinets, doors, kitchen islands, or headboards, these tambour wood panels can easily be tailored to your specific needs. The 1″ half-round shape provides texture and dimension, adding a touch of elegance to any space.
Easy Installation
WoodyWalls tambour wood panels are lightweight and easy to install, making them ideal for both DIY projects and professional renovations. Simply measure the area, cut the reed panels to the desired size using a fine-tooth saw, apply construction adhesive to the back, and press them into place. The simplicity of installation makes these flexible wall panels a quick and effective way to transform any room or surface with minimal effort.
Multi-Functional and Stylish
These tambour wood panels are designed not only for walls but also for furniture upgrades. Their lightweight and flexible design allow them to be used on cabinet doors, kitchen islands, headboards, and even custom furniture projects. With the ability to cut and shape them to fit any surface, they offer a versatile solution for both small and large-scale projects. The result is a high-end, custom finish that brings a sense of luxury and refinement to your space.
Cost-Effective and Long-Lasting
In addition to their aesthetic appeal, WoodyWalls tambour panels offer excellent value. Their solid walnut construction ensures long-lasting durability, while the moisture-resistant finish makes them a suitable choice for high-traffic areas or spaces with varying humidity. Compared to other wall and furniture paneling options, tambour paneling is a cost-effective solution that combines beauty and functionality.
Before You Decide:
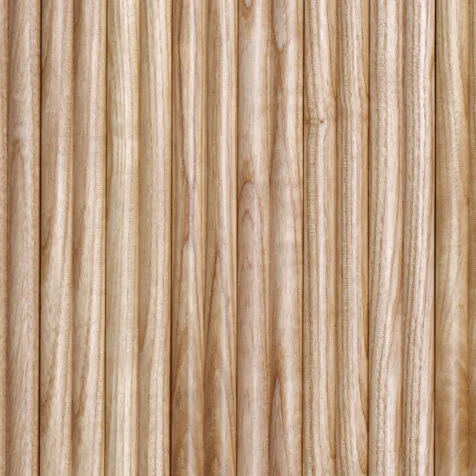
- Order Samples: Before committing to a full project, we highly recommend ordering samples. This will allow you to experience the two types of patterns—small and large—in both white ash and walnut. Seeing these options in person will give you a clearer vision of how these reeded wood panels can enhance your space, helping you choose the perfect fit for your design.
- Watch Our Installation Guide: We provide a step-by-step installation guide that makes fitting these panels simple and straightforward, ensuring you achieve a flawless finish.
Installation Instructions:
- Ensure your surface is clean, smooth, and dust-free for optimal adhesion.
- Measure and cut the reed panels to the required size using a fine-tooth saw or circular saw for precise cuts.
- Apply construction adhesive to the back of the tambour panel and press it firmly against the surface.
- Allow the adhesive to set, and enjoy the seamless, hassle-free transformation of your space.
Transform Your Space
WoodyWalls tambour wood panels are the perfect way to introduce warmth, texture, and elegance into any room. Their flexible design and ease of use make them a versatile choice for a wide range of applications, from simple wall installations to more creative projects like upgrading furniture. Whether you’re looking to enhance your home’s interior or embark on a more ambitious renovation project, these wood wall panels offer a timeless, practical, and stylish solution.
With their natural walnut finish and classic half-round shape, these tambour panels will bring an enduring elegance to your space, making them a smart and versatile choice for any interior design upgrade.


1 review for 1″ Half-Round Walnut Tambour Wood Panels
We just finished our project using the tambour wood panels, and we are absolutely in love with the result! The panels added a beautiful texture and warmth to the space, a ... We just finished our project using the tambour wood panels, and we are absolutely in love with the result! The panels added a beautiful texture and warmth to the space, and the installation was simple and smooth. Highly recommend for anyone looking to add a modern, natural touch to their home!
Pam Lyons Verified Buyer