


Canyon Long 3D Wall Panels
$129.00 per box
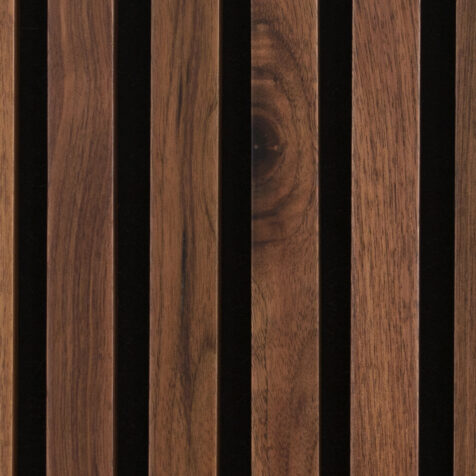
Material:
TeakSquare feet p/box:
9.2 sq. ft.Installation:
Glue & NailsQuantity per box:
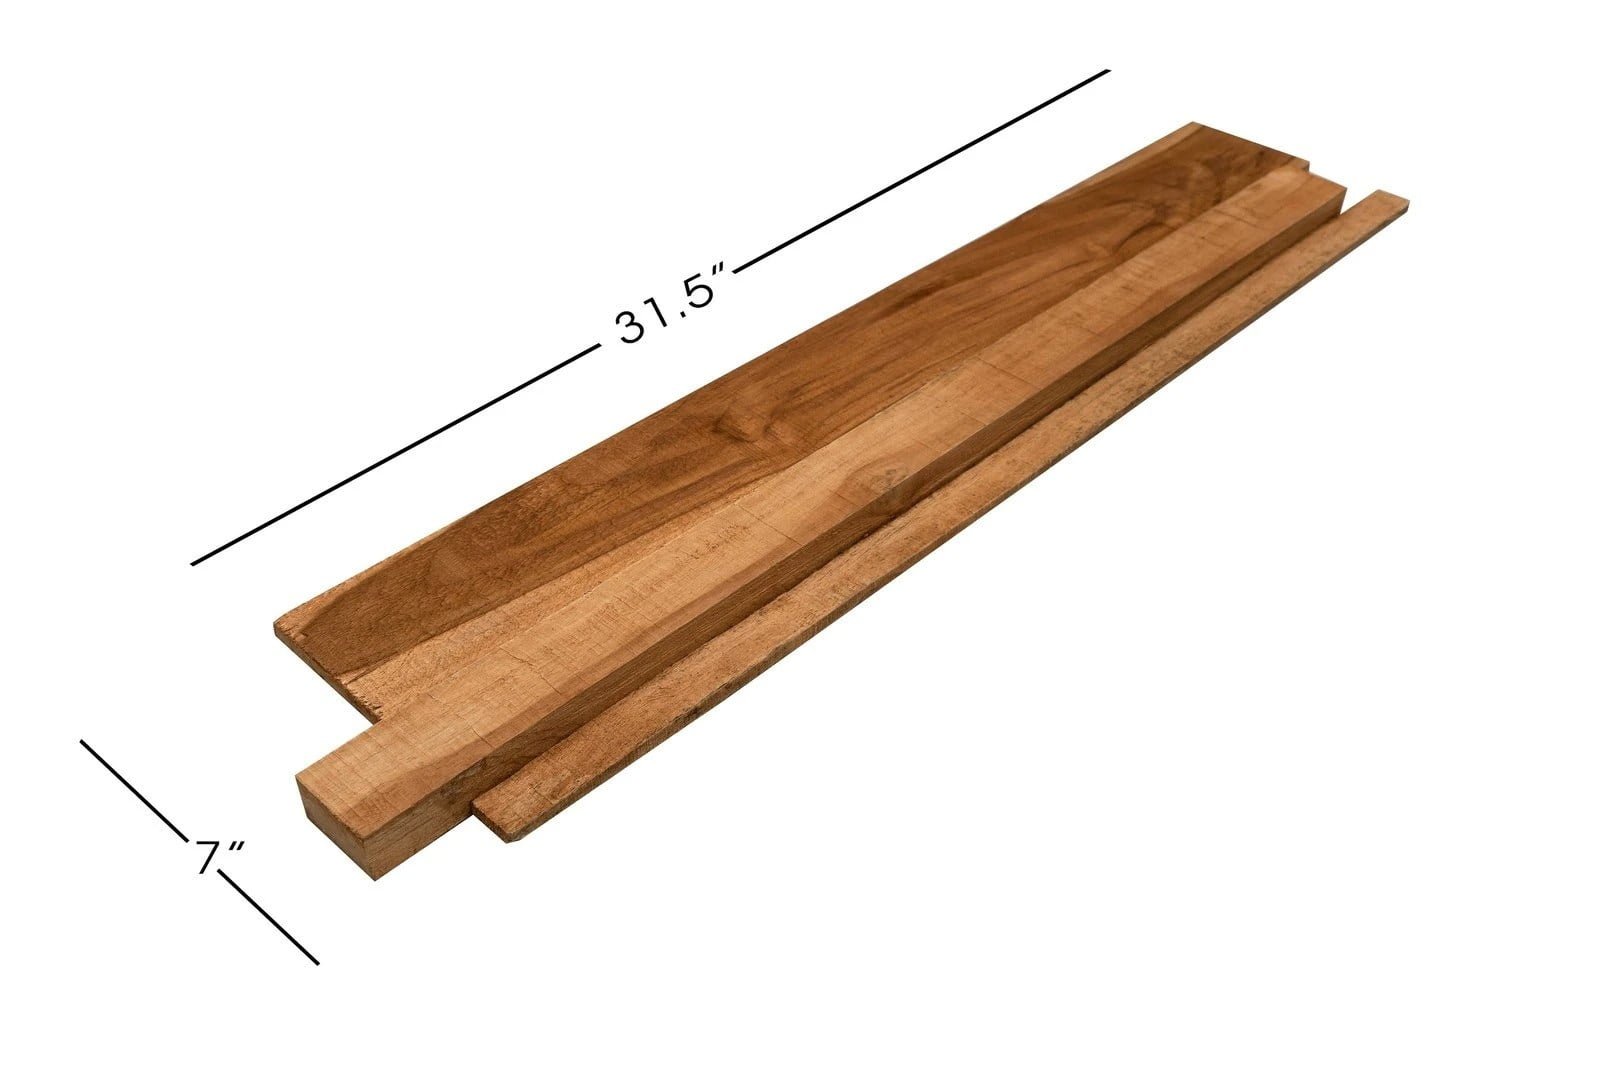
6 panelsSize per panel:
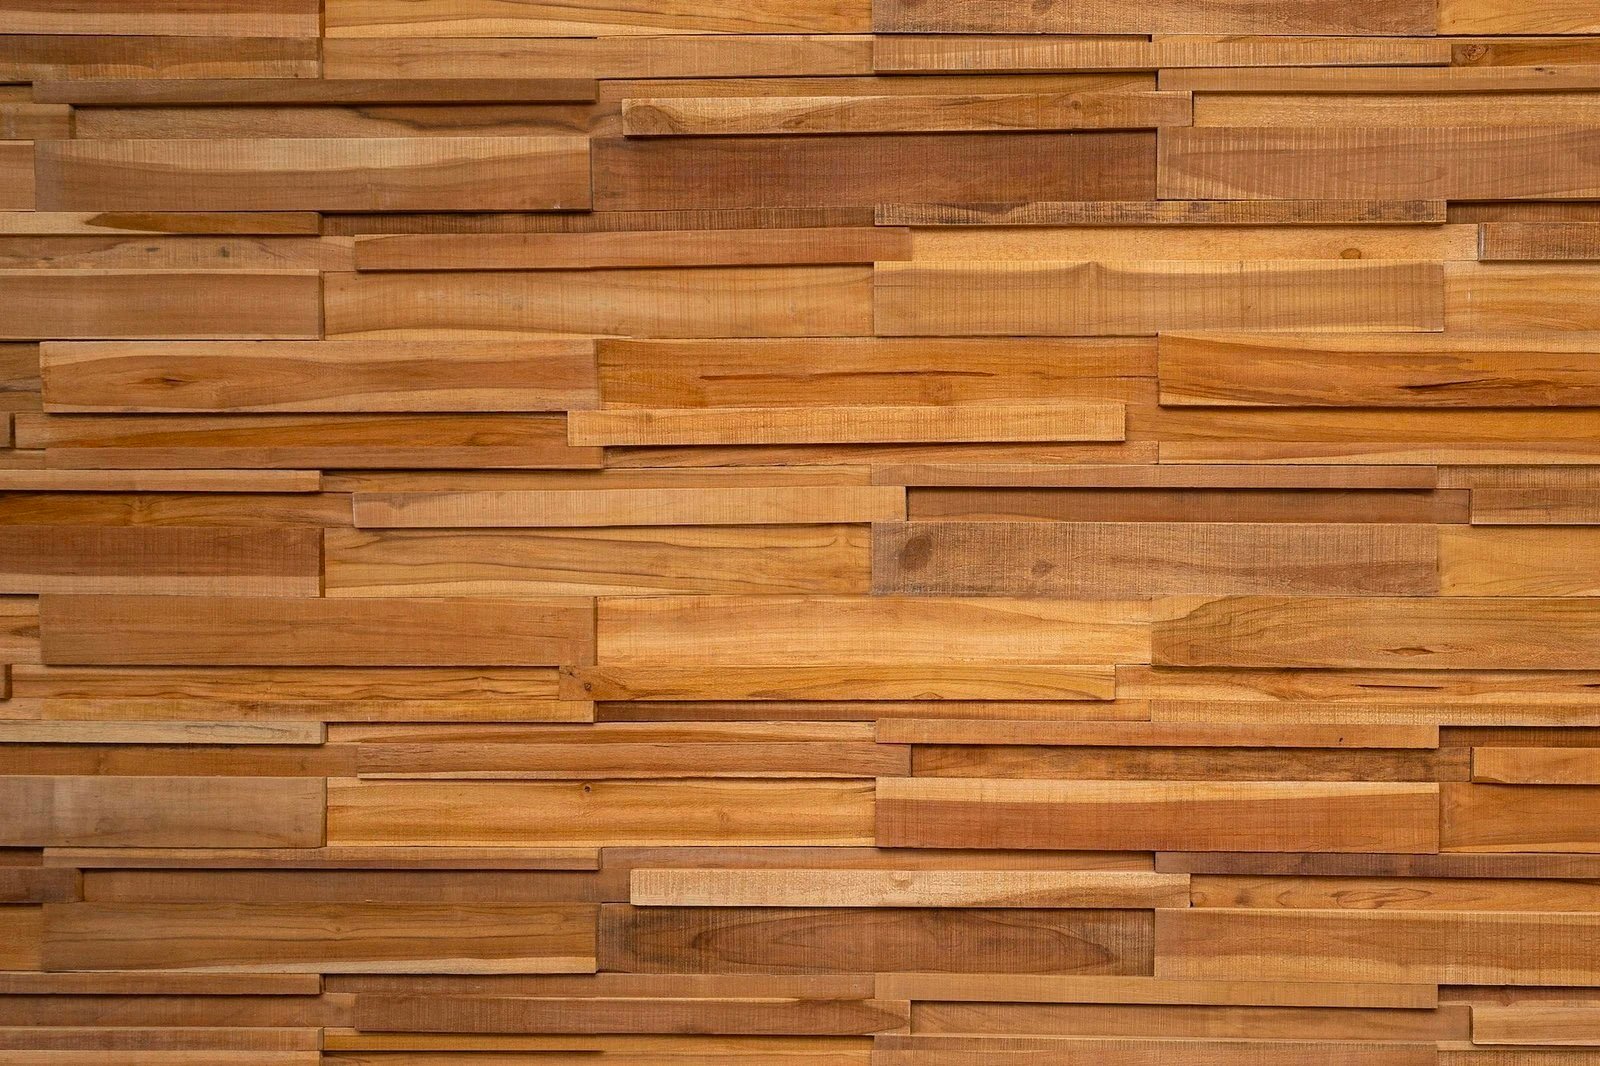
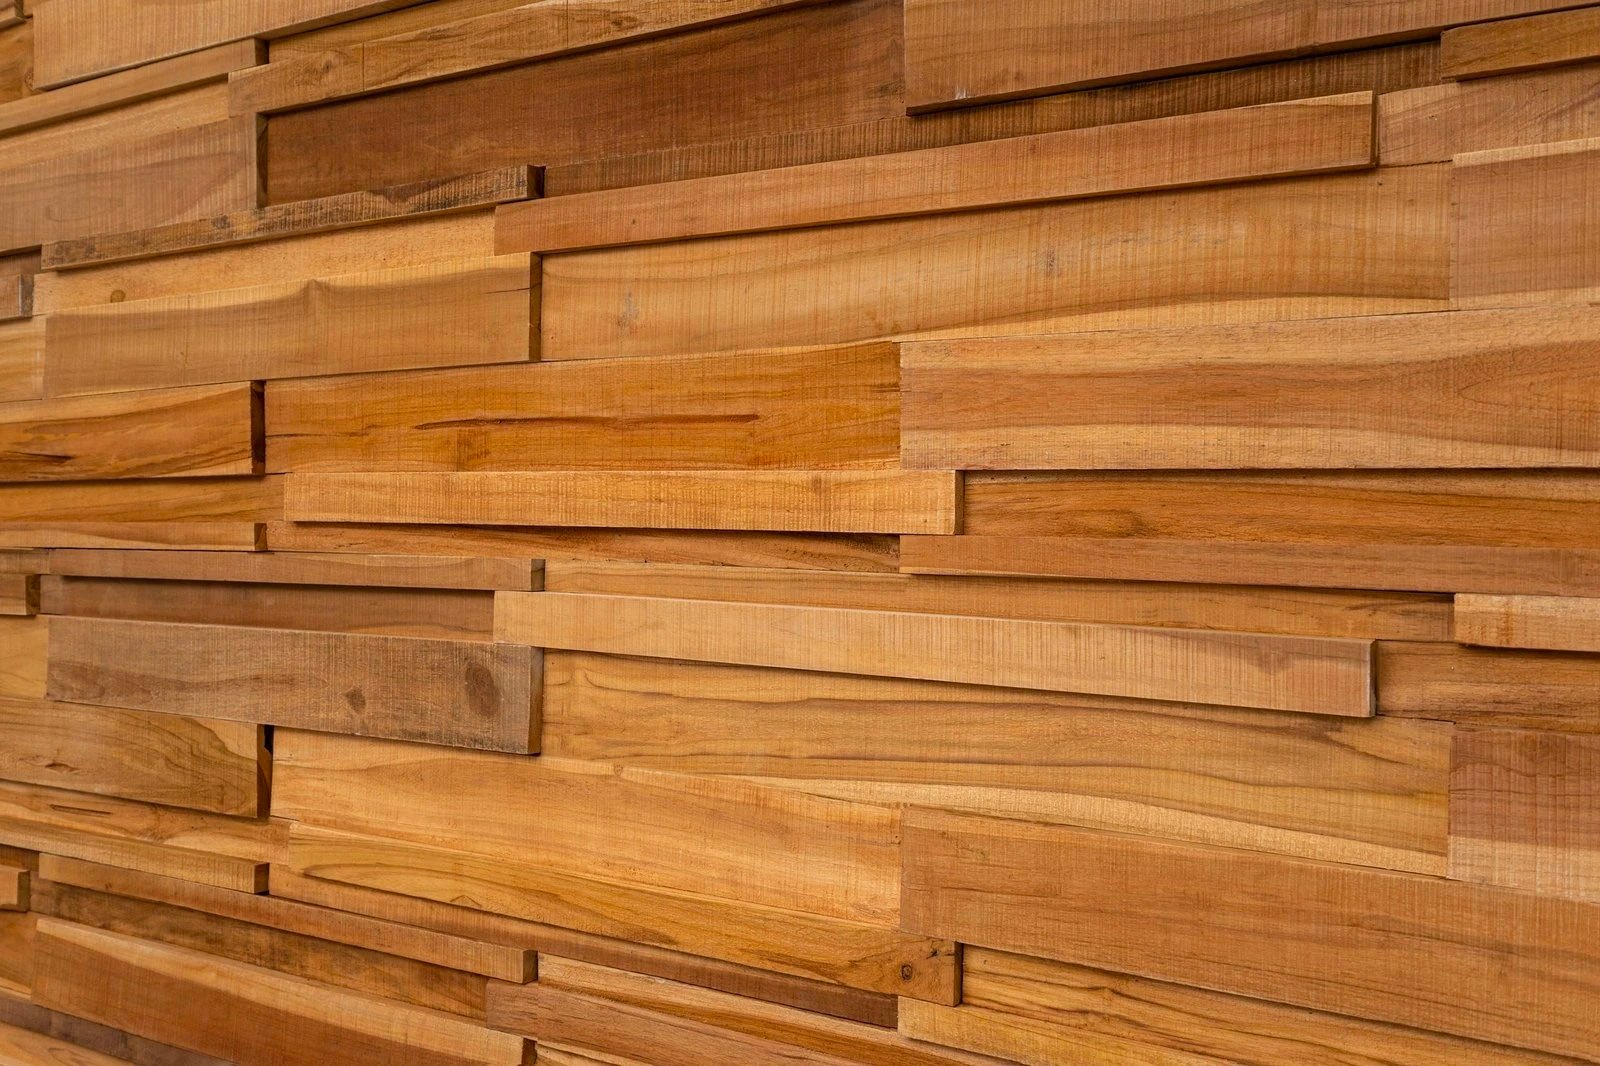
31.5” x 7” x 0.3"-1”CANYON WOOD WALL PANELING
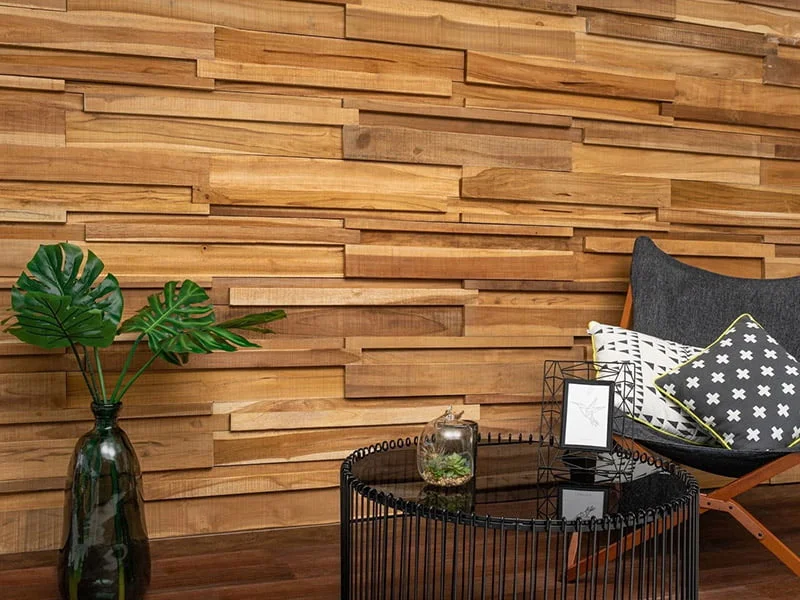
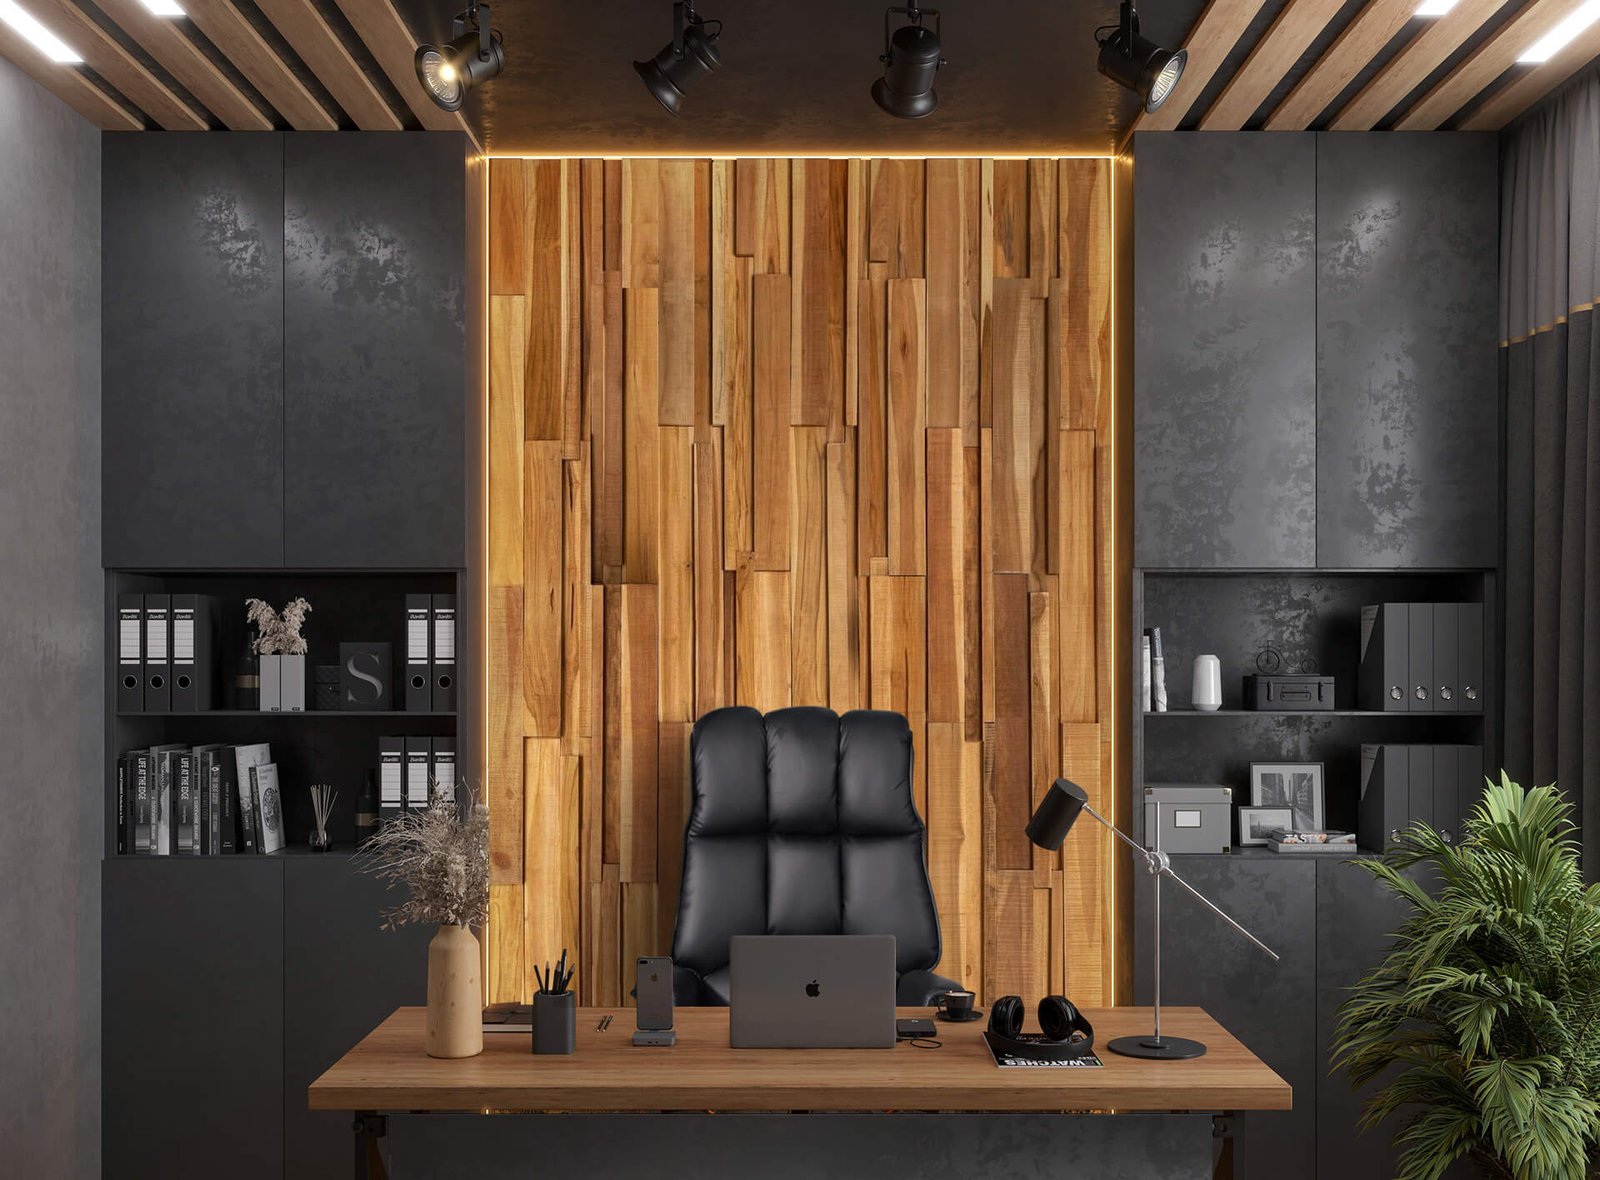
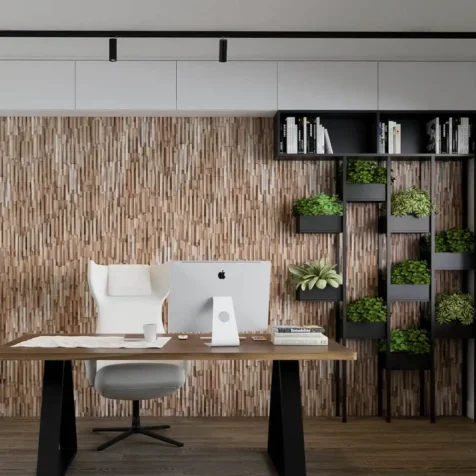
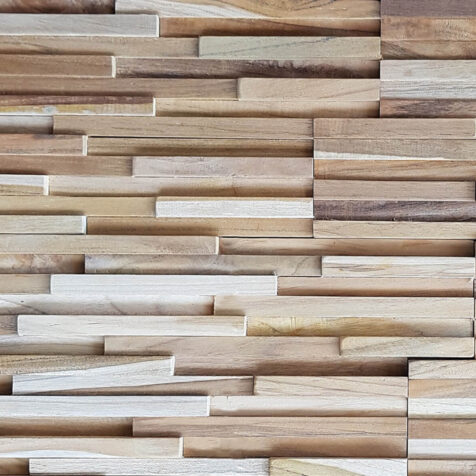
Looking to make a real statement, perhaps with the largest wall in the room. These extra-long teak 3D wood wall panels are ideal for such a project and their warm, natural colours add a particular richness to the atmosphere of any room
3D WOOD WALL PANEL DIMENSIONS
Canyon long 3D wall panels measure 31.5″ by 7″. There are six teak wall panels inside each box which covers a total surface area of 9.2 square feet. Our teak wall paneling can vary in thickness measuring 0.3″- 1″. Our Canyon long 3D wall panels are made of 100% teak wood – we never use laminated wood
ALL OUR TEAK WALL PANELS ARE EASY TO INSTALL AS A DIY PROJECT
We recommend using 18-gauge brad nails and construction adhesive for installation. No complex mounting hardware or heavy tools are needed. All our wood panelling is precision cut. We cut them precisely to fit each other perfectly making the installation process smooth and fun. Our long 3D wall panels are suitable for DIY projects as well as commercial and residential installation.
OUR WALL CLADDING IS PERFECT FOR COVERING ANY TYPE OF WALL
Canyon 3D walls can be installed on different types of surfaces including textured walls, backsplashes or headboards. Our teak wall panels are perfect for installation in places with high humidity (avoid areas where wood panels could be directly exposed to moisture). Please be sure the application surface is dry and clear of dust/debris to ensure long-lasting adhesion.
UNMISTAKABLE LUXURY AND CLASSIC APPEAL
Long 3D wood wall panels in a dramatic golden mocha color that is warm, attractive, and elegant. Teak wood panels will not only improve the look of any space, they provide superb protection for wall surfaces, with superior performance against insects, moisture, and decay.
GUARANTEED QUALITY FOR ALL OUR DECORATIVE WOOD WALL PANELS
Every single wood wall panel has been sourced responsibly, is fully recyclable and is 100% free of harmful chemicals. We only use non-toxic adhesives.
Reviews
You must be logged in to post a comment.


6 reviews for Canyon Long 3D Wall Panels
I bought the long 3D wood panels, and I’m really impressed! They’re made of real teak wood, which is perfect for the bathroom. They’re not only beautiful but also very co ... I bought the long 3D wood panels, and I’m really impressed! They’re made of real teak wood, which is perfect for the bathroom. They’re not only beautiful but also very comfortable to work with.
Margaret Verified Buyer
Easliy installed with a trim nailer/stapler and a compuound miter saw for edge cuts. I used a table saw for the one long edge but a circular saw would have worked. Looks ... Easliy installed with a trim nailer/stapler and a compuound miter saw for edge cuts. I used a table saw for the one long edge but a circular saw would have worked. Looks incredible and doesn't vibrate even with a soundbar mounted right to it
Nancy Verified Buyer
Looks amazing! Easy to install- used Brad nailer instead of glue Looks amazing! Easy to install- used Brad nailer instead of glue
Kelsey Angell Verified Buyer
PROS: Easy to install, I used liquid nails and finishing nails in the studs:Great 3D look,CONS: Not many peices for the price, I only go ... PROS: Easy to install, I used liquid nails and finishing nails in the studs:Great 3D look,CONS: Not many peices for the price, I only got what was done in the 4th picture with 1 bundle, it took 2 bundles to do this behind a 65" TV.I prob wouldn't of bought this if I hadnt already started on it. Total cost was around $200-250. But now I'm glad I did buy them it looks killer we were going with a Mid-century Modern look
Iceman Verified Buyer
We converted a bedroom into a home gym. The beige walls were pretty stark so we wanted to warm things up with a textured accent wall.Alt ... We converted a bedroom into a home gym. The beige walls were pretty stark so we wanted to warm things up with a textured accent wall.Although the instructions recommended using adhesive, we didn’t want to trash the ‘old’ drywall in case a future owner decides to remove the paneling. Instead, we used a nail gun with tiny nails and that worked fine. We love the finished look!
Roland Schumann Verified Buyer
We installed this today on our fireplace to create a fabulous feature wall in our home. Love the outcome. It was easy to use and looks s ... We installed this today on our fireplace to create a fabulous feature wall in our home. Love the outcome. It was easy to use and looks stunning.
Igor Verified Buyer