Free USA shipping available in 48 hours

Call us

+1 (786) 615-4148
$0.00
SubscribeSubscribe_Mob
Igloo (Pure White) <br>3D Wall PanelsIgloo (Pure White) <br>3D Wall Panels 2Igloo (Pure White) <br>3D Wall Panels 3Igloo (Pure White) <br>3D Wall Panels 4Igloo (Pure White) <br>3D Wall Panels 5Igloo (Pure White) <br>3D Wall Panels 6Igloo (Pure White) <br>3D Wall Panels 7Igloo (Pure White) <br>3D Wall Panels 8Igloo (Pure White) <br>3D Wall Panels 9
  • Igloo (Pure White) <br>3D Wall Panels 10
  • Igloo (Pure White) <br>3D Wall Panels 11
  • Igloo (Pure White) <br>3D Wall Panels 12
  • Igloo (Pure White) <br>3D Wall Panels 13
  • Igloo (Pure White) <br>3D Wall Panels 14
  • Igloo (Pure White) <br>3D Wall Panels 15
  • Igloo (Pure White) <br>3D Wall Panels 16
  • Igloo (Pure White) <br>3D Wall Panels 17
  • Igloo (Pure White) <br>3D Wall Panels 18
video

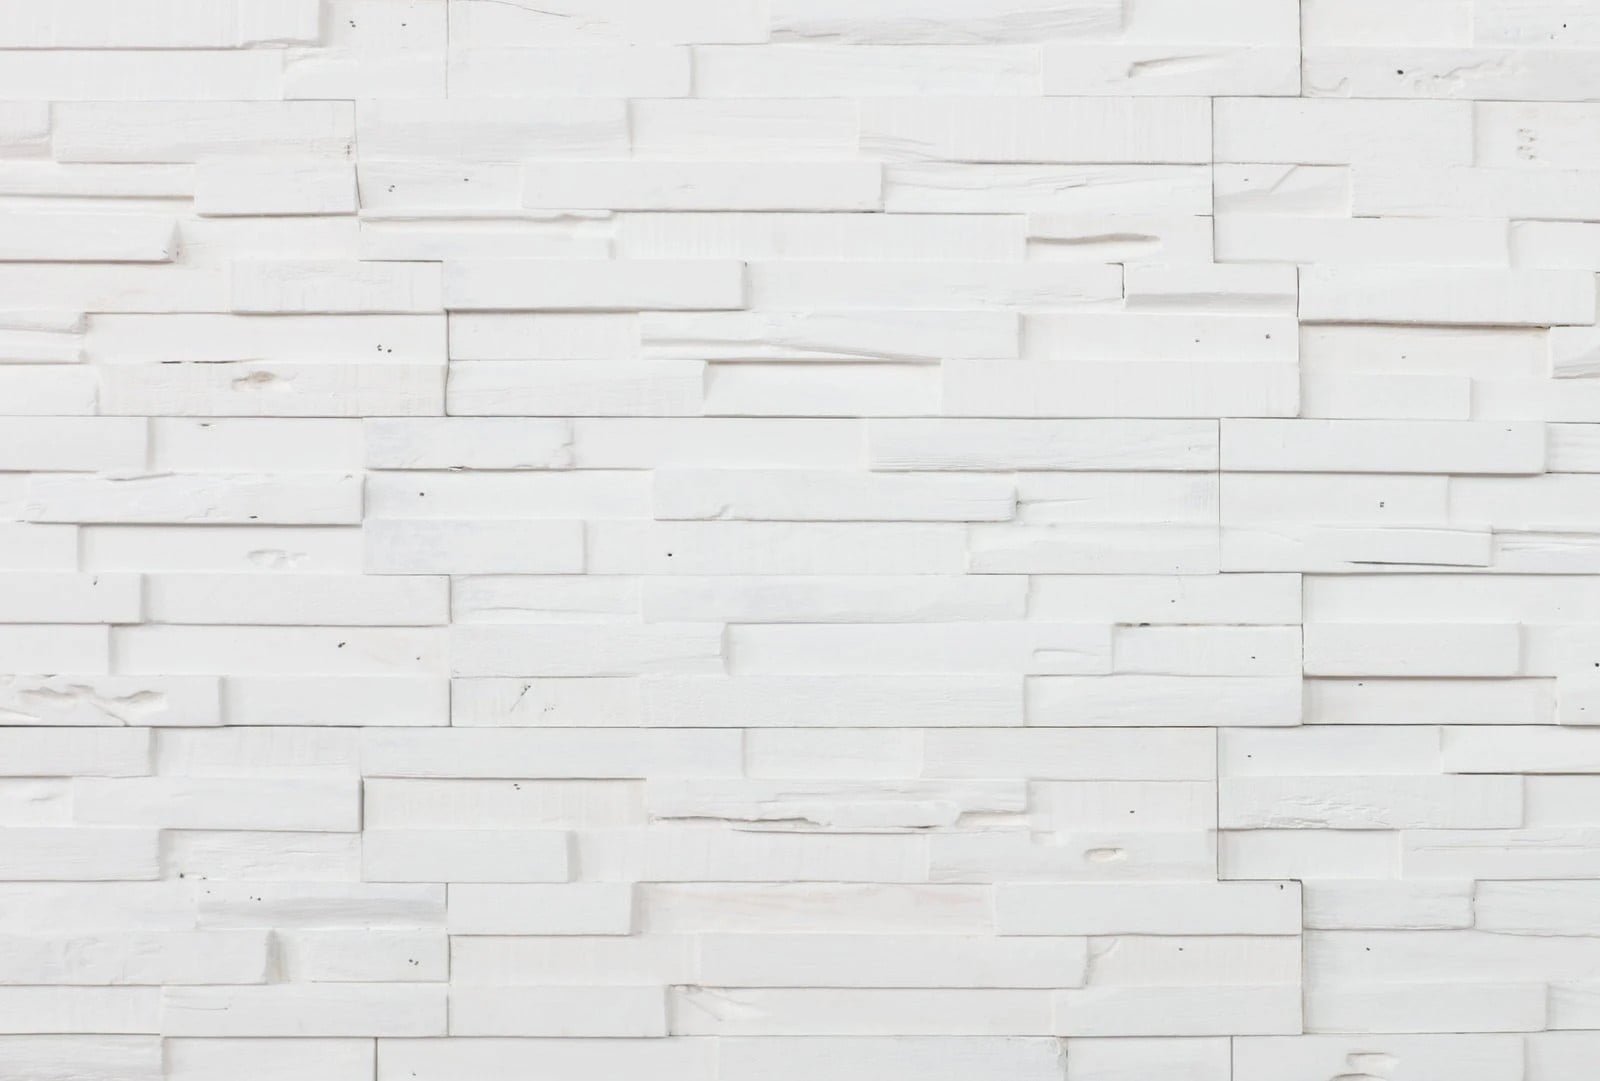
Igloo (Pure White)
3D Wall Panels

(1 customer review)

$119.00

per box
Box coverage:
9.5 sq. ft.
Installation:
Glue & Nails
Quantity per box:
10 planks
Square feet:
$12.52
Size per plank:
19.5” x 7” x 0.3"-0.75”
Square per box:
9.5 sq. ft.
Installation:
Glue & Nails
Quantity per box:
10 planks
Size per plank:
19.5” x 7” x 0.3"-0.75”
Visa Mastercard American Express PayPal Diners Club Discover
video
Recyclable
Recyclable
Glue and nails installation
Handmade panels
Handmade panels

Description

IGLOO (PURE WHITE) 3D WALL PANELS

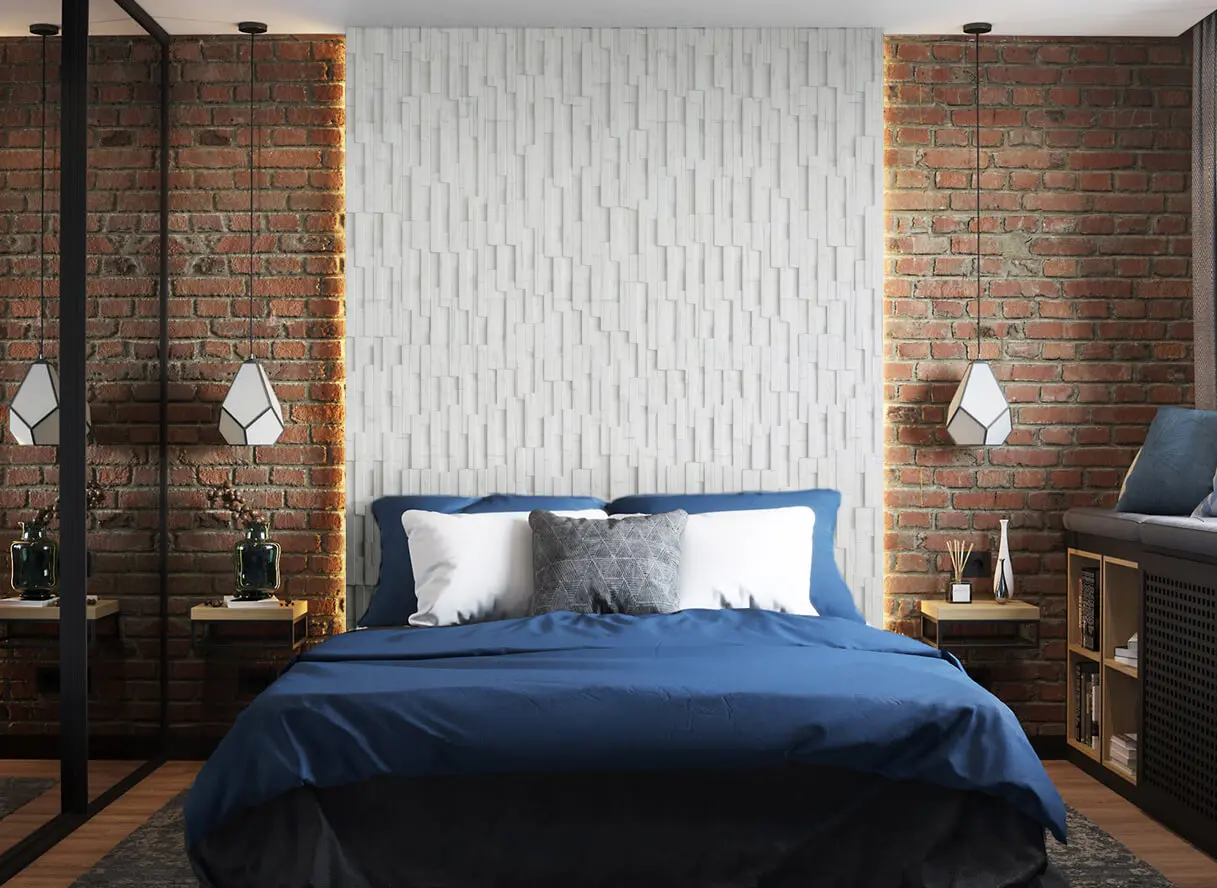
You may wonder with the natural colors of wood why painting it all white is necessary. With our 3D barn wood wall panels, especially for well-lit rooms, white is the optimum option, however, you can’t get the visual look from textured paints or plaster that wood can provide. Nor do they have sound softening and absorption properties that can get rid of the echo from a room with minimal soft furnishings.

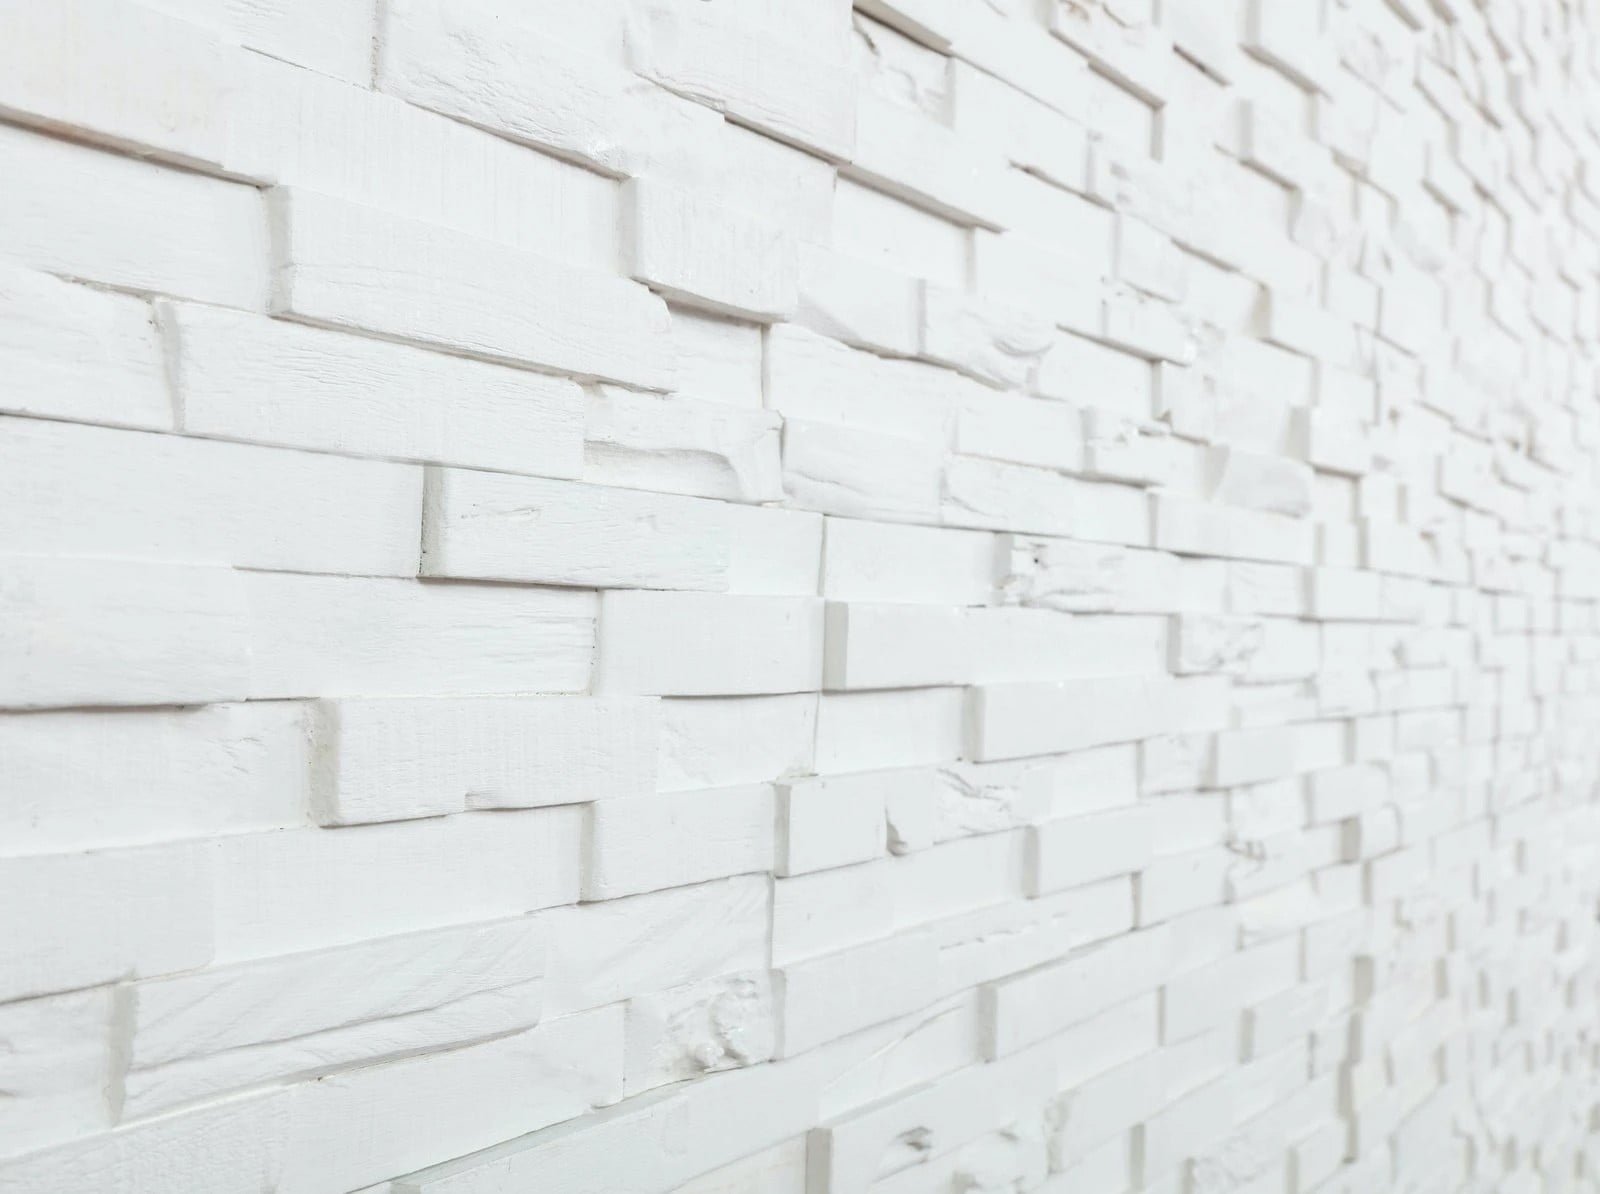
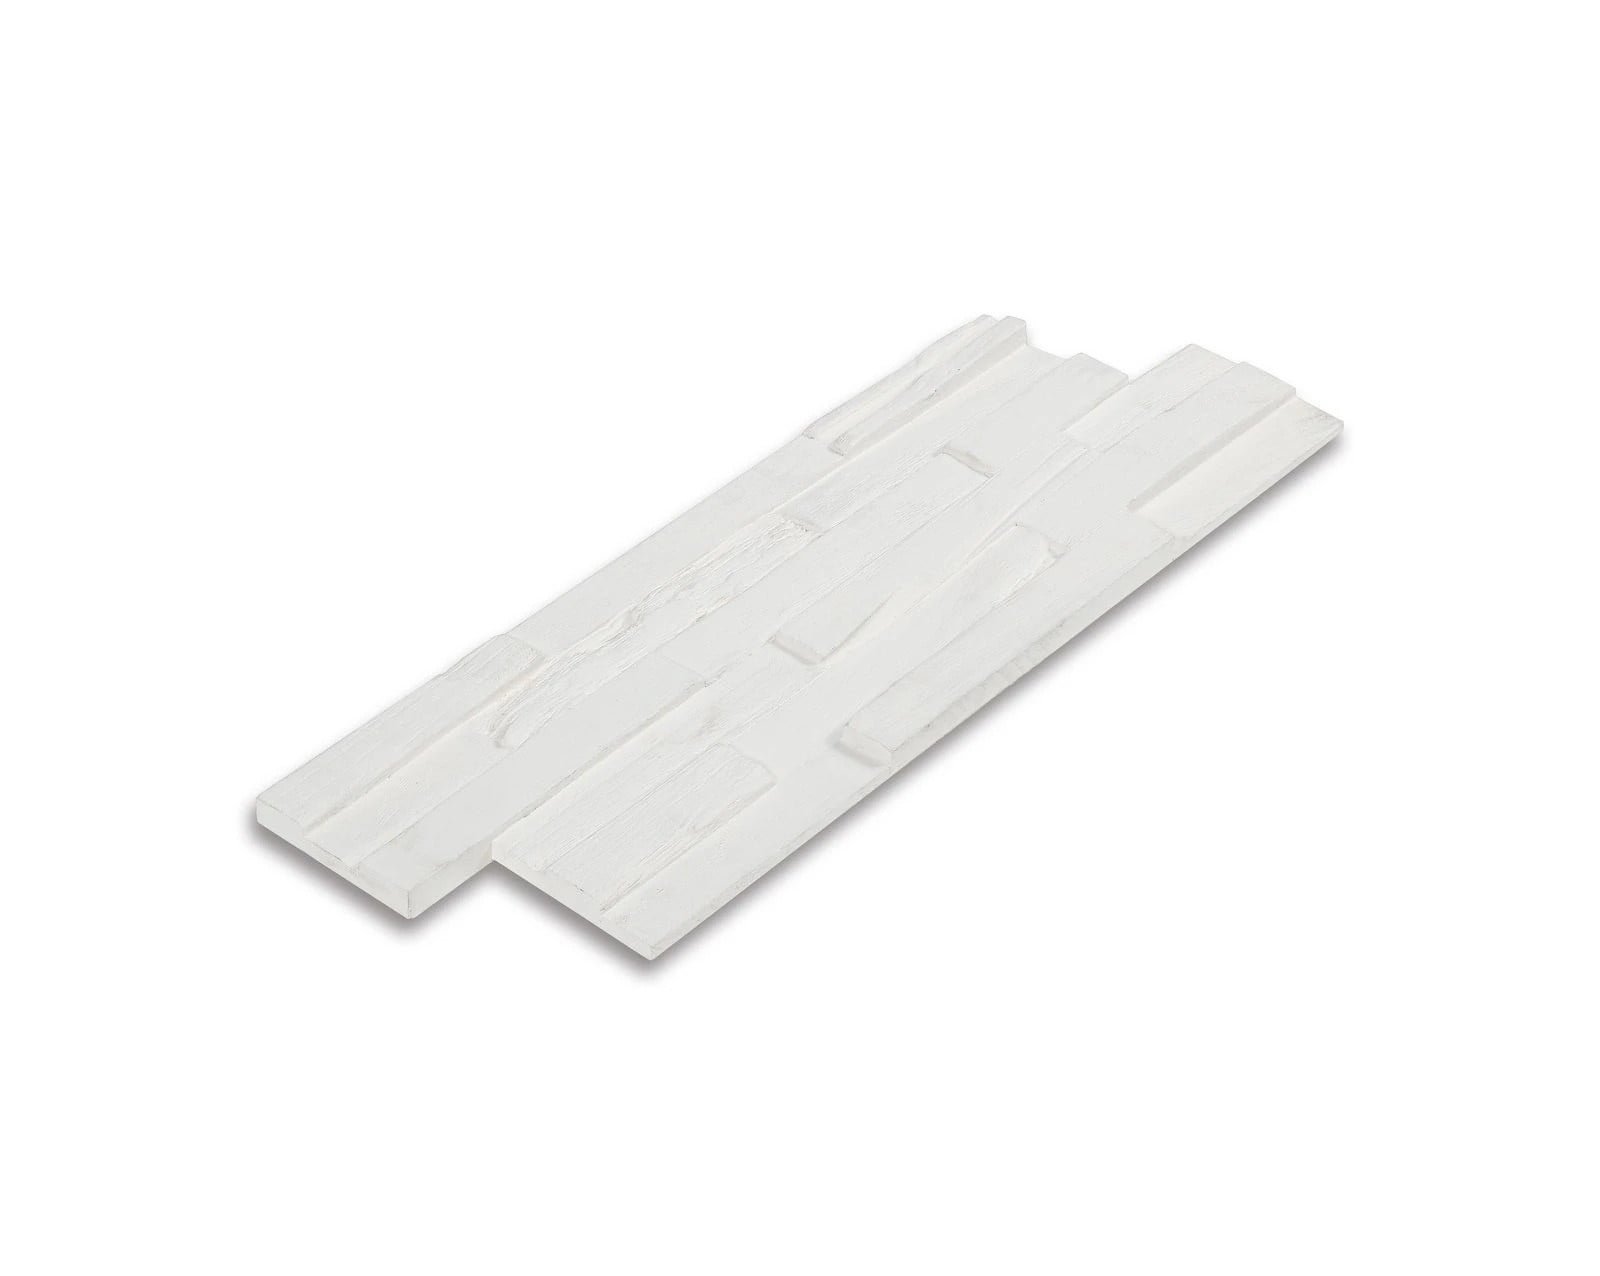
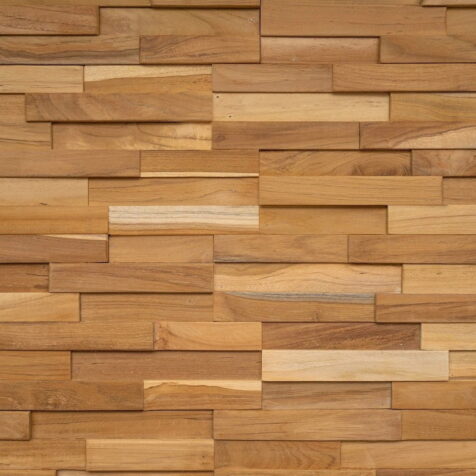
SPECIFICATIONS OF ALL 3D WOOD PANELS

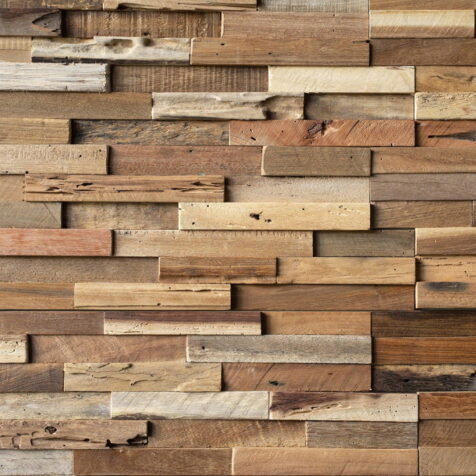
Each 3D wood wall panel is 19.5” X 7” and you will find there are ten wood panels per box with a total coverage area of 9.5 square feet. Our 3D barn wood wall panels vary in thickness, measuring between 0.3’’ and 0.75”. We are very proud of the fact that all our barn wood panels are made only with 100% reclaimed wood.

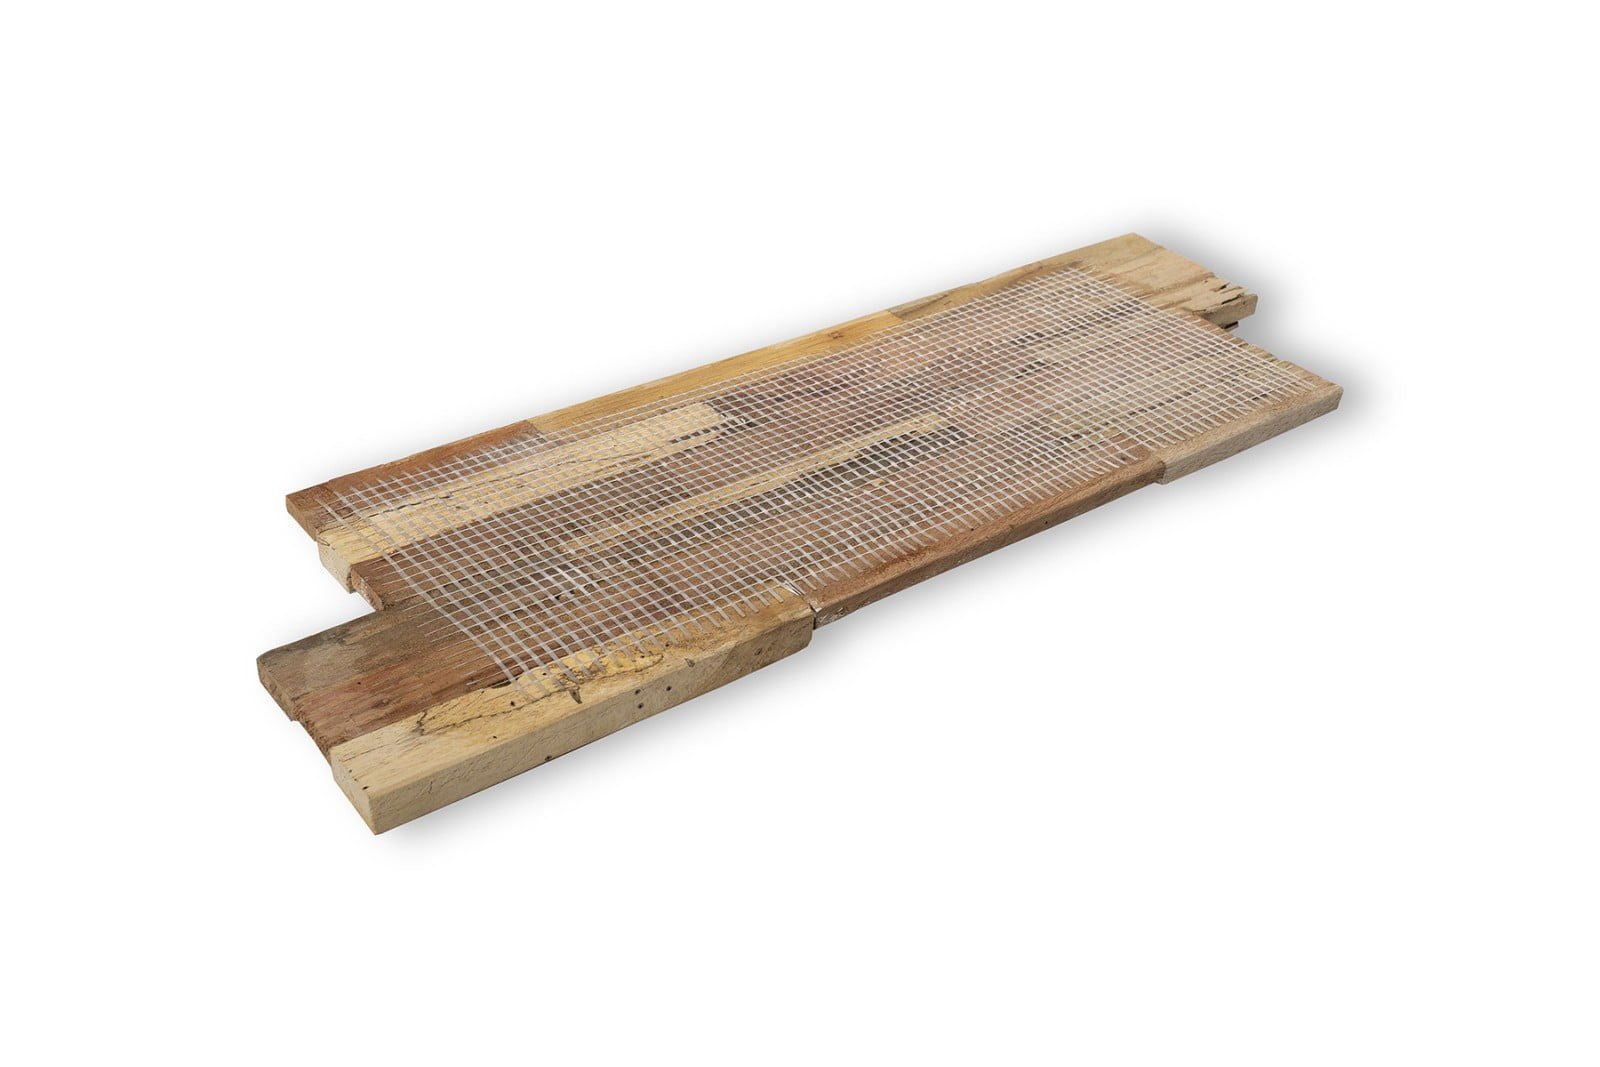
WOOD WALL PANELS INSTALLATION COULDN’T BE SIMPLER

While the change in appearance of any wall can be dramatic, do be misled into thinking that the installation process is difficult or complicated. It couldn’t be easier! Applying this type of wood cladding couldn’t be easier – check out our installation video if you don’t believe us!
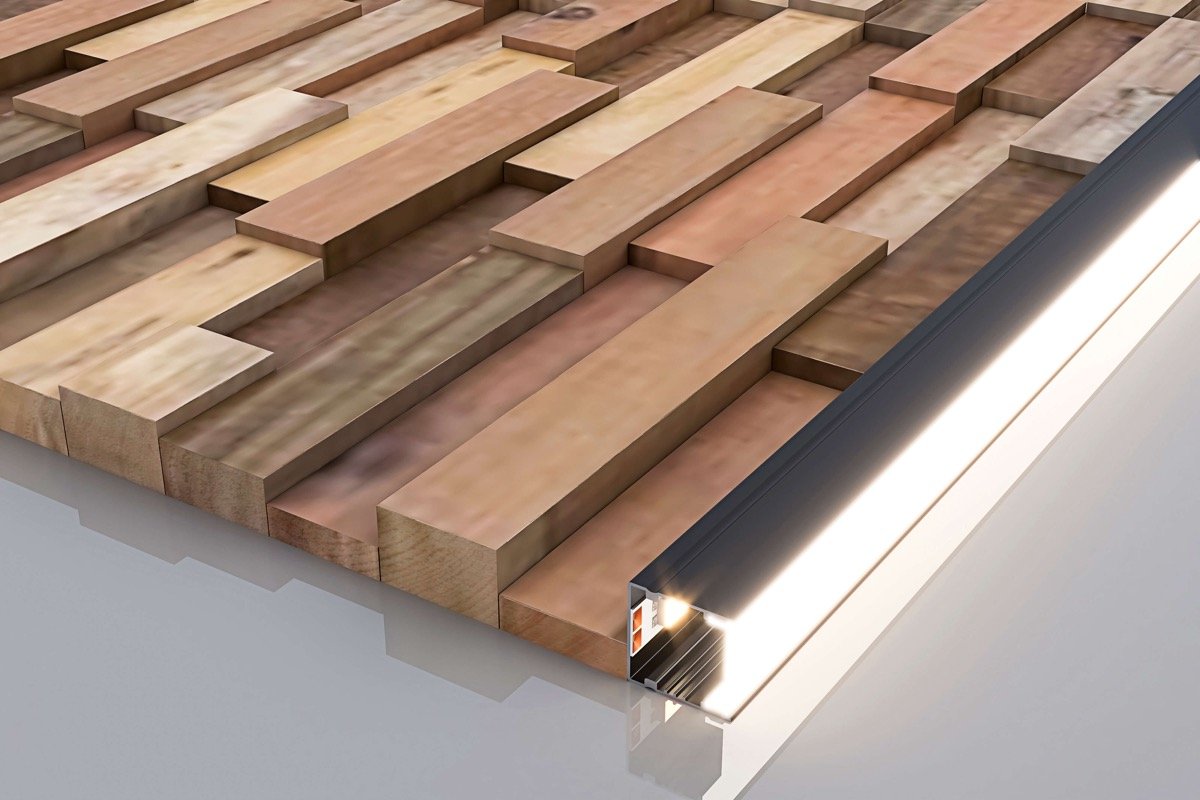
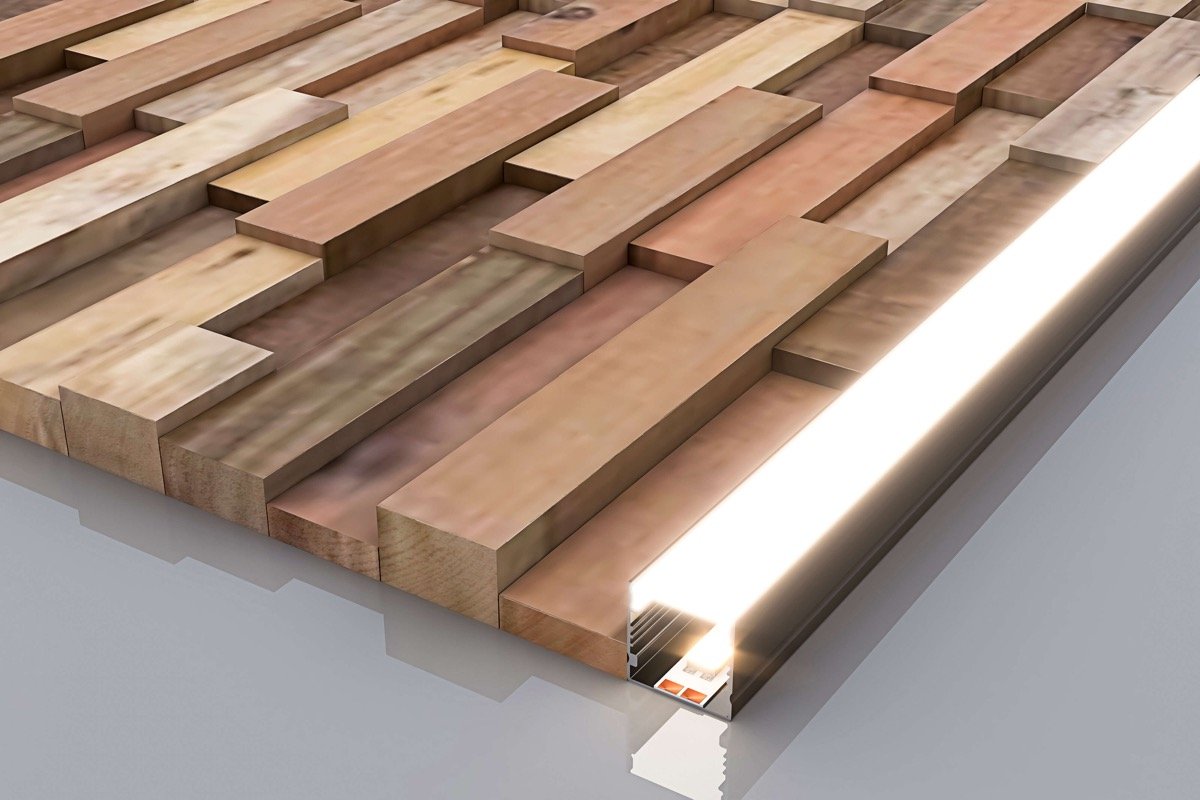
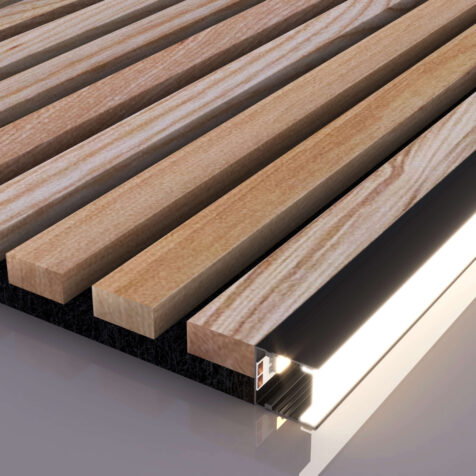
ELEVATE YOUR WOOD ACCENT WALL's CHARM WITH OUR LED CHANNEL FOR WOOD WALL EDGING

Elevate the aesthetic appeal of Woody Walls 3D wood wall panels with our remarkable LED accent lighting. Designed exclusively for 3D wood walls, our lighting solutions will take your 3D wood wall panels to the next level. Our seamlessly integrated Edge Lighting Channels effortlessly complement our 3D wood wall panels, allowing you to effortlessly create captivating lighting effects that amplify the inherent beauty of your wood accent wall, while also adding a touch of elegance and sophistication.

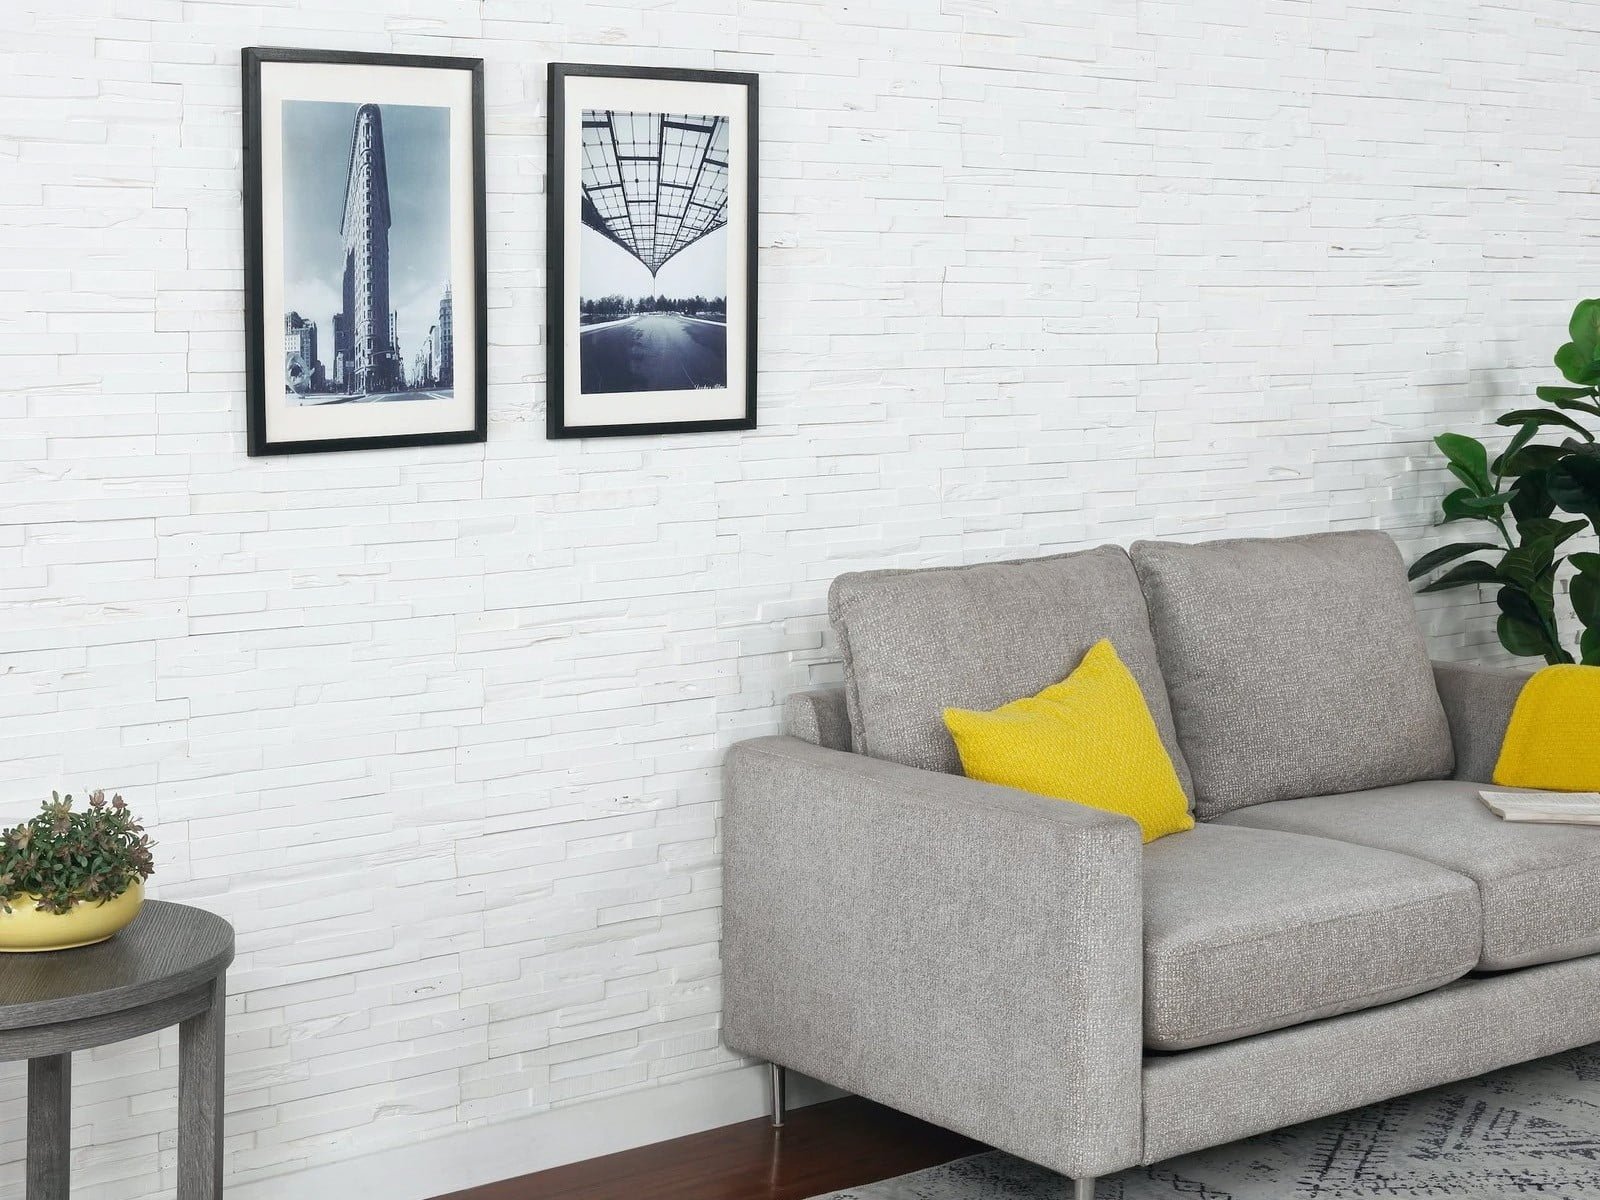
OUR 3D WALL PANELS ARE SUITABLE FOR MOST EXISTING WALL FINISHES

One of the most frustrating and time-consuming aspects of any DIY project is preparation. With our barn wood wall panels, providing the wall to be covered has a stable surface and it is free from dust, you can begin work straight away.

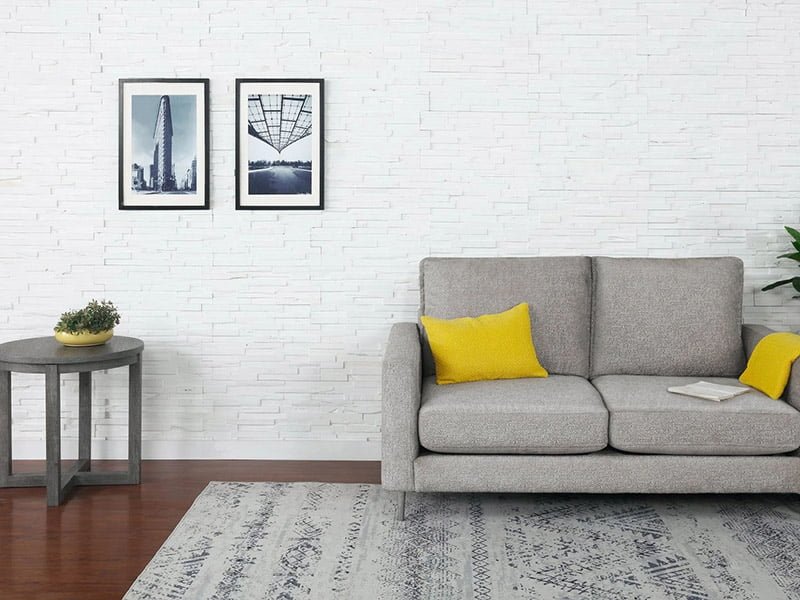
All OUR BARN WOOD WALL PANELS HAVE A LOVELY NATURAL RUSTIC FEEL TO THEM

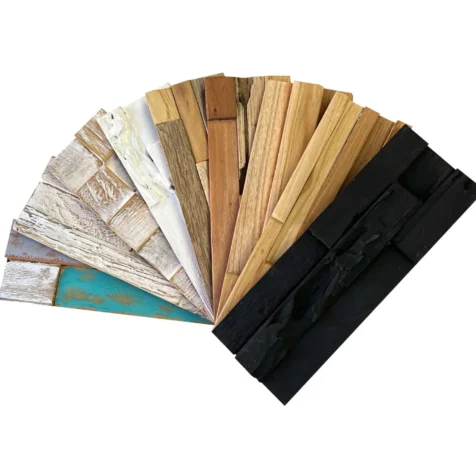
The beauty of Woody Walls 3D barn wood wall panels is that they have been naturally weathered over time by the elements. This adds unique, individual character to each panel, giving them such characteristics like deeply weathered grooves and natural splitting, enabling you to capture that rustic warmth and charm that only wood can provide. Don’t forget that you can order our samples before you make a full order if that helps. 

GUARANTEED QUALITY FOR ALL OUR BARN WOOD WALL PANELS

All our wall cladding products are responsibly sourced, fully recyclable and 100% free of toxic substances. We only ever use only non-toxic adhesives and VOC-free paints. Our 3D wood wall panels also have a class B fire rating.

Reviews

Star Star Star Star Star

Good quality. Great product. Really stylish. Good quality. Great product. Really stylish.

Juwes Verified Buyer

Frequently Asked Questions

You can install WoodyWalls peel & stick wood wall planks around a code-approved fireplace, as long as they don't touch any combustible materials.

Avoid installing panels right behind the stove. Ensure adequate space between the wooden planks and the stove or fire to prevent damage or fire hazards.

Here’s why you can’t miss peel & stick wood wall paneling:

  • Flexible: Peel and stick wood wall planks provide adaptability for a range of layouts and may be used in any size space.
  • Easy DIY Installation: Peel and stick wood wall paneling installation is super easy. Just take measurements, lay out your design, take off the backing, and stick them to the wall. That's as simple as it gets!
  • Trendy: Their stunning quality and simplicity of installation are drawing in more homeowners who want to update their homes.

Peel and stick wood wall panels normally last around ten years. However, their longevity largely depends on several factors:

  • Material Quality: Choosing high-quality brands, like WoodyWalls, ensures durability.
  • Proper Installation: When installing peel and stick wood wall planks, it’s crucial to adhere to the instructions supplied by the manufacturer. Wear and tear may be prevented by carefully cleaning the surface and making sure it is aligned correctly.
  • Surface Condition: The surface has to be dry, clean, and free of any debris or dirt for the adhesive to adhere well.
  • Environmental Factors: Areas with high moisture content may be less able to cling to the panels. However, there are options for places like kitchens that could see occasional moisture.
  • Maintenance: To keep the peel and stick wood planks looking nice and lasting a long time, use gentle cleaning agents for regular care.

Installing peel and stick wood planks is a straightforward process. Here’s how to do it:

  • Step 1: Clean the wall surface to ensure the wall is free of dust, grease, and debris.
  • Step 2: Mix planks from different bundles to create a balanced look.
  • Step 3: Arrange the planks on the floor to visualize your design before installation.
  • Step 4: Draw a reference line with a level to guide your first row.
  • Step 5: Peel off the backing and position the first row along the reference line, groove side up.
  • Step 6: Use a J-roller to press down firmly for a secure bond.
  • Step 7: Mark the positions of light switches and outlets on the planks before removing the adhesive liner.
  • Step 8: Cut planks for the top and bottom rows with a jigsaw or table saw for accurate fits. Use a dust mask to protect yourself while cutting.
  • Step 9: Sand to smooth cut edges for a polished look.

For a visual guide, check out this video: DIY WoodyWalls Peel and Stick Wood Wall Planks.

Peel and stick wood wall planks are usually made from high-quality materials like American spruce, pine, fir, or reclaimed wood to add character and authenticity to your area. Notably, WoodyWalls uses 100% real pine wood, ensuring a natural and beautiful finish.

Most peel and stick wood wall panels are very thin. For example, peel and stick wood wall panels from WoodyWalls are around 3/16 inches. This slim profile allows for easy installation without adding bulk to your walls.

Removing peel and stick wood wall planks could potentially damage your wall as the strong 3M adhesive may take off some paint or harm the drywall underneath.

We advise covering the surface you wish to cover with plywood before putting the peel and stick boards to facilitate removal. This will ensure that you just have to fix the plywood and not the entire wall when you remove the panels.

You can use peel and stick wood planks in various areas of your home, but avoid damp spaces like bathrooms or saunas. They work well on smooth surfaces where traditional paneling isn't feasible, such as mirrors, tile, or concrete walls. Just ensure the area has a relative humidity of 30-65% and is dry for optimal adhesion.

Absolutely! The easiest way to cut WoodyWalls peel and stick wood wall planks is with a miter saw, but you can also use a utility knife, jigsaw, or fine-toothed hand saw. Follow these steps:

  • Step 1. Choose Your Saw: A jigsaw or table saw is recommended for clean cuts.
  • Step 2. Mark Where to Cut: Clearly mark your cut lines.
  • Step 3. Make the Cut: Carefully cut along your marked lines for precise results.

Yes, you can install peel and stick wood planks over existing tile!

Clean the tile well with your favorite cleaner and make sure it's dry before you start. As long as the tile is dust-free and level, the glue will adhere well. This is a simple and reasonably priced method of updating your area without removing the tiles. Simply avoid places that receive a lot of moisture, such as shower walls.

You may also like our Best Selling products

usercartphone-handset