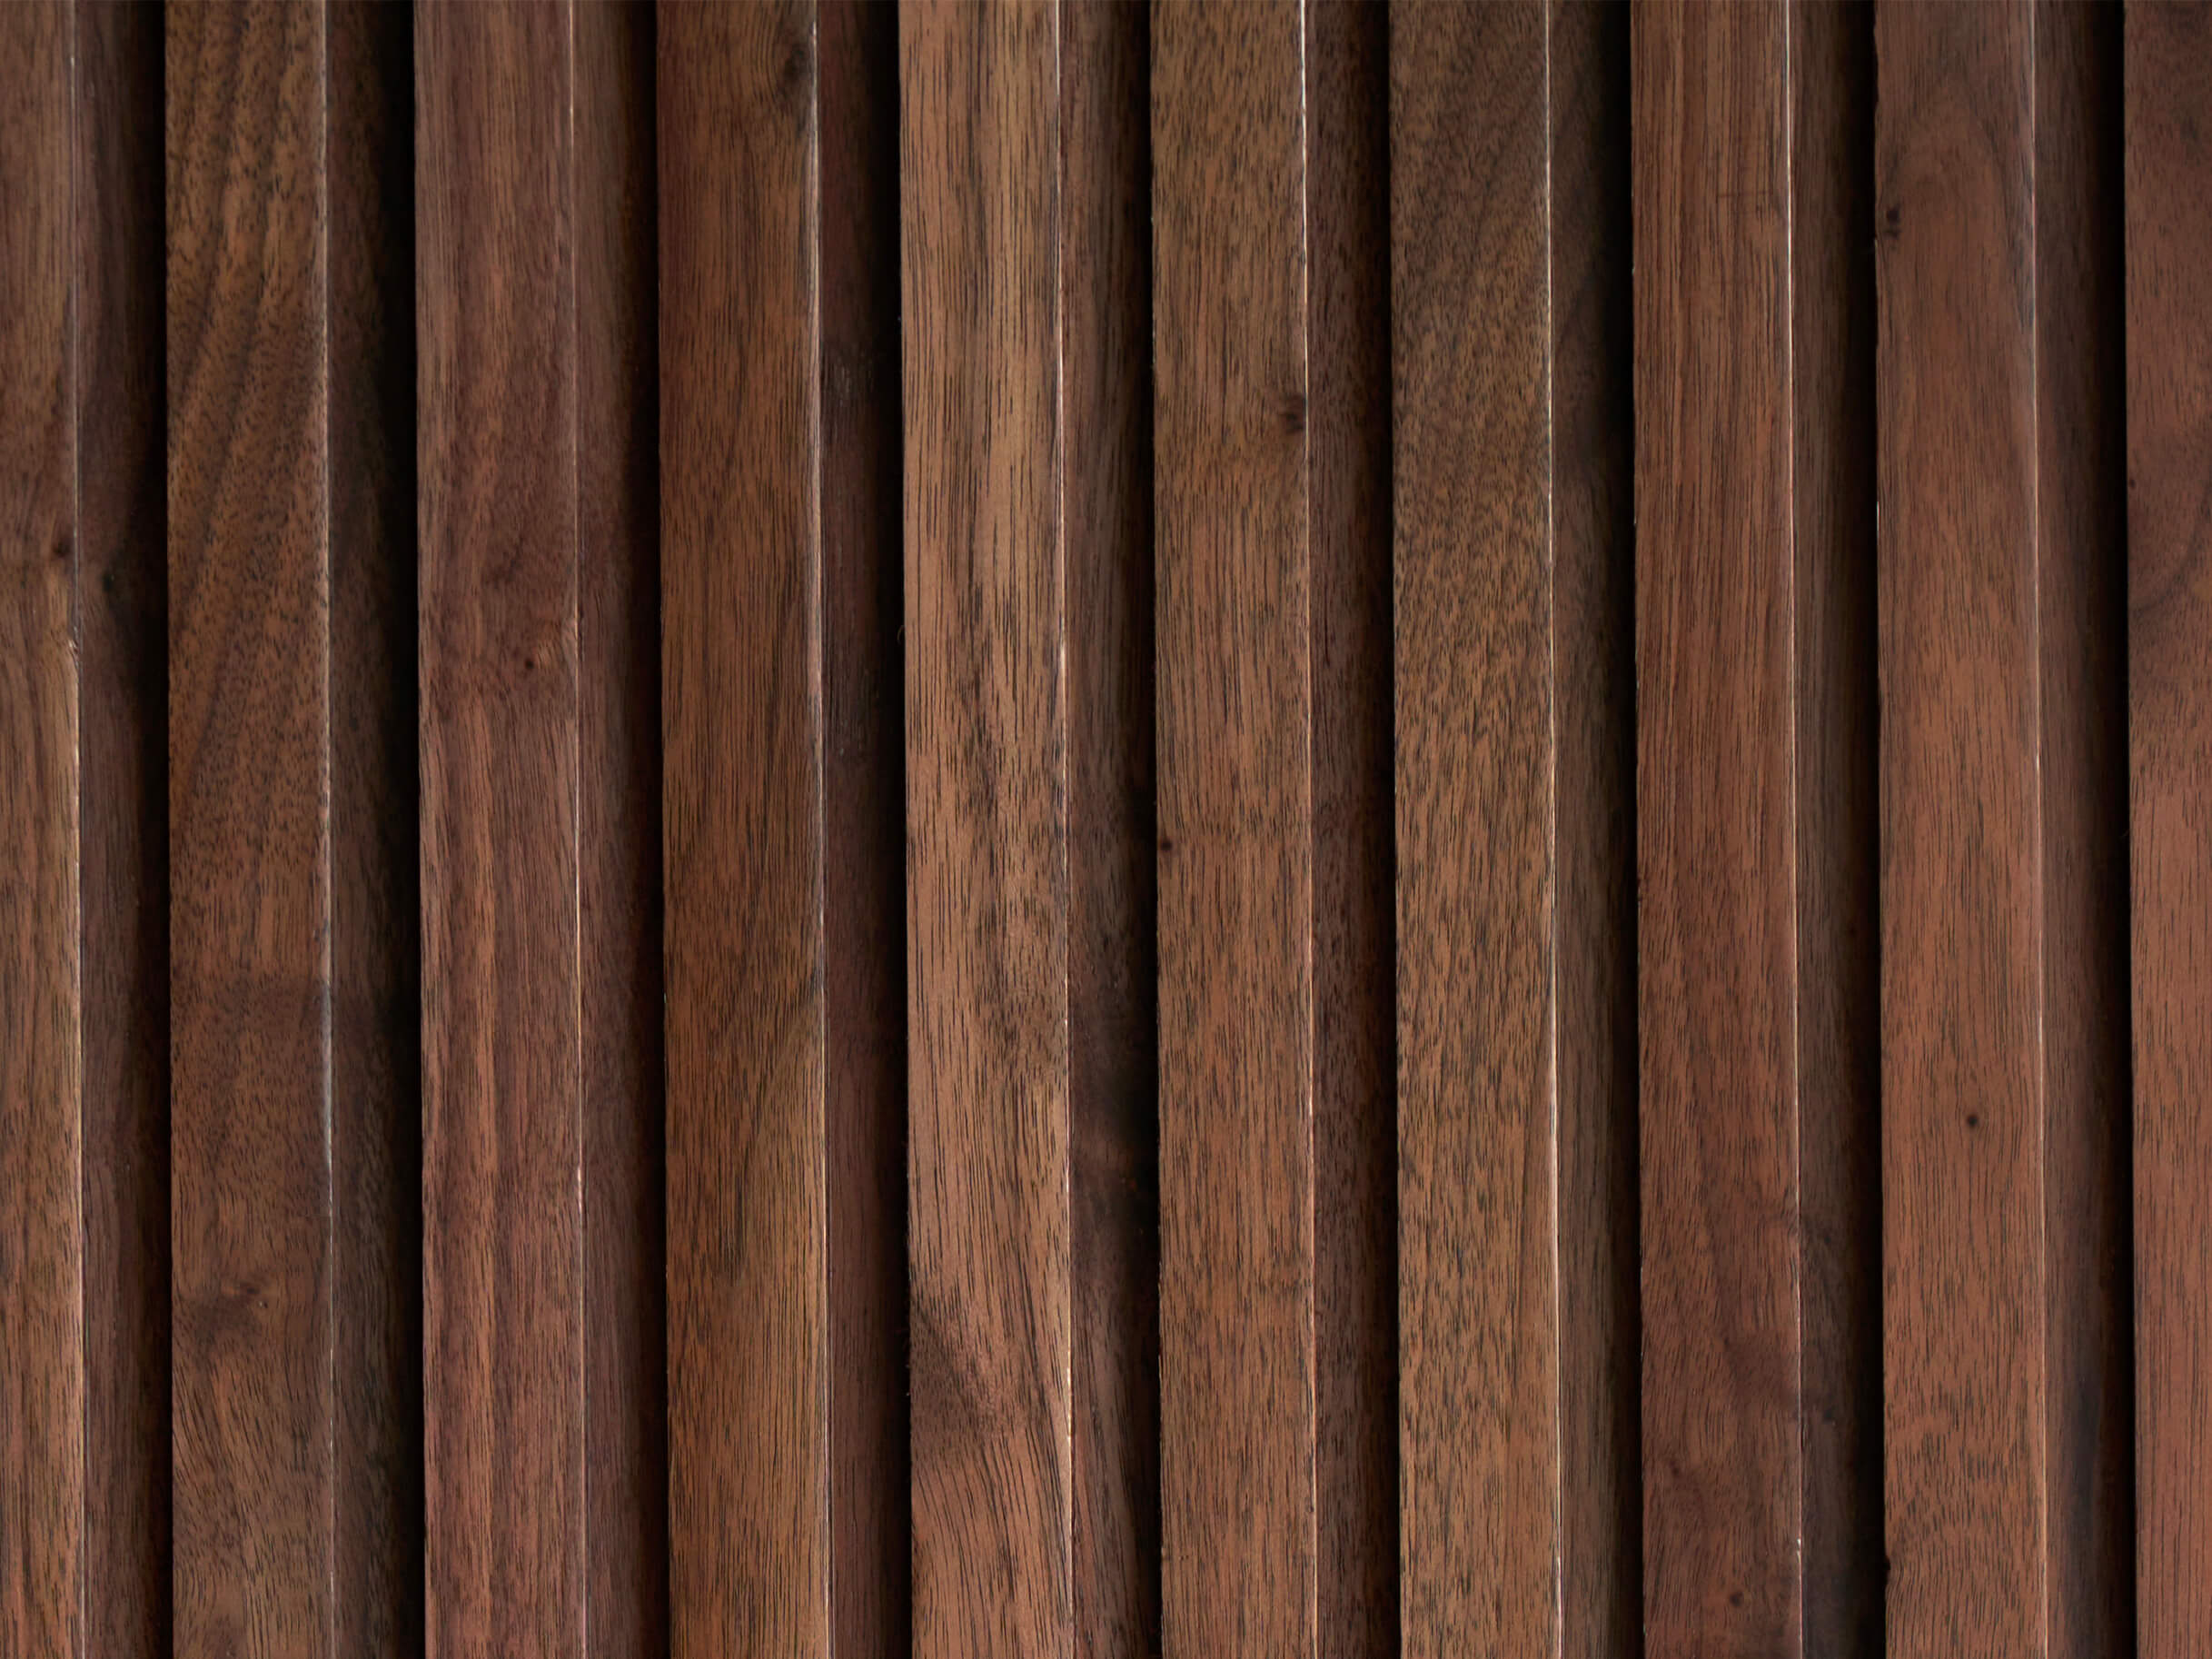
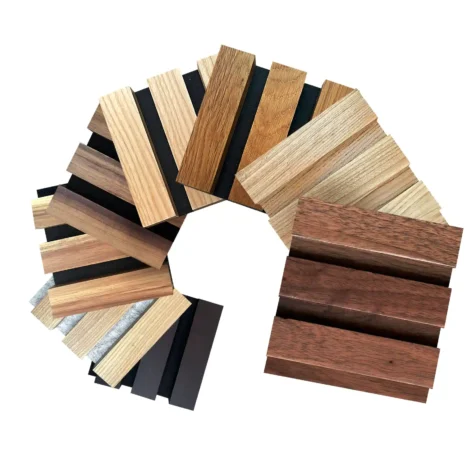
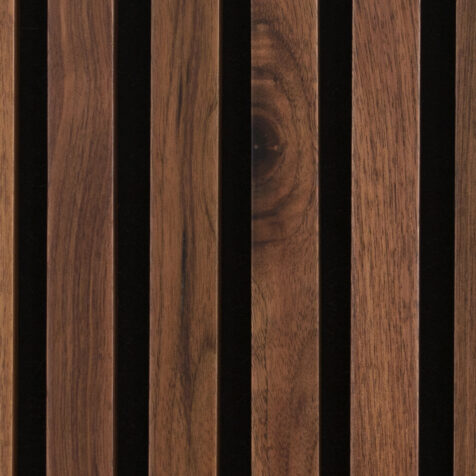
Walnut Fluted Wood Panels
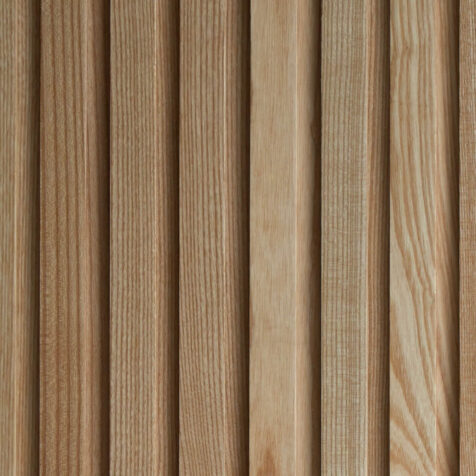
Immerse your space in the timeless allure of Walnut with our Walnut Fluted Wood Panels. Known for its enduring strength, resilience, and natural rich color, Walnut seamlessly integrates with diverse interior design schemes, making it a perennial favorite for interior decor. Its durable yet elegant nature ensures longevity and adaptability to various styles and preferences.
Specifications
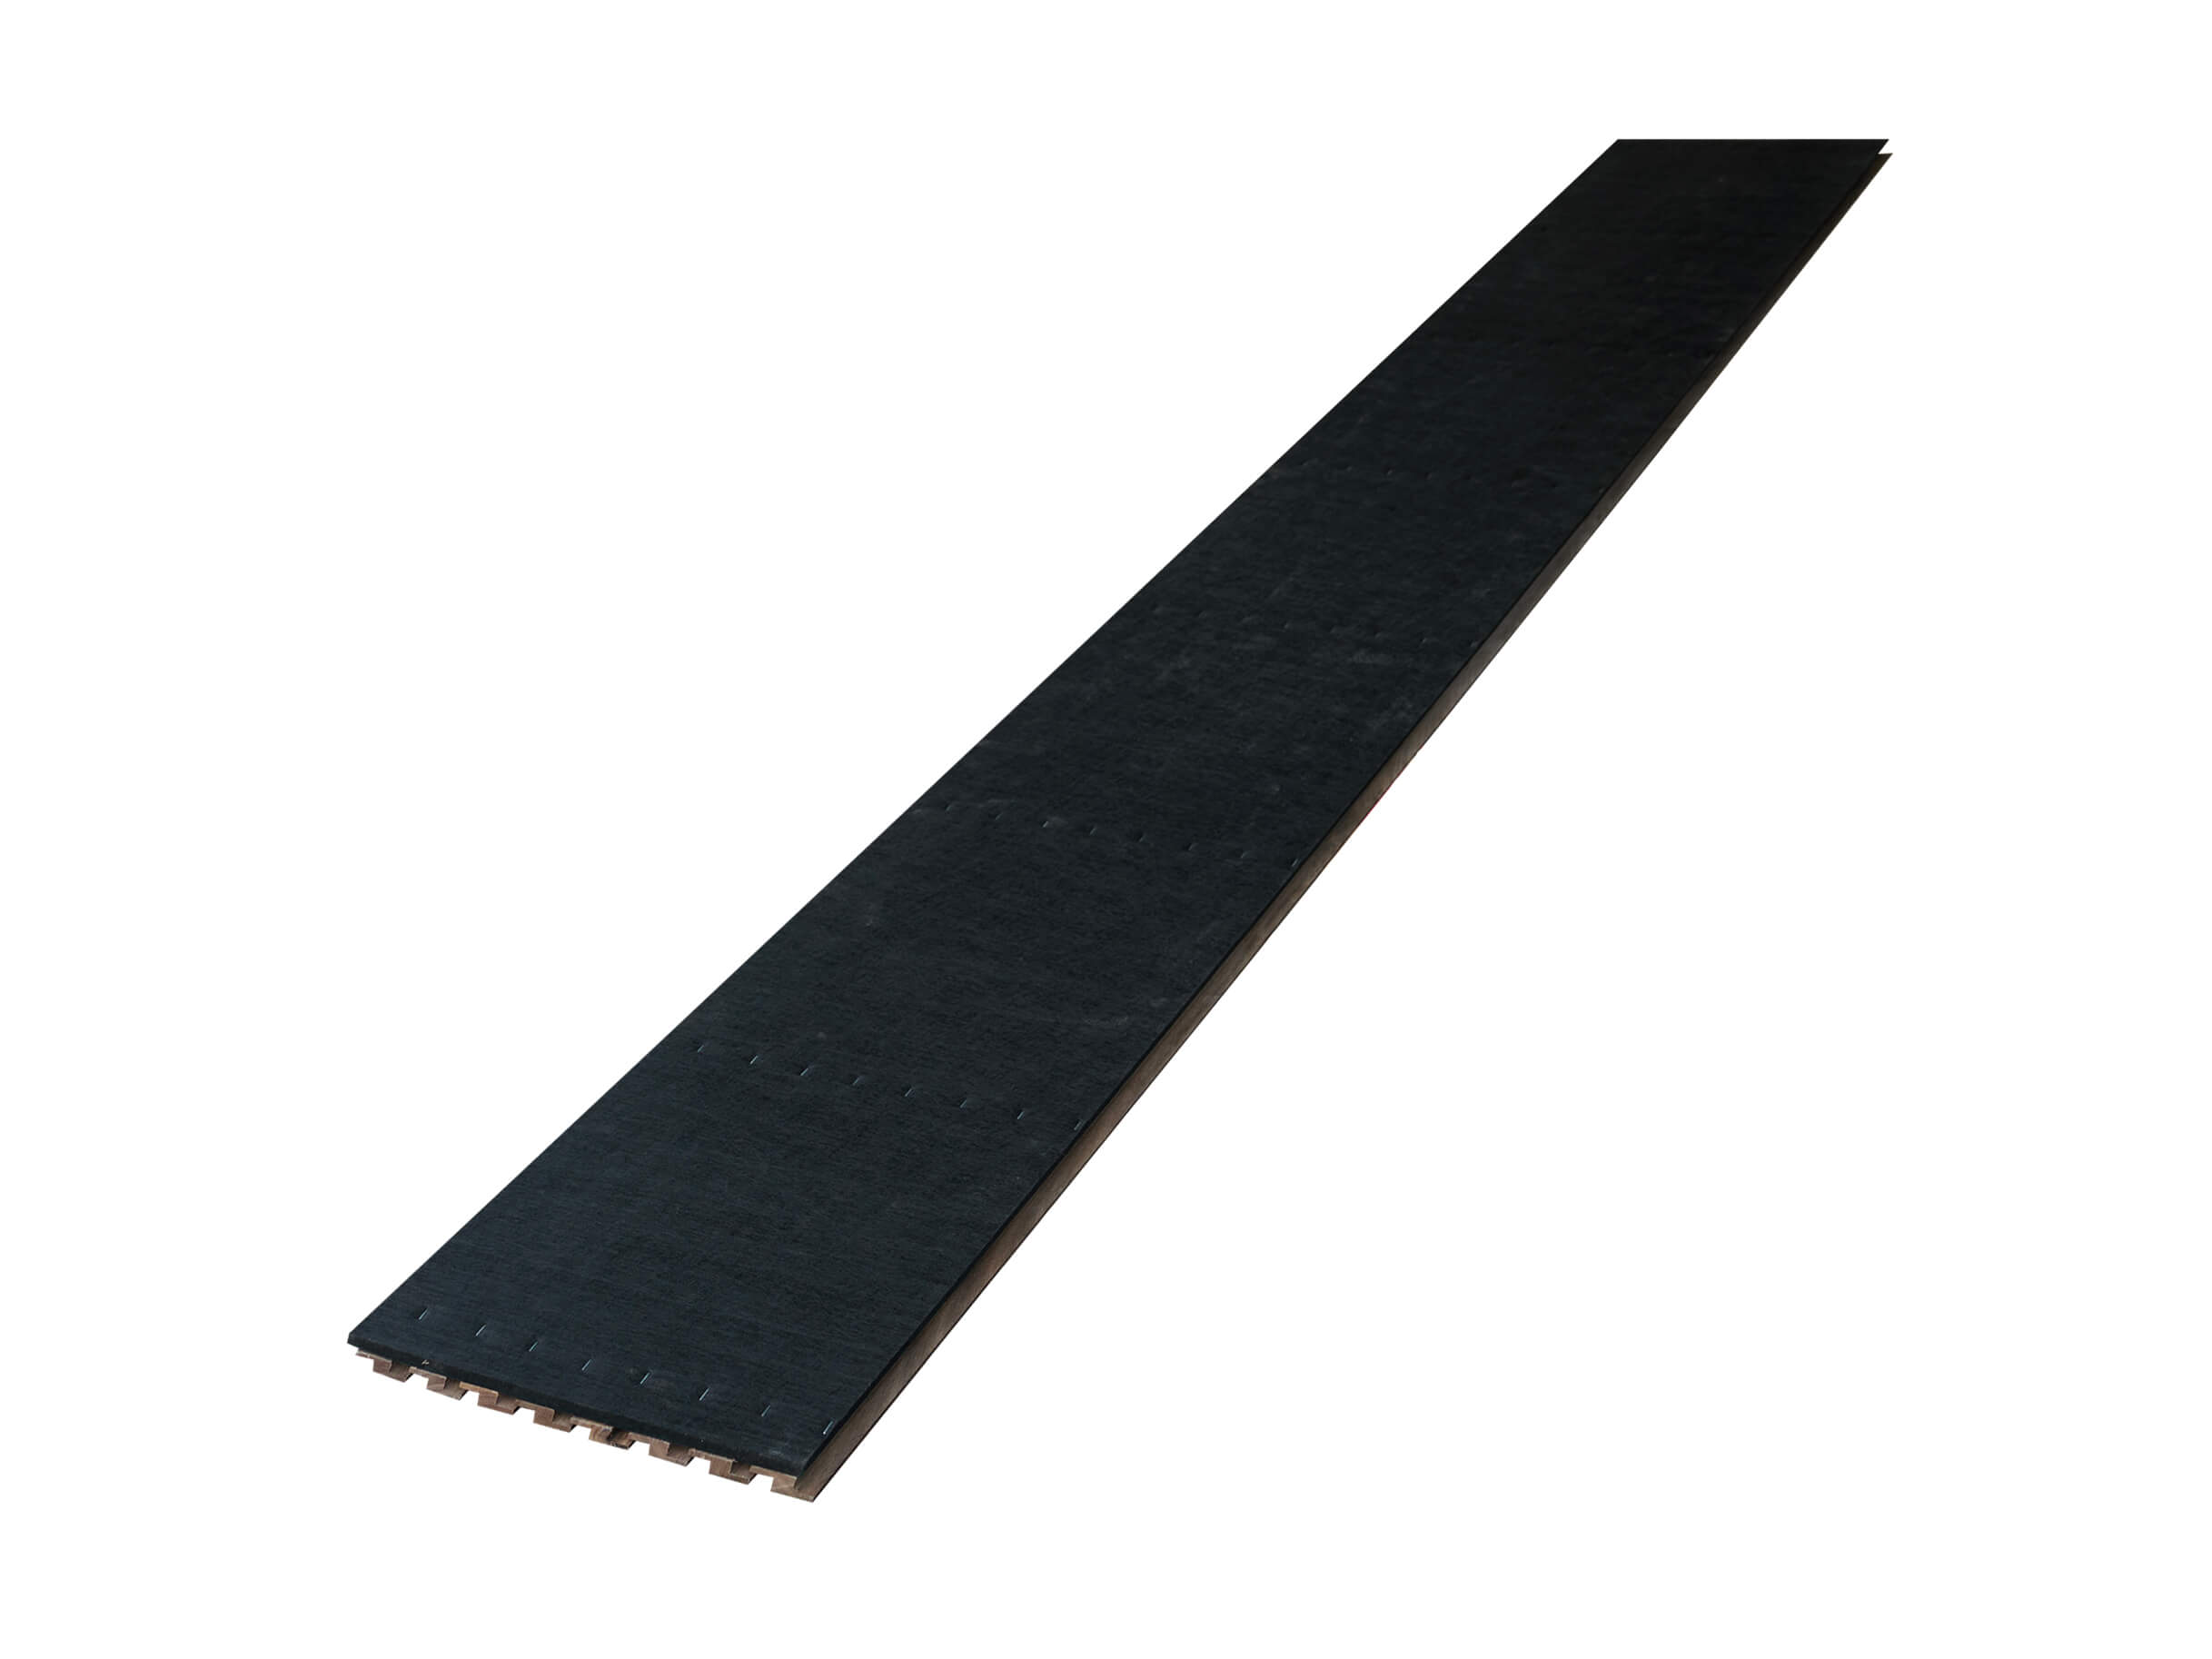
Crafted from genuine solid American Walnut wood, our meticulously hand-treated N Shape Slat Wall Panels with acoustic felt backing epitomize enduring beauty and resilience. Each box includes a pair of wood panels, each measuring 94 1/2″ x 11 7/8″ x 7/8″, covering an area of 15.75 square feet. Designed for seamless connection, these multiple wood wall panels enable the creation of a sophisticated wood slat wall.
For DIY Enthusiasts & Professionals
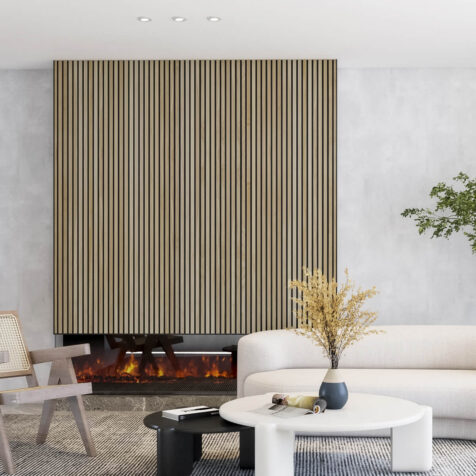
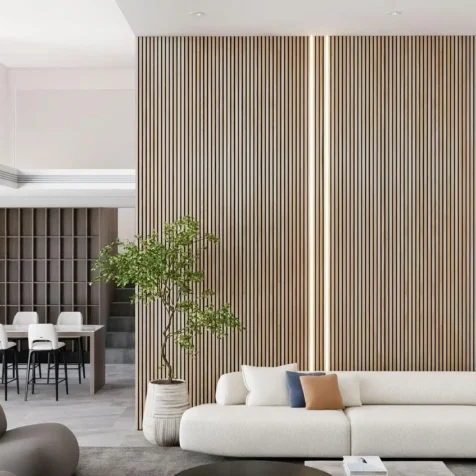
At Woody Walls, embarking on DIY projects is a seamless and cost-effective endeavor. Installing our fluted wood paneling requires basic tools such as a circular saw, nails, and construction adhesive. Their versatility extends to adorning ceilings, alcoves and accent walls, offering a myriad of design possibilities.
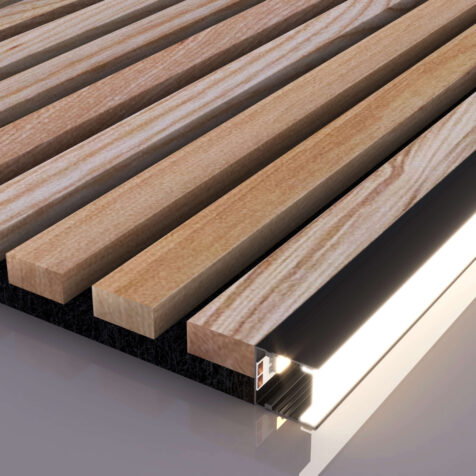
Amplifying Charm with LED Channel Lighting
Enhance the visual allure of Woody Walls’ Fluted Wood Panels with our exceptional LED accent lighting. Tailored specifically for slat walls, our lighting solutions enrich the visual charm of our Walnut slat wall panels. The seamless integration of our LED channels and Edge lighting channels effortlessly blends with the decorative wood panels for walls, enabling the creation of captivating lighting effects that accentuate the inherent charm of your wood accent wall while introducing an element of elegance.
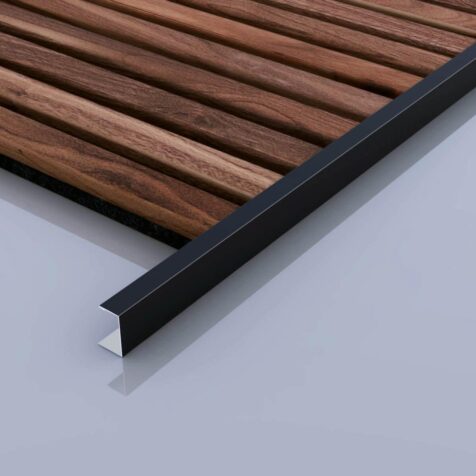
Perfect Pairing: Fluted Wood Panels and Metal Edge Trim for an Elegant DIY Project
Effortlessly achieve a polished and refined DIY project by combining slatted wall panels with our exclusive Black Metal or Brushed Metal Edge Trim. While slat wall panels offer versatility for various interior ideas, attaining a sophisticated edge finish can be challenging. Our Metal Edge Trim provides the ideal solution, addressing edge-finishing dilemmas while adding a touch of elegance to your creative projects. Perfect for enhancing the aesthetics of wood accent walls and ceilings, the Black Metal and Brushed Metal Edge Trim options ensure a cohesive and refined result, elevating the overall appearance of your space with ease.
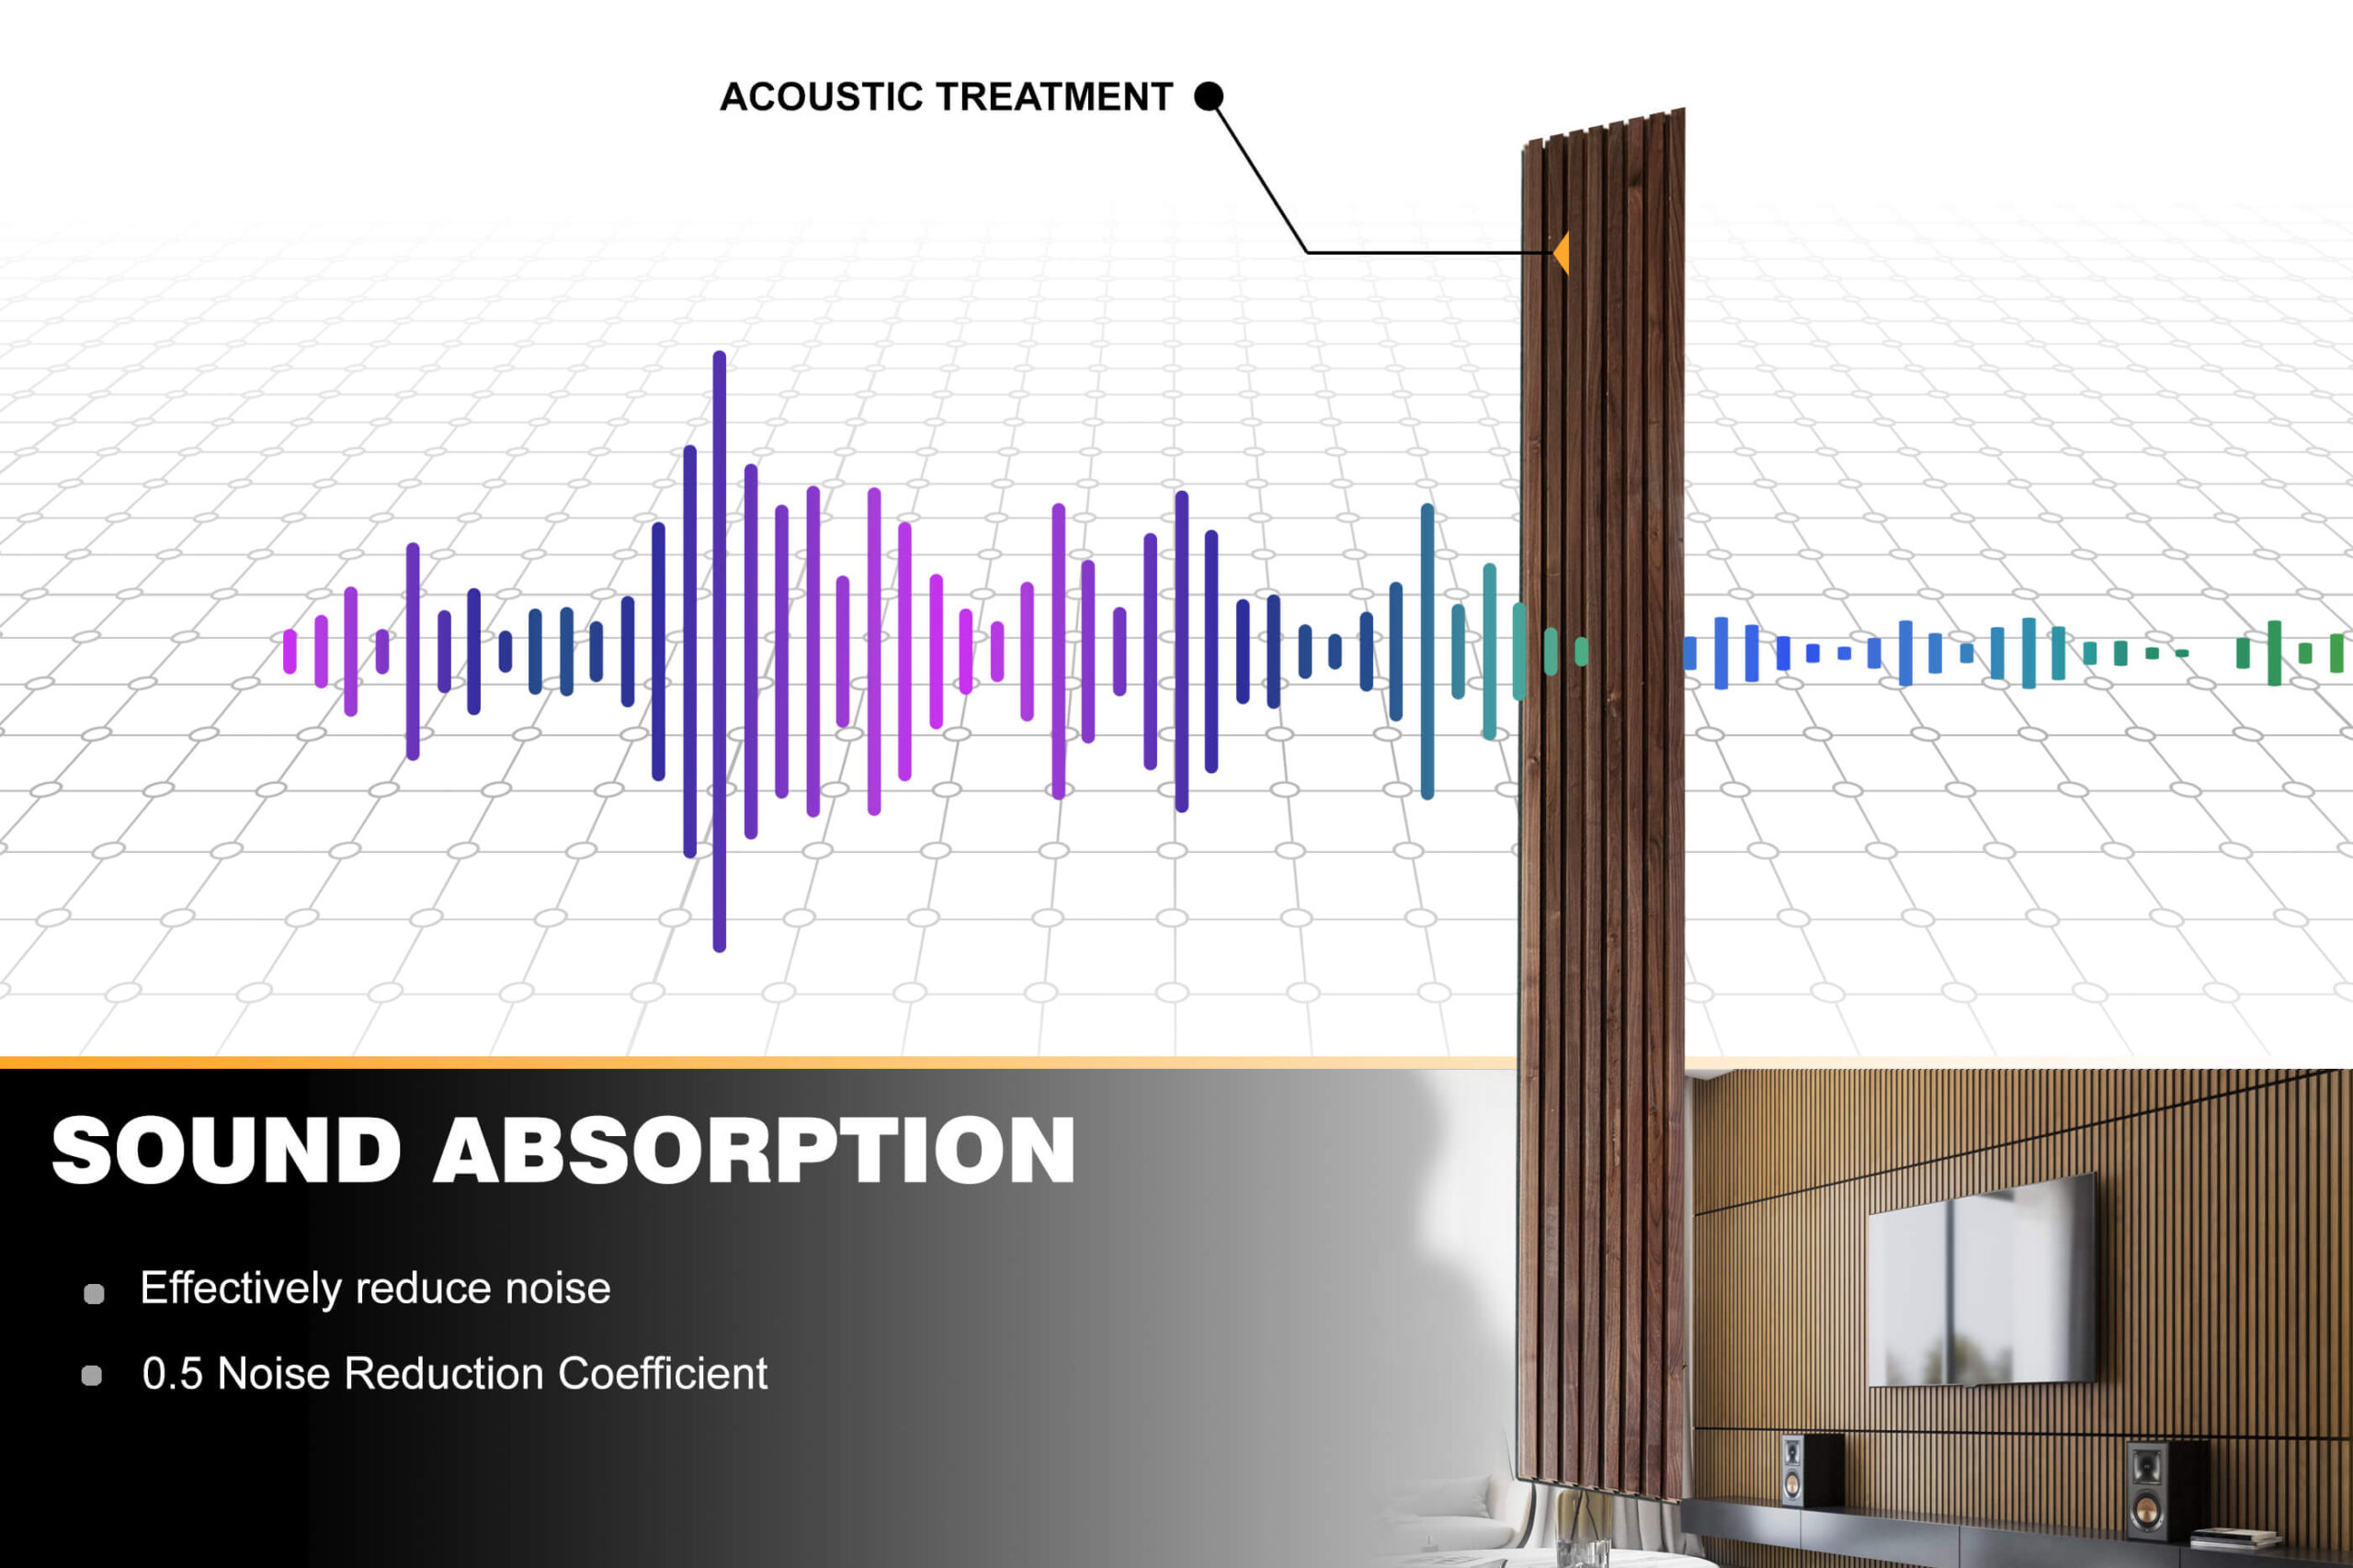
Enhanced Acoustic Performance
Our Walnut Fluted Wood Panels go beyond mere aesthetics, designed to enhance acoustic performance. These acoustic wood panels effectively minimize echoes and unwanted noise, improving the sound quality of your space and creating a more welcoming atmosphere. With an NRC rating of 0.5, our slat wall panels deliver exceptional acoustic benefits.
Reflecting Your Unique Taste
Adaptable to a myriad of interior styles, our Walnut wood panels for walls exude authentic and elegant charm. Embrace the opportunity to craft slat walls that distinctly reflect your individual taste and creative vision. The versatility of our Walnut Fluted Wood Panels allows you to create a space that resonates with your unique style and preferences.


")
")
")
")
")
")
")
")


1 review for Walnut Fluted Wood Panels (N Shape)
I couldn’t be happier with my purchase from Woody Walls! Fluted wood panels were incredibly easy to install and instantly transformed my living room. The quality is outst ... I couldn’t be happier with my purchase from Woody Walls! Fluted wood panels were incredibly easy to install and instantly transformed my living room. The quality is outstanding, and I love knowing the materials are eco-friendly. Highly recommend to anyone looking to add warmth and character to their space!
Emmar Chardson Verified Buyer