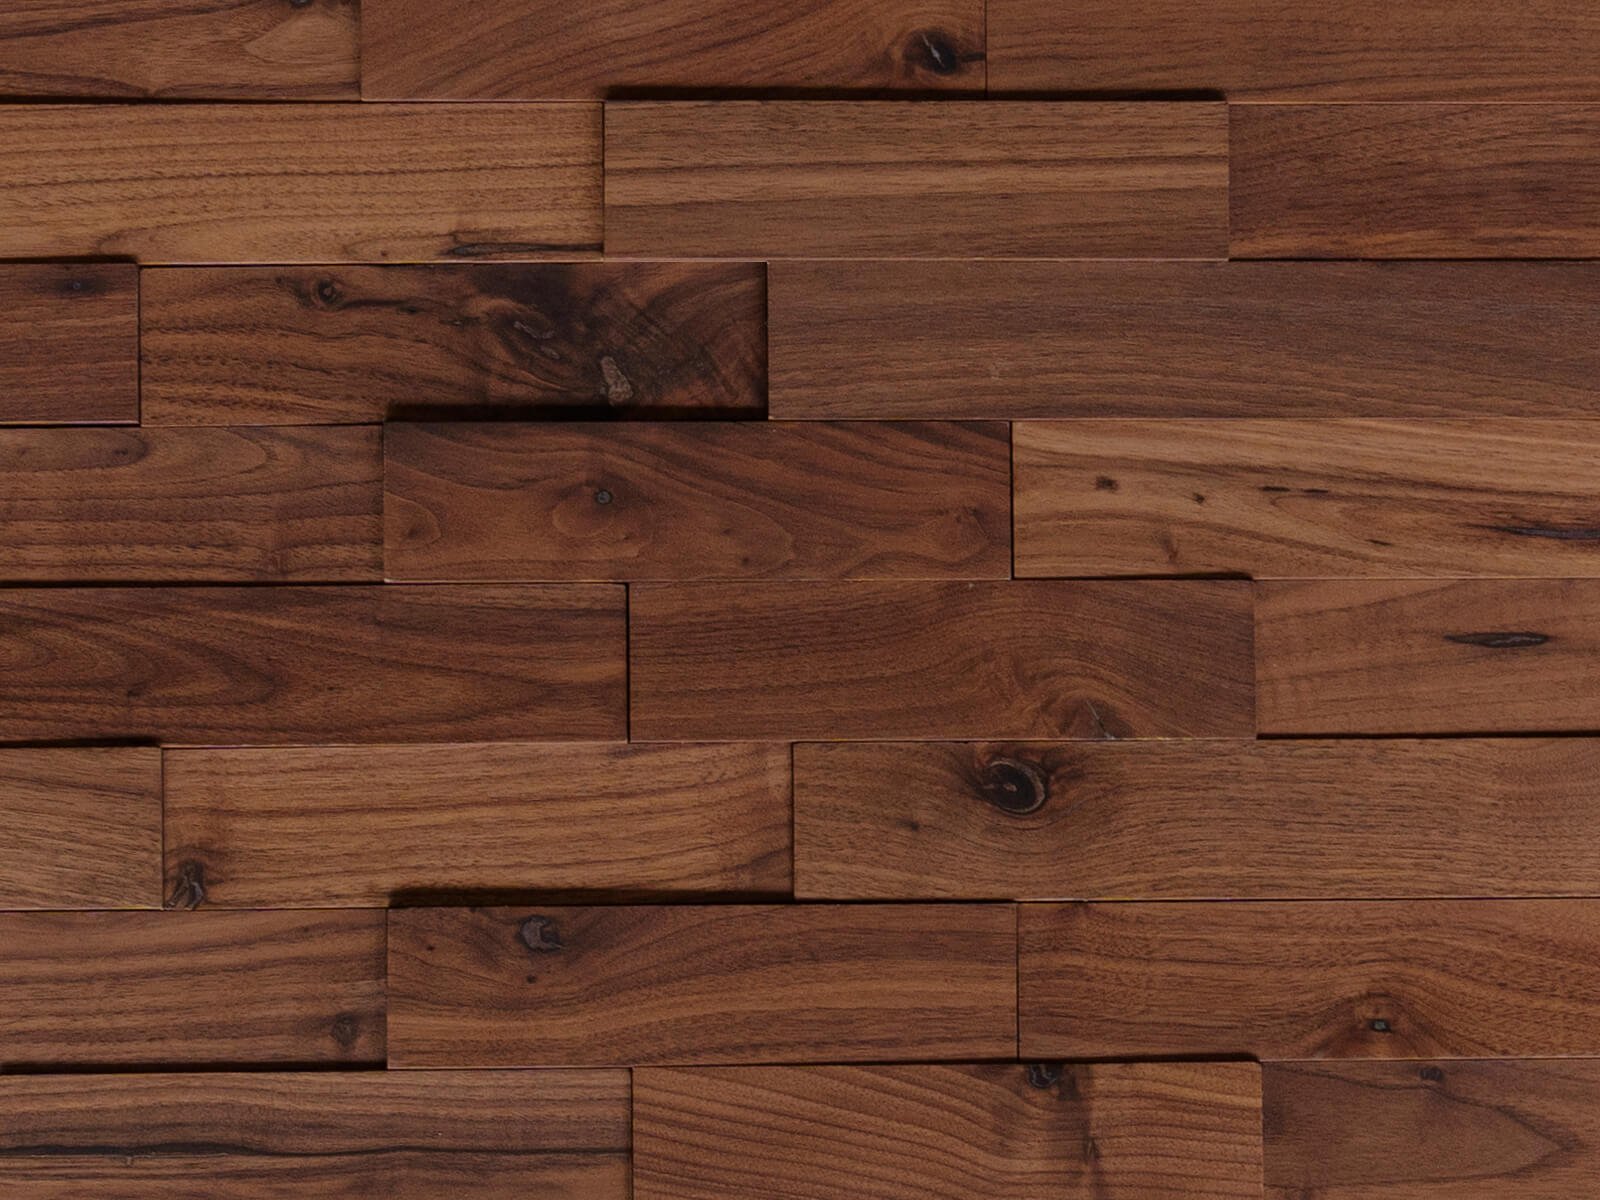
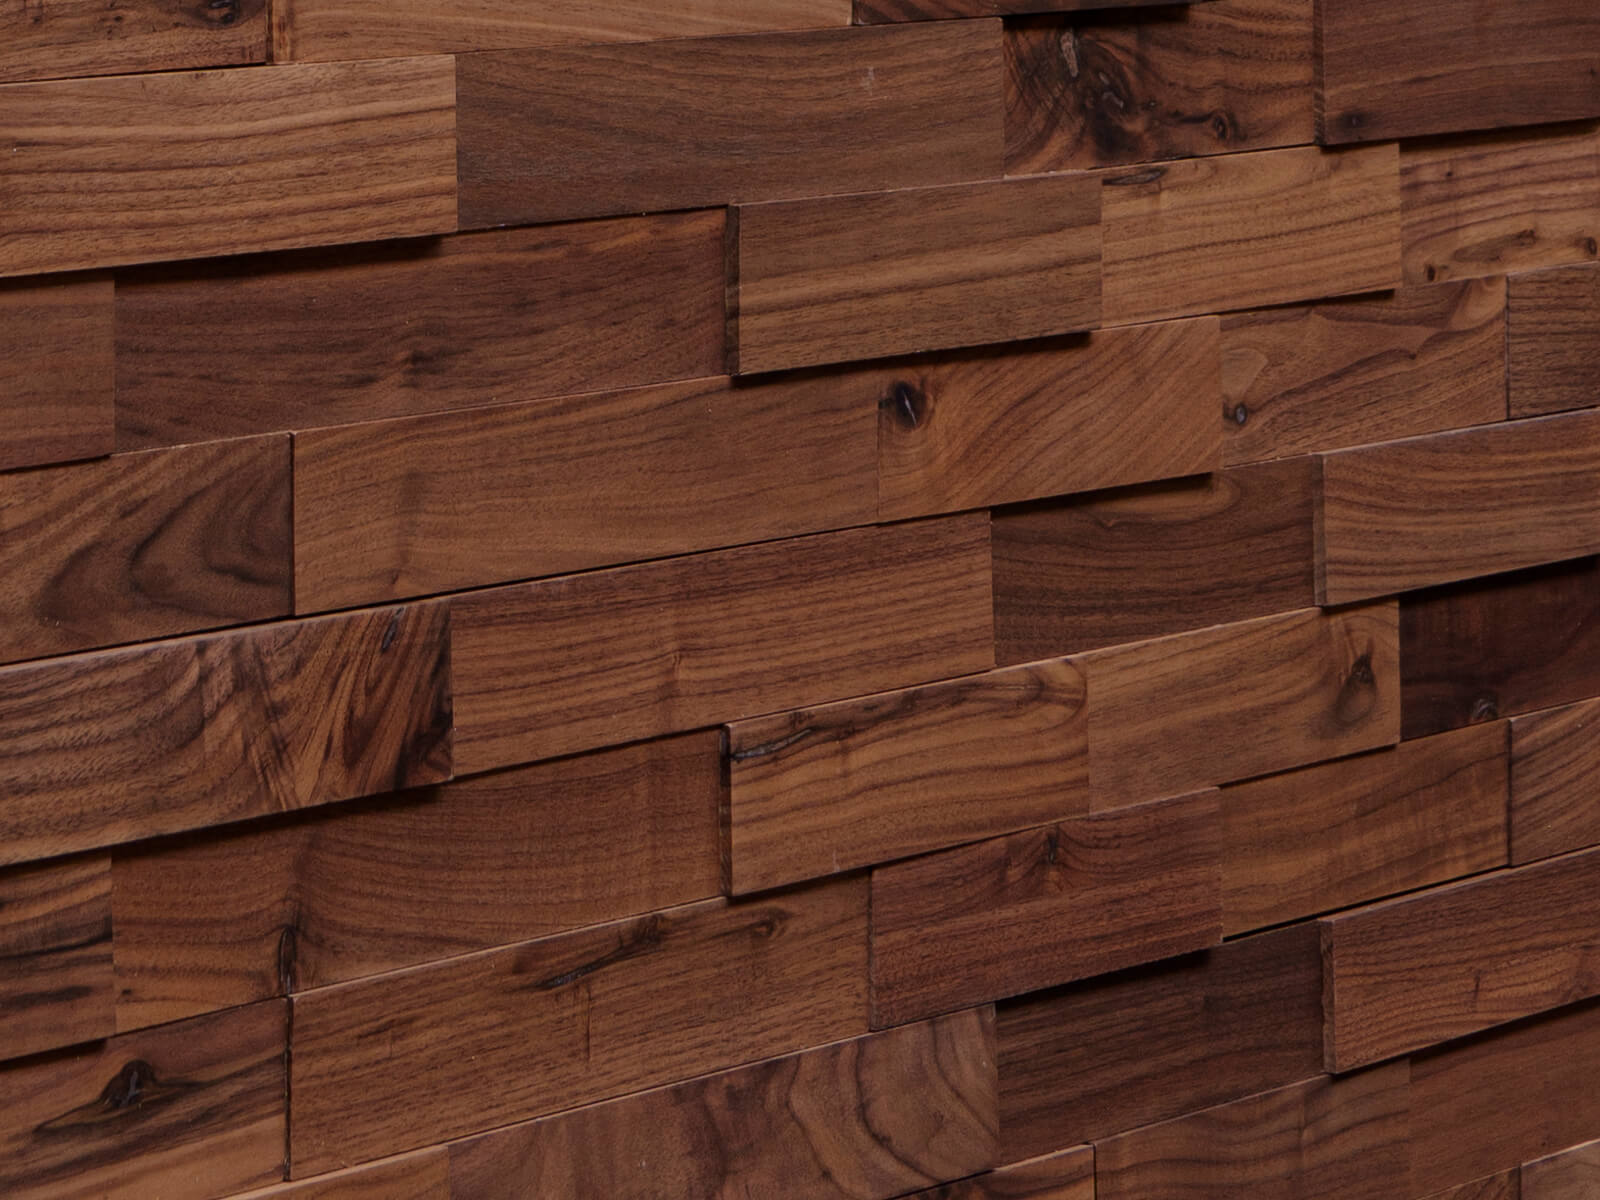
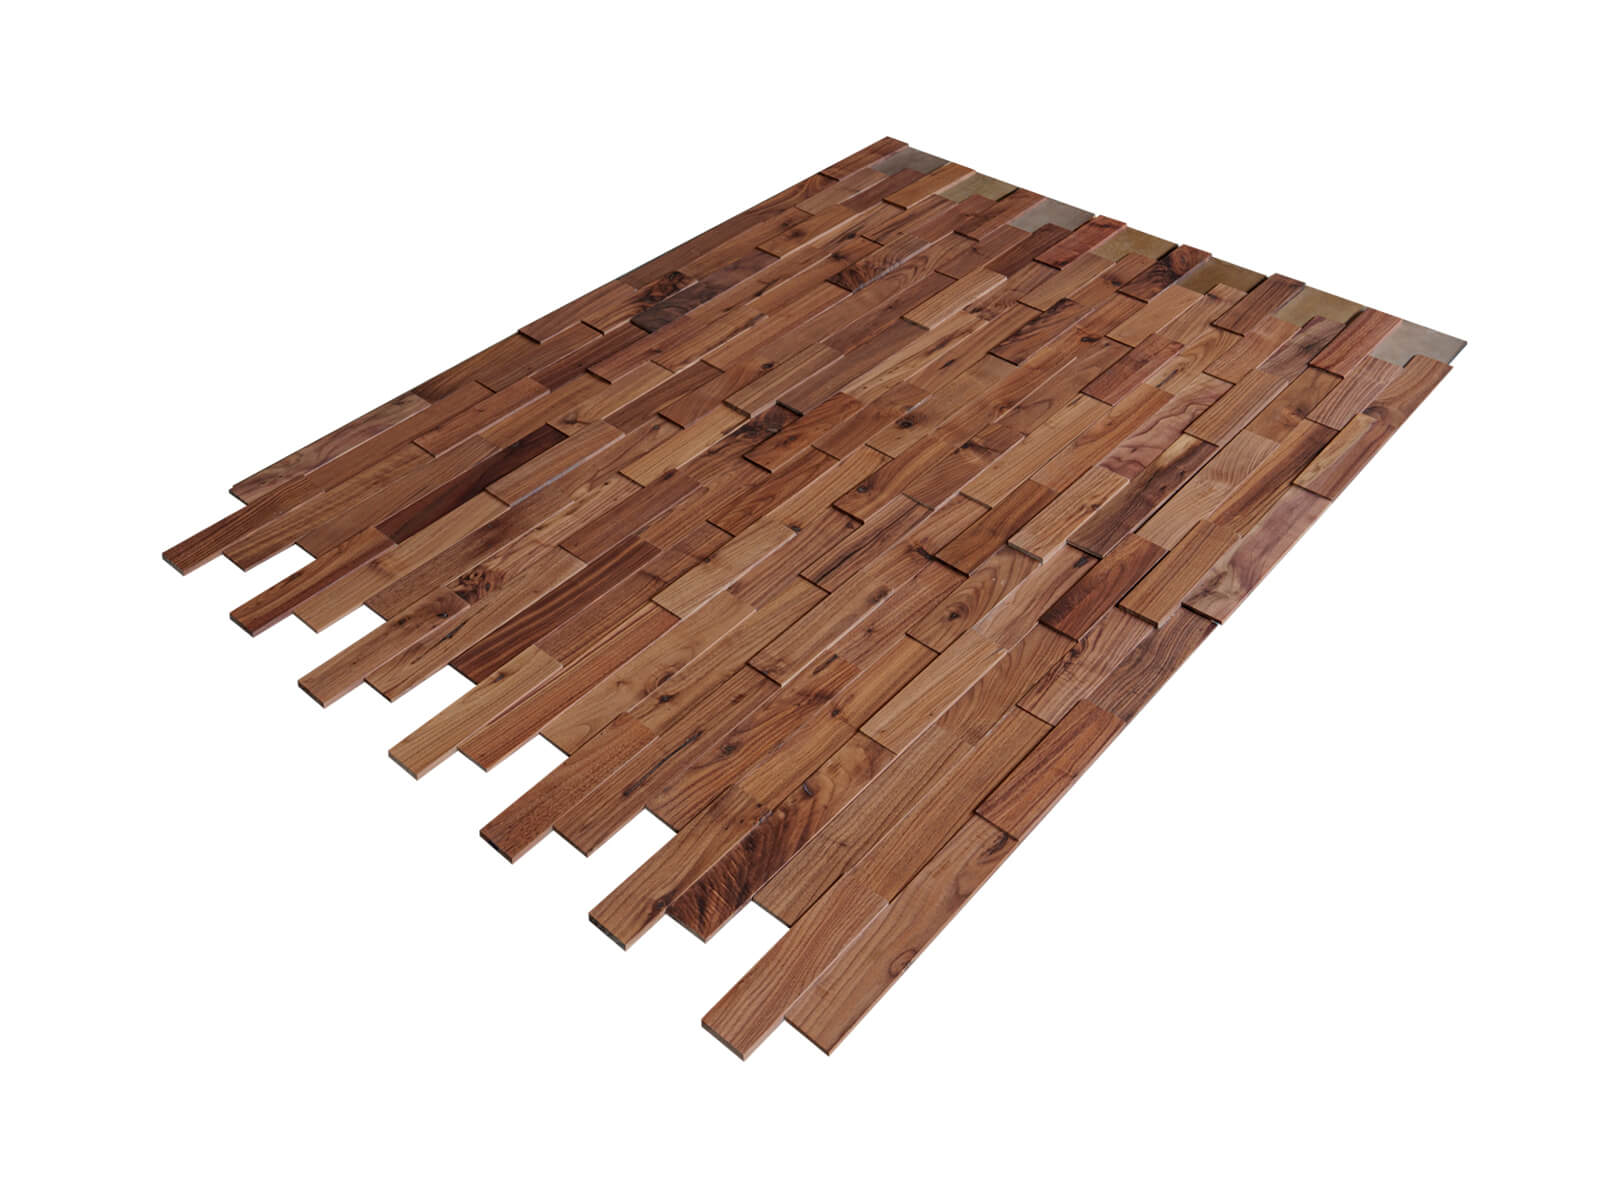
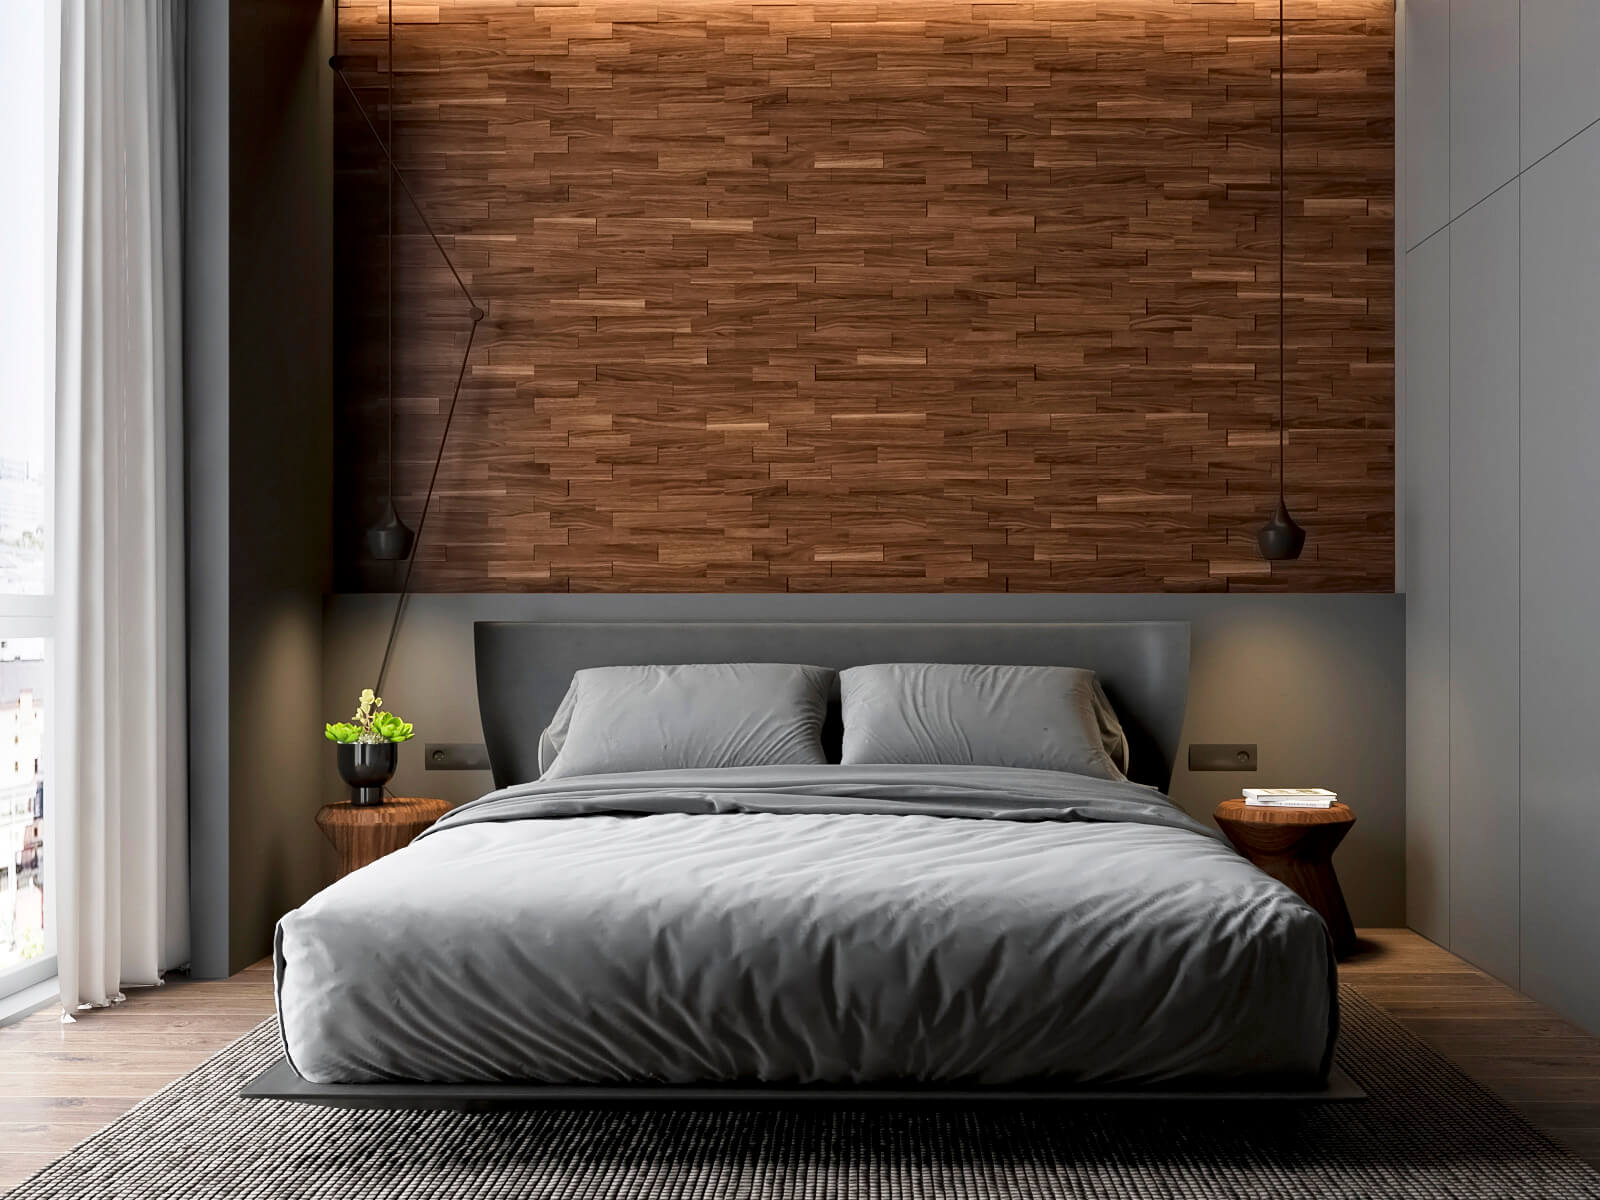
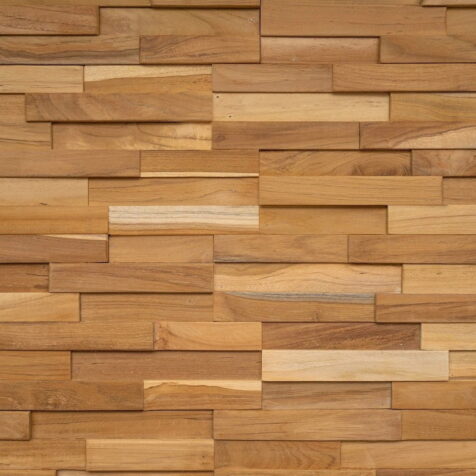
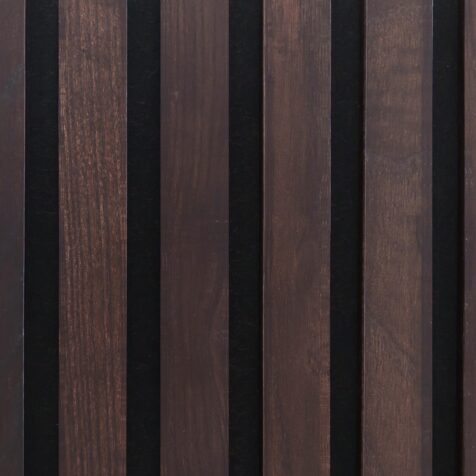
Walnut Linear 3D Wall Panels
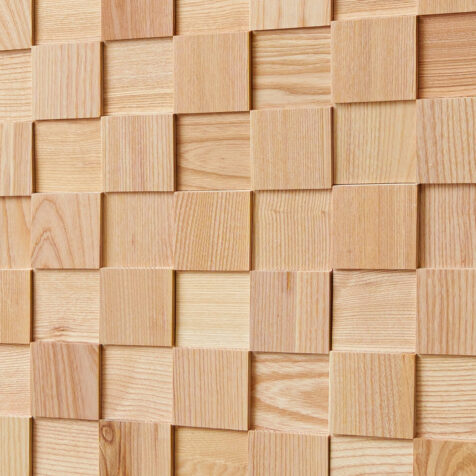
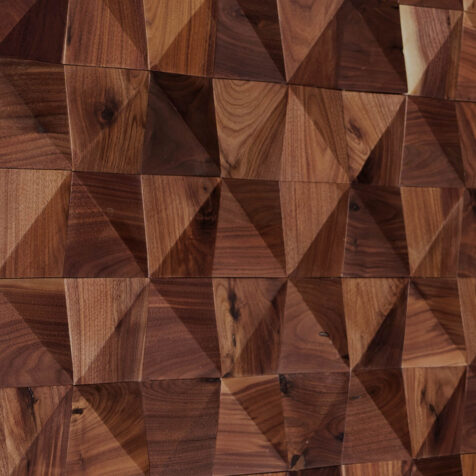
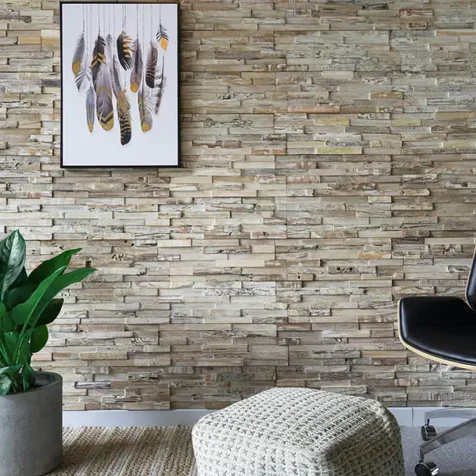
Revamp your space with the enduring charm of natural walnut wood embodied in our Walnut Linear Wood Mosaic Tiles. Meticulously crafted from premium American walnut, each wood panel emanates a warm brown tone and unique grain design, adding a dash of opulence and refinement to any room.
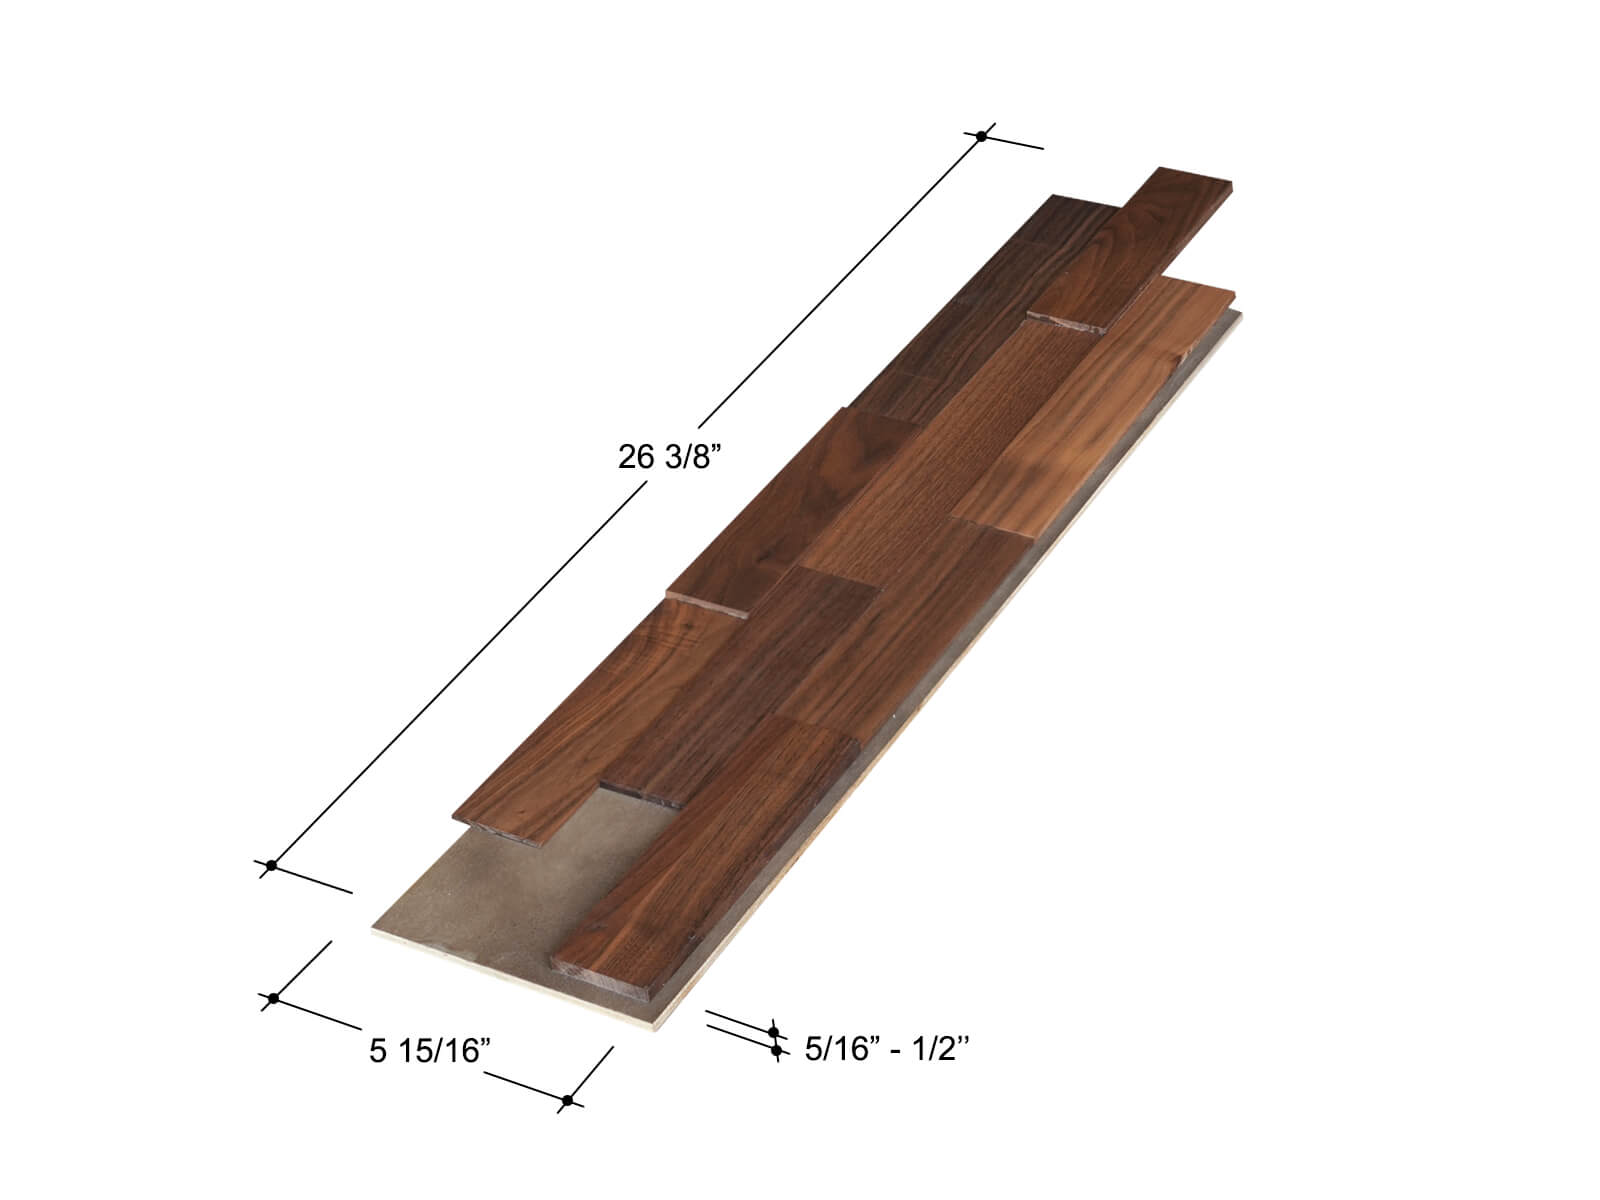
SPECIFICATIONS:
EASY INSTALLATION:
No need for complex tools or prior expertise! Our decorative wall panels seamlessly interlock, ensuring effortless installation. Simply employ glue and nails for a secure attachment. Our instructional video streamlines the process, catering to both DIY enthusiasts and commercial ventures. Elevate any interior effortlessly with our Premium Wood Mosaic 3D Wall Panels, ideal for creating stunning wood accent walls without the need for extensive resources.
VERSATILE APPLICATION:
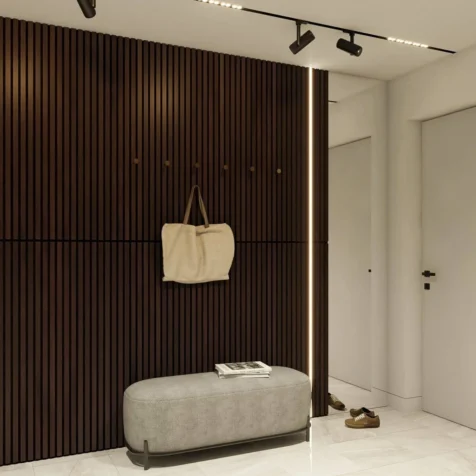
These walnut wood mosaic tiles complement a variety of wall surfaces, from textured walls to backsplashes and headboards. Suitable for interior use, they withstand higher humidity levels, although direct exposure to moisture should be avoided. Prior to installation, ensure the surface is dry and free from debris for optimal adhesion.
SAMPLES:
In our dedication to delivering top-notch wood paneling and ensuring customer satisfaction, we offer Samples of our PremiumWood Mosaic Collection. Purchasing samples enables you to experience firsthand the beauty and quality of our panels before making a larger commitment. With samples in hand, confidently select the perfect option for your space, seamlessly integrating our wall cladding panels into your design vision.
UNPARALLELED QUALITY:
Rest assured, our walnut wall panels are crafted to endure. Naturally resistant to insects, moisture, and decay, they exude lasting beauty and durability. Responsibly sourced and devoid of harmful pollutants, they’re assembled with non-toxic adhesives, presenting a safe and eco-conscious choice for your home or office.
Indulge in the allure of authentic walnut wood with our Walnut 3D Wall Panels, and elevate your space into a sanctuary of timeless allure and sophistication.


2 reviews for Walnut Linear 3D Wall Panels
Got my bar done with 3d wall panels. Amazing! Got my bar done with 3d wall panels. Amazing!
Josh Padget Verified Buyer
WoodyWalls offers a fantastic selection of wood panels. We chose the walnut panels for our DIY fireplace surround, and the vertical installation turned out to be a great ... WoodyWalls offers a fantastic selection of wood panels. We chose the walnut panels for our DIY fireplace surround, and the vertical installation turned out to be a great idea. It gave the space a stylish, modern look.
Gino Spada Verified Buyer