
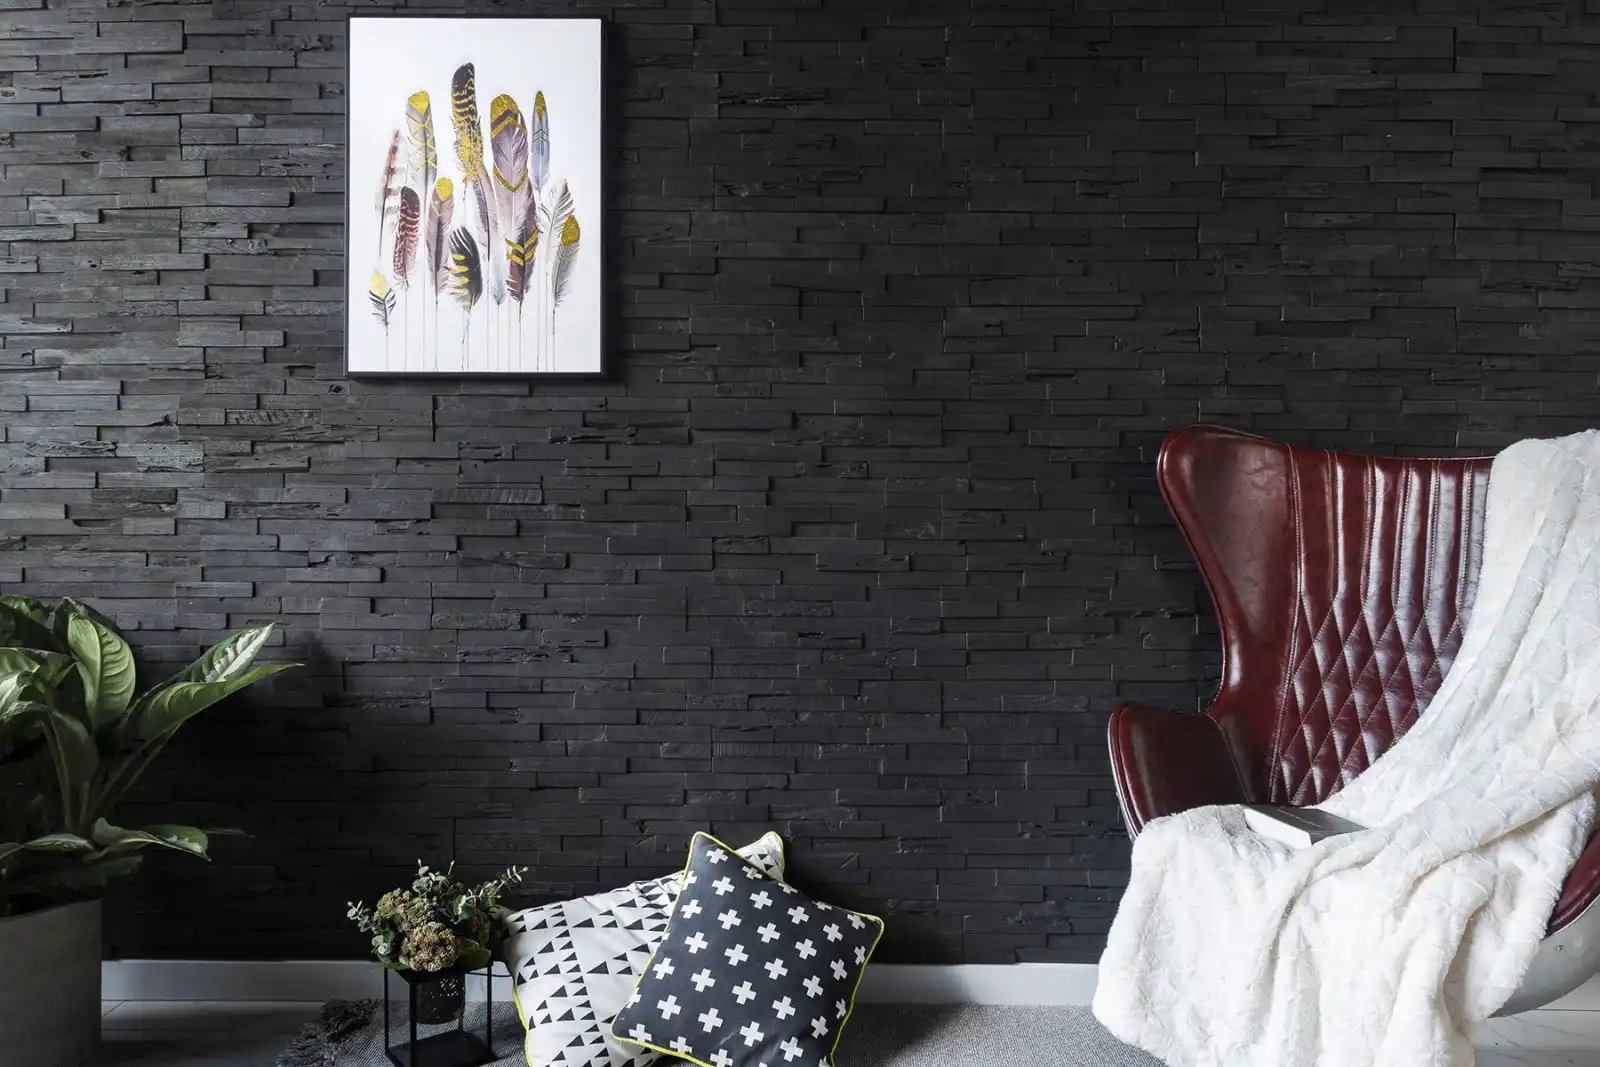
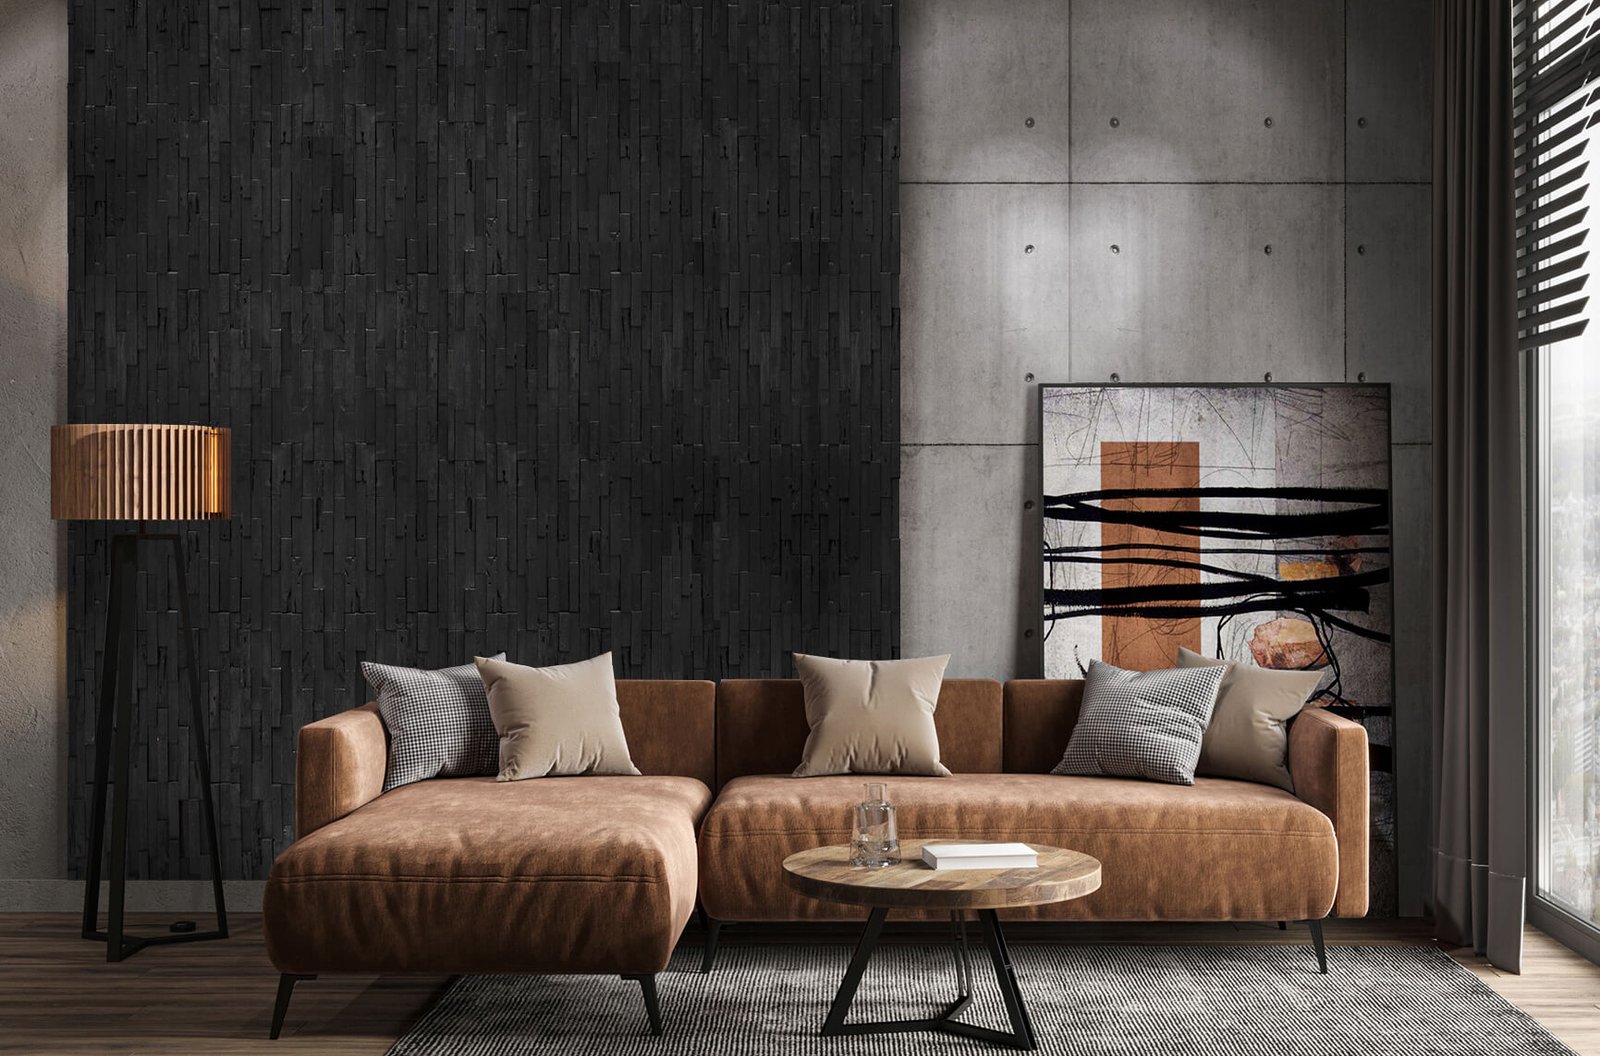


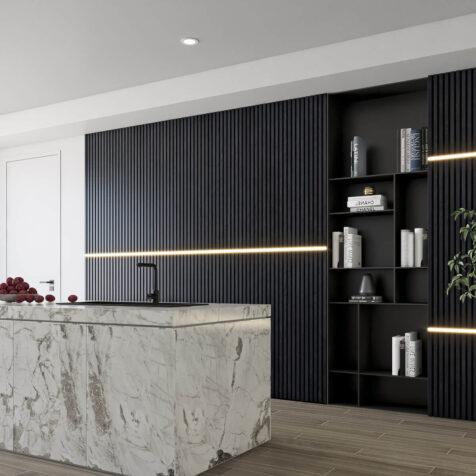
Dark Graphite 3D Wall Panels
$119.00 per box
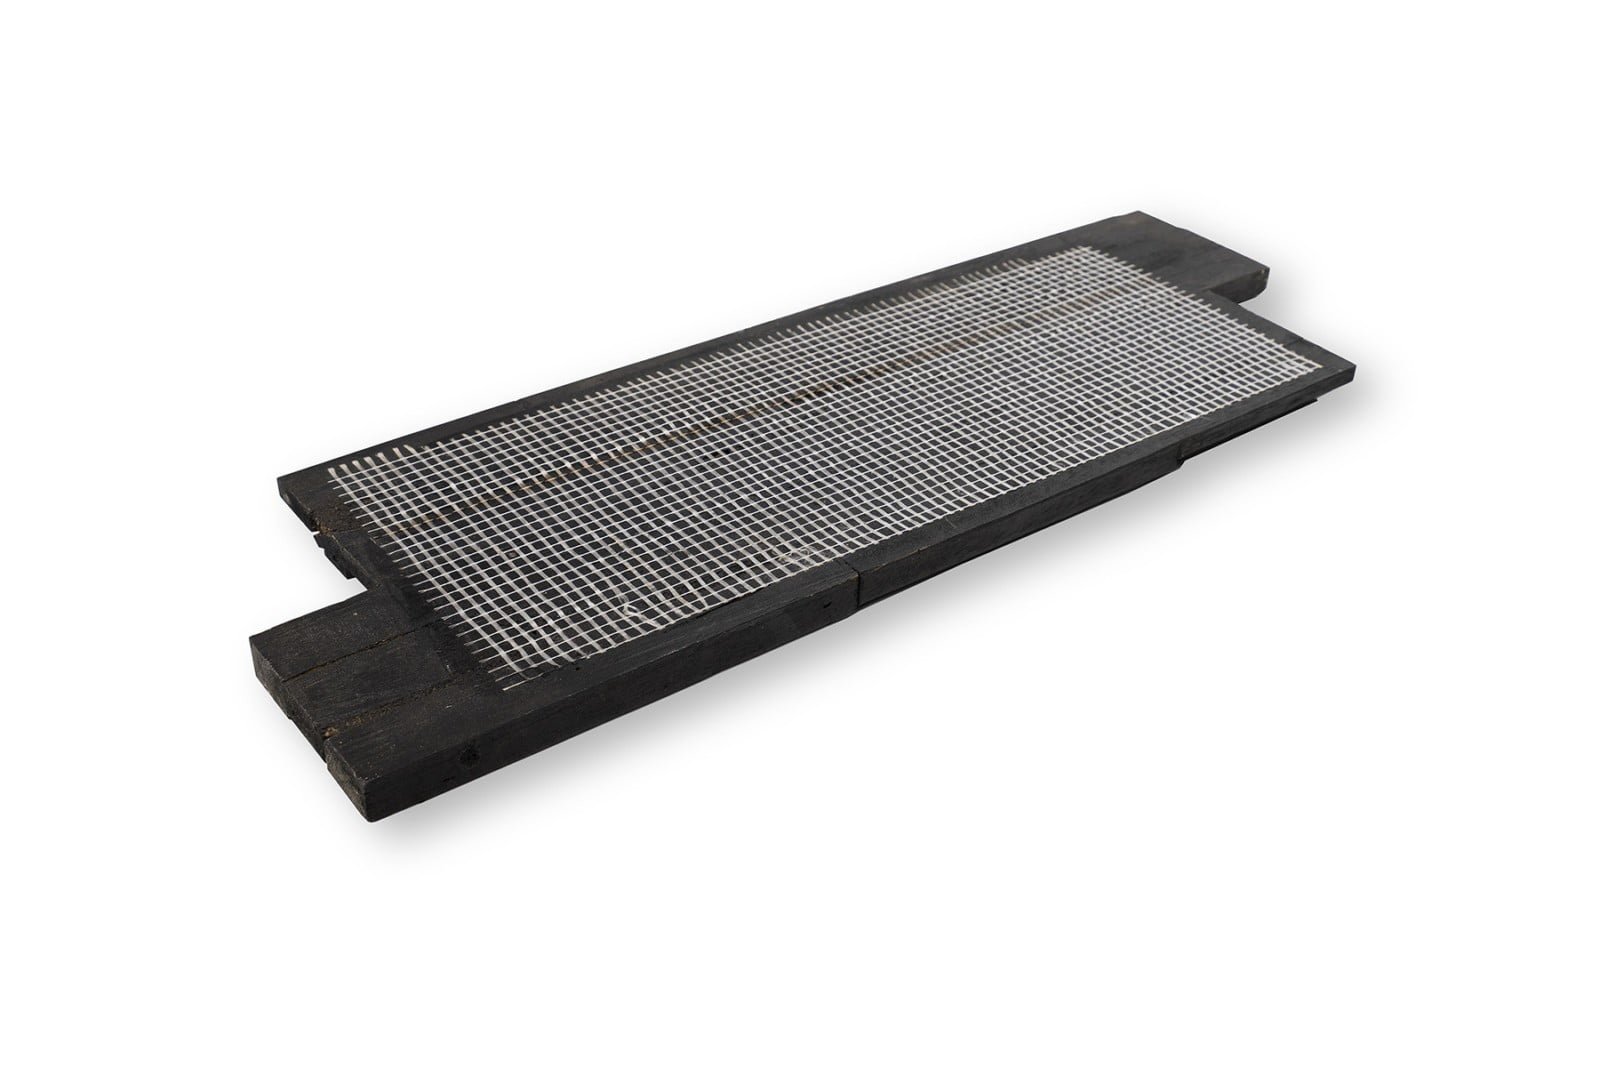
Material:
Authentic Reclaimed WoodSquare feet p/box:
9.5 sq. ft.Installation:
Glue & NailsQuantity per box:
10 panelsSize per panel:
19.5” x 7” x 0.3"-0.75”Related products


Dark Graphite 3D Wall Panels
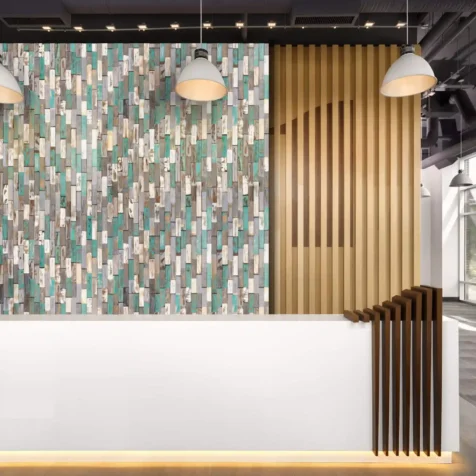
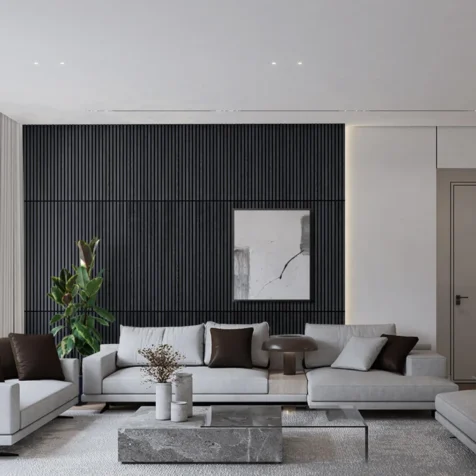
Our Black 3D wall panels are so amazingly versatile. Whether to create one eye-catching feature black accent wall, or to kit out a home cinema room, with black wood paneling not just on the walls, but over other surfaces. Not sure if the color would be too strong. Don’t forget that you can order our samples before you make a full order if that helps.
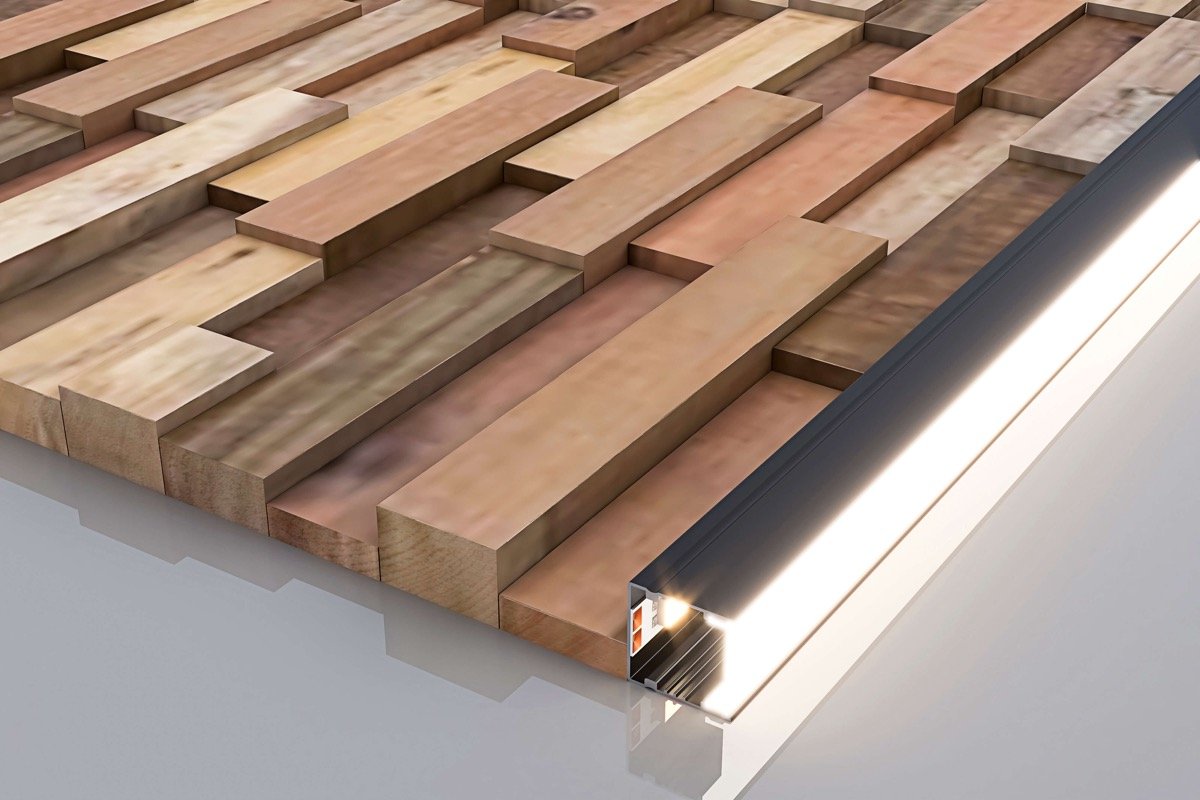
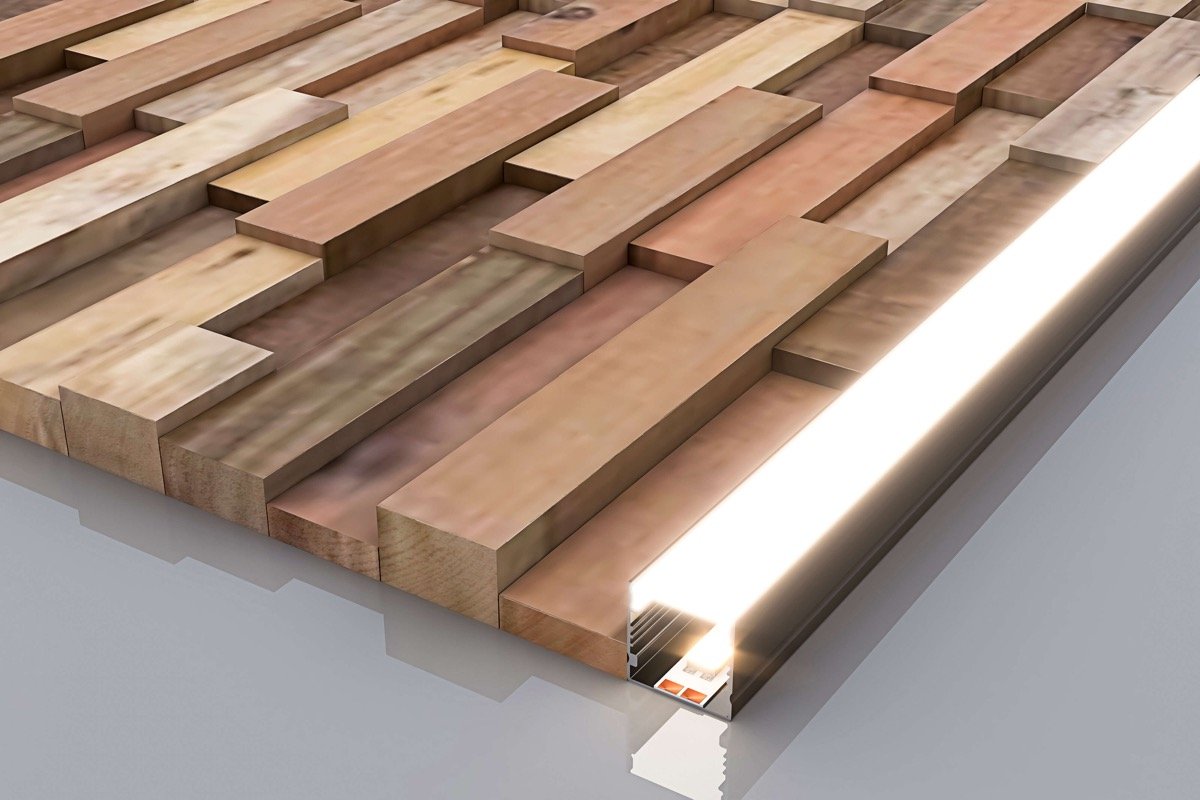
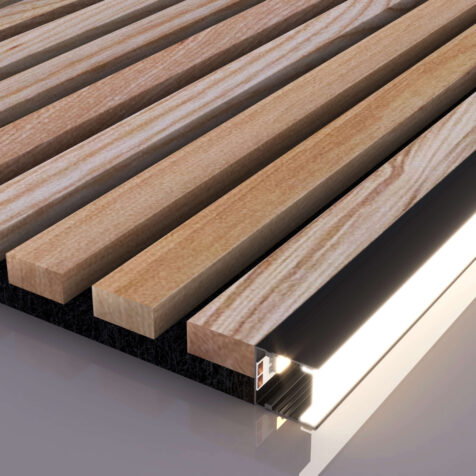
3D WOOD WALL PANEL SPECIFICATIONS
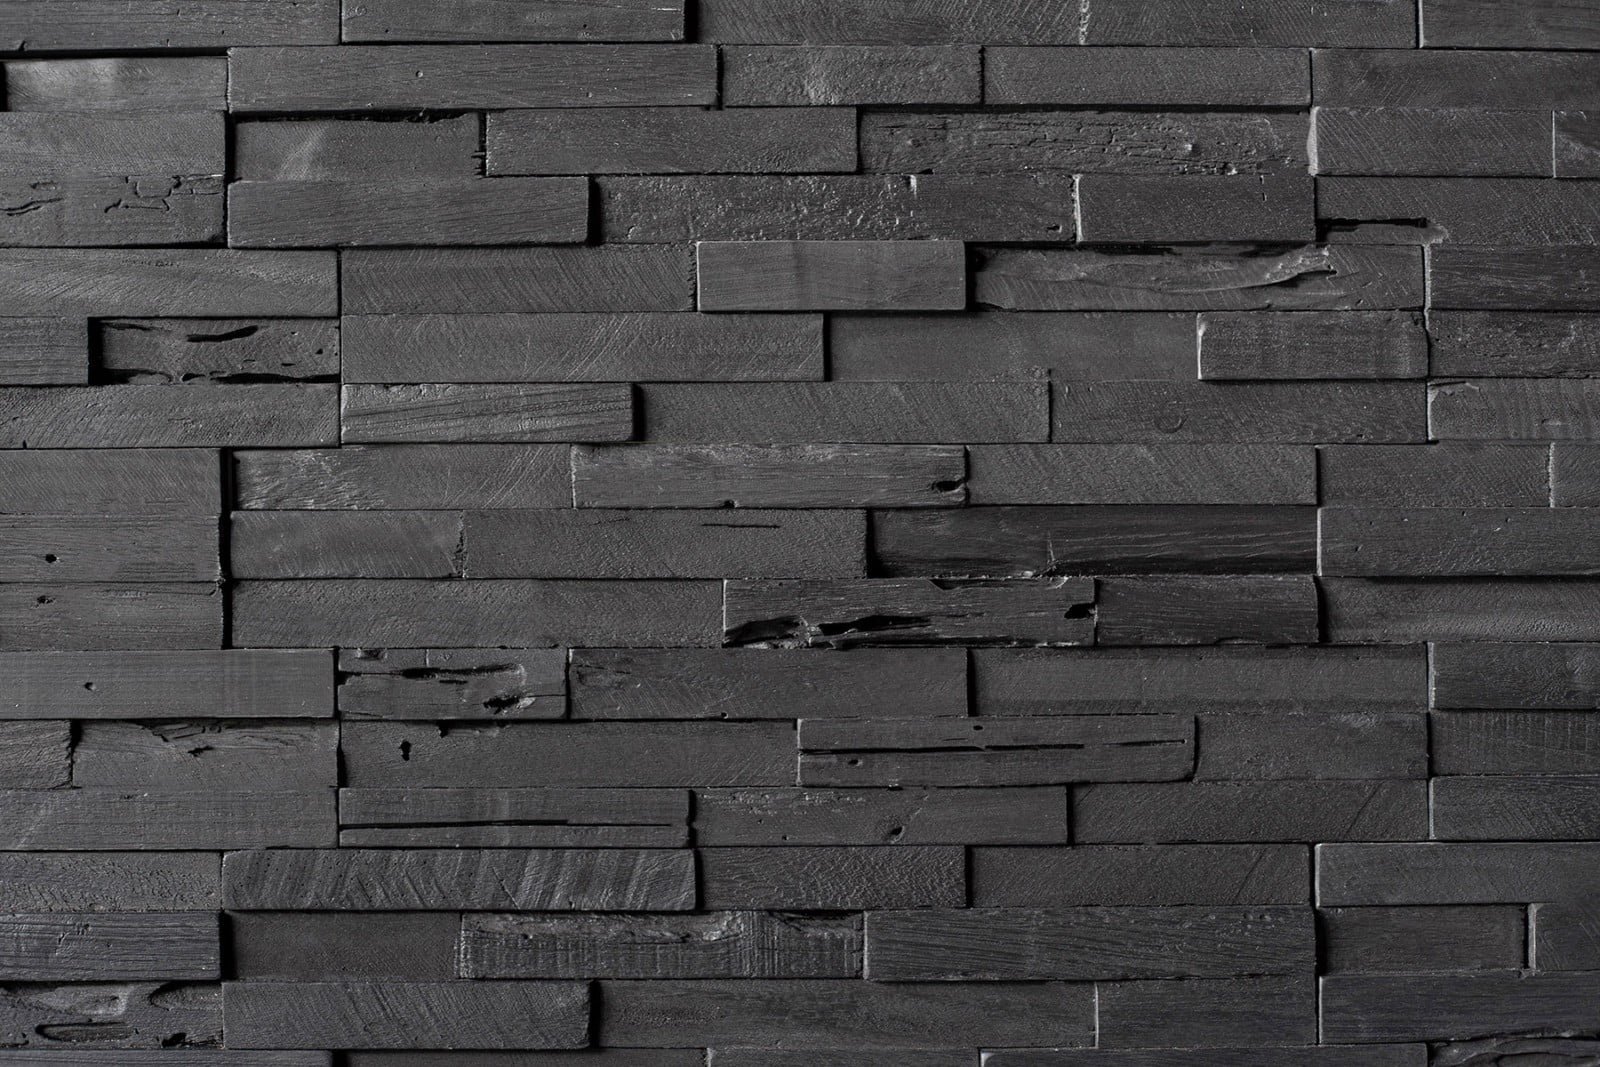
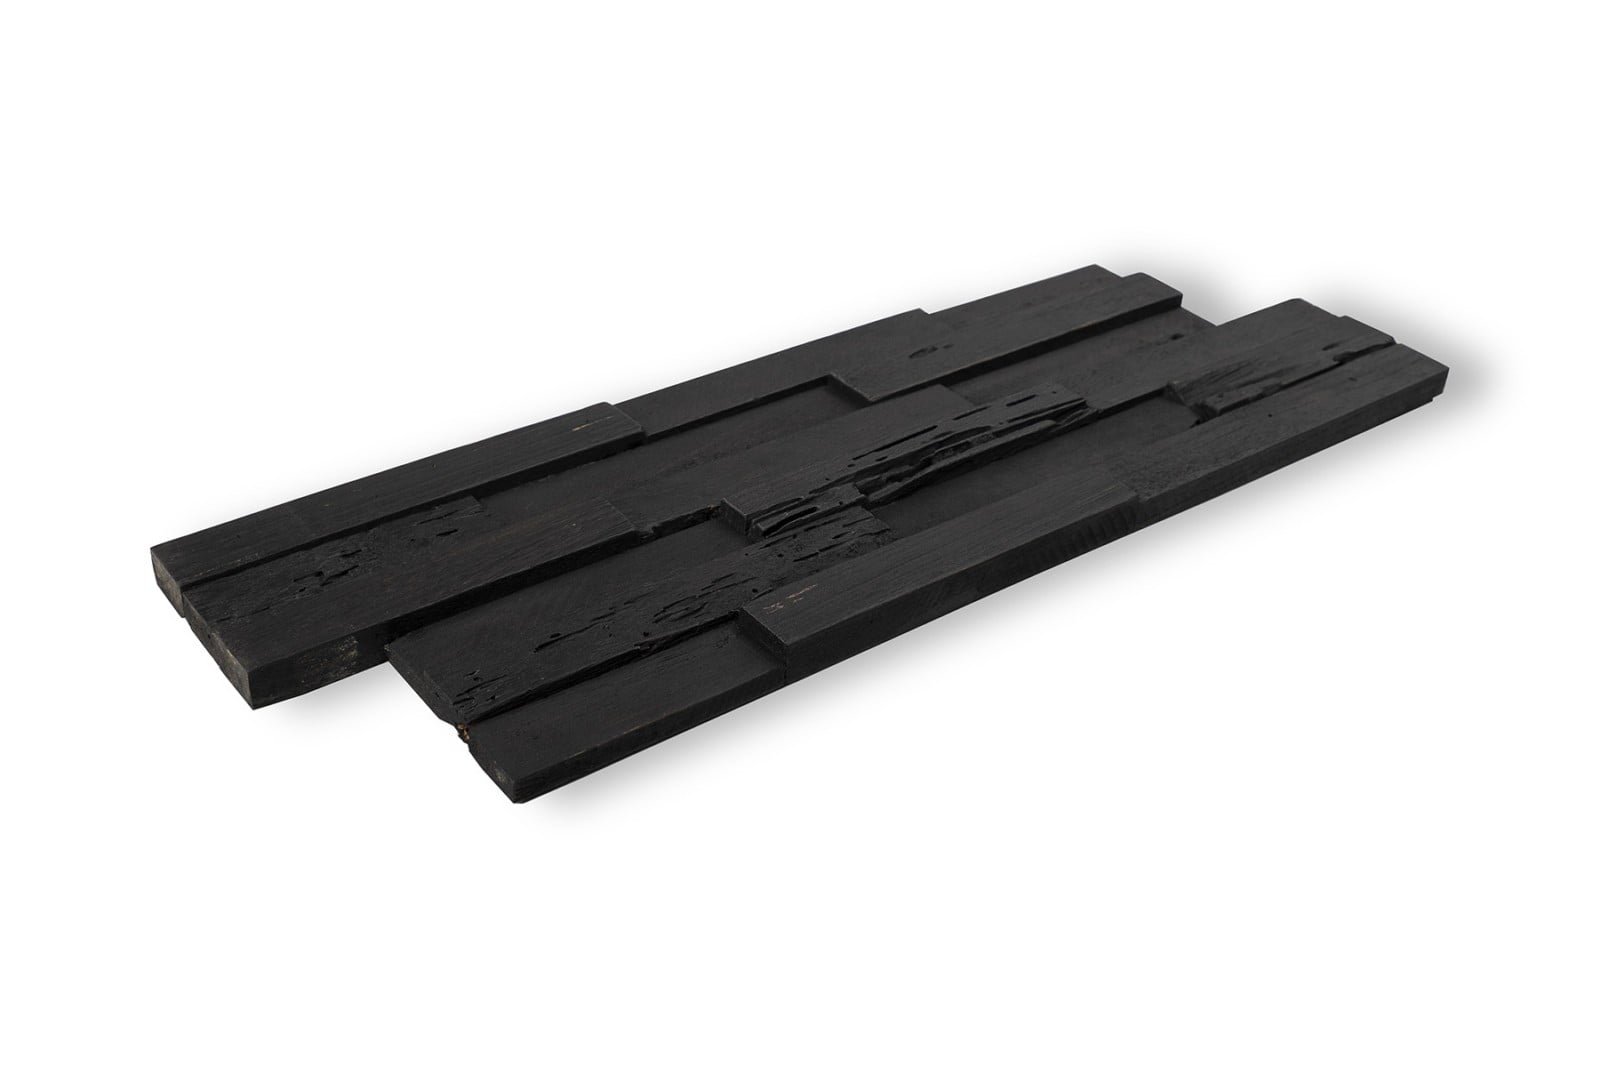
Each of our 3D wall panels measures 19.5” x 7”, and there are ten barn wood wall panels in each box with a total coverage area of 9.5 square feet. Our 3D wood wall panels have a varying thickness measuring between 0.3’’- 0.75” and each and every one of our black wood panels is made of 100% reclaimed wood.
YOU CAN FIT OUR 3D WALL PANELS IN NO TIME AT ALL
One of the greatest selling points of Woody Walls’ 3D wall panels is the ease with which you can install them. There is no complicated procedure to fitting any Woody Walls wooden wall cladding and our installation video will show you that you really only need a few tools including a nail gun, saw, constriction adhesive and a spirit level. We recommend painting the surface in black color prior to installation.
THE SWIFTEST WAY TO COVER UP ANY OLD WALLING IS WITH 3D WALL PANELS
3D wall panels are ideal for applying to any surface, as long as it is stable, clean and dry. Our 3D wood wall panels are totally suitable for installation in places with higher humidity, including kitchens and bathrooms (avoid areas where wood panels could be directly exposed to moisture).
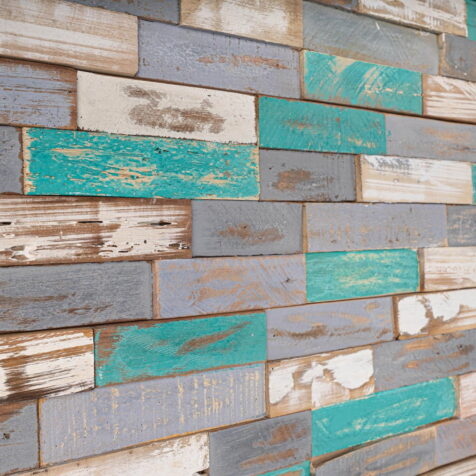
NATURAL RUSTIC FEEL TO OUR BARN WOOD WALL PANELS
All 3D barn wood wall panels have been naturally weathered over time by the elements with a helping hand from Mother Nature. They will include features such as deeply weathered grooves and natural splitting, enabling to capture that rustic warmth that can only be achieved with a real wood accent wall.
GUARANTEED QUALITY WITH ALL WOODY WALLS 3D WALL PANELS
All our wood panels are responsibly sourced, fully recyclable and 100% free of harmful pollutants. Non-toxic adhesives and VOC-free paints are all we use. It is important you know how safe our products are before you bring them into your home or workspace. Our 3D wood wall panels also have a class B fire rating.
Reviews
You must be logged in to post a comment.


7 reviews for Dark Graphite 3D Wall Panels
We purchased a house with boring ole nursery and turned it into a speakeasy. We purchased a house with boring ole nursery and turned it into a speakeasy.
David Ostergaard Verified Buyer
Since I already received a coupon from winning the monthly WoodyWalls challenge, I don’t need another — but I still wanted to share how my project turned out using the Da ... Since I already received a coupon from winning the monthly WoodyWalls challenge, I don’t need another — but I still wanted to share how my project turned out using the Dark Graphite wood panels I got. I absolutely love the result!
Josh Verified Buyer
Love this product. Was easy to install and worth the money. Made into a fireplace wall in sunroom. Highly recommend painting sub structure black before adhering panels du ... Love this product. Was easy to install and worth the money. Made into a fireplace wall in sunroom. Highly recommend painting sub structure black before adhering panels due to nature of product. The wood panels show cracks between seams when placing panels side by side and top to bottom.
Troy Verified Buyer
Great product , super easy to install . I used liquid nails . I will buy more of it for another wall Great product , super easy to install . I used liquid nails . I will buy more of it for another wall
Jergenz Verified Buyer
First off, it’s hard to really capture in pictures how incredible this product looks on our wall - it’s gorgeous! I rarely leave reviews but feel compelled for those who ... First off, it’s hard to really capture in pictures how incredible this product looks on our wall - it’s gorgeous! I rarely leave reviews but feel compelled for those who were apprehensive to pull the trigger on this product like we were.During all of our quarantine down time we found a few feature walls we wanted to do in our home. Our initial thought was a peel & stick wood plank - they’ve been around long enough, you can find decent quality, low cost product at most online retailers and even Home Depot. I bought many samples and wasn’t having luck finding one we love - I found one last option as I simultaneously stumbled upon the 3D Woody Walls. We opted to buy the cheap peel & stick as the cost of 240 sq. ft. added up quick. Right before we got ready to install my husband suggested we just buy a sample kit of the 3D so we can see if we even like it, and put it on the back of our mind if not. We are SO glad we did, because it is gorgeous and we know we wouldn’t have been happy with our option option - worth it to us to exceed our original budget! (This WoodyWalls 3D really is reasonable when you consider how much the high end peel & stick products like Stikwood and Timberchic are).As far as install goes, I had read other reviews and decided the smartest thing to do would be slap a rough coat of black paint on to hide any of the wall visible between the seams. It’s an extra step, but was absolutely worth it. We chose to use the clear Gorilla adhesive and a nail gun. My husband is a very skilled craftsman and proficient with most tools - we had intricate cuts around windows that gave him some trouble and frustration (photo included) but the flat, straight wall surfaces were a breeze. Since cut panels had raw wood exposed, he stained those with ebony stain as he went and it was a perfect match. For a flat wall without windows, installation would be simple even for the lease experienced person. We were initially worried about the thickness of the 3D panels as it was very close to the depth of our existing floor moulding. We did not want to remove and replace, and also didn’t want the panels to fully hang over the depth of the moulding. We could tell from our initial sample order that some pieces would having over, and some would be thinner, which actually looks great (picture included). I initially followed him with some ebony putty to fill the nail gun holes, but the flat sheen of the putty stood out as much as the nail hole soI decided to come up with a new plan and will simply color each nail head with a sharpie so it blends better - I’m waiting for the rain to come and I can no longer get outdoor projects done. We also found some Lutron outlets on Amazon that match really well, and added those at the end (photo included).You would put a little sweat equity in getting a project done, but it’s 100% worth it and I would recommend to anyone!
John Verified Buyer
Unfortunately this would have looked amazing on the wall but I would have needed way more than expected and simply couldn’t afford it. Do I recommend it? You bet I do. ... Unfortunately this would have looked amazing on the wall but I would have needed way more than expected and simply couldn’t afford it. Do I recommend it? You bet I do. It’s cool and different and textured and well i really liked it.
Ethan Verified Buyer
This is a great product! Looks amazing and is easy to install! This is a great product! Looks amazing and is easy to install!
Nick N. Verified Buyer